background image

WARNING- THIS APPLIANCE MUST BE EARTHED

This appliance is designed to operate from a mains supply of AC230V ~ 50HZ. 
Check that the voltage marked on the product corresponds with your supply voltage.
This product is fitted with a 13A plug complying with BS1363.
If this plug is unsuitable or needs to be replaced, please note 
the following:Important: The wires in the mains lead are
Coloured in accordance with the following code: 
GREEN/YELLOW-EARTH
BLUE-NEUTRAL
BROWN-LIVE 
For UK use only – Plug fitting details (where applicable):
As the colours of the wires in the mains lead of this appliance may not correspond with 
the coloured markings identifying the terminals in your plug, proceed as follows: 
The GREEN/YELLOW wire is the EARTH and must be connected to the terminal which 
is marked with the letter E or by the earth symbol 

or coloured GREEN or 

GREEN/YELLOW.
The BLUE wire is the NEUTRAL and must be connected to the terminal marked with the 
letter N or coloured BLACK.
The BROWN wire is the LIVE wire and must be connected to the terminal marked with 
the letter L or coloured RED.
Always ensure that the plug cord grip is fastened correctly.
If a 13A (BS1363) fused plug is used it must be fitted with a 
13amp fuse conforming to BS1362 and be BSI or ASTA 
approved.

If your appliance is supplied with a non-rewireable plug fitted to the mains lead you will 
find that it incorporates a fuse, the value of which is indicated either on the base of the 
plug or on the fuse carrier. Should the fuse need replacing, you must use an ASTA 
approved fuse (conforming to BS1362) of the same rating. If the fuse cover is lost the 
plug must not be used until a replacement is obtained from an electrical supplier. If you 
need to remove the plug, cut it from the mains lead and dispose of it. Never attempt to 
re-use this plug or insert it into a socket outlet, as there is a very great risk of an electric 
shock.
SPECIFICATIONS: 
Rated voltage:

230V~50Hz, 

Operating frequency:

2,450MHz

Power output:

800W

Outside Dimensions:

262mm(H) x 452mm(W) x 390mm(D)

Oven capacity dimensions 210mm(H) x 315mm(W) x 314mm(D)
Oven Capacity:

20 Litres

Weight:Approx.

           10.8kg

Connection to the mains supply

13

Non-rewireable mains plug

Summary of Contents for RHM2009S

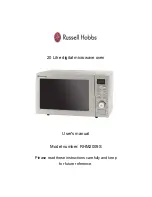
Page 1: ...20 Litre digital microwave oven User s manual Model number RHM2009S Please read these instructions carefully and keep for future reference...

Page 2: ...rating instructions 6 Setting the clock 6 Microwave cooking 6 Quick start cooking 7 Weight defrost 7 Auto menus 8 Hints 8 Auto menu chart 9 Kitchen timer 10 Child safety lock 10 Cleaning and care 11 P...

Page 3: ...tal mesh which stops microwaves getting through This means that when the microwave oven door is shut there is no possibility that microwaves can be released This is why the microwave oven has been mad...

Page 4: ...n order to avoid burns Always test the temperature of cooked food never eat or drink food or liquid straight from the oven allow it to stand for a few minutes and stir to distribute the heat evenly Fo...

Page 5: ...inside of the door These seals are not airtight although no microwaves can be released it is normal for small amounts of air or steam to escape when the oven is in use Warning liquids and other foods...

Page 6: ...1 Door safety lock system 2 Oven window 3 Turntable support 4 Control panel 5 Wave guide cover Do not remove 6 Glass tray 7 Air vents Feature diagram 4 7 6 5 4 3 1 2...

Page 7: ...nob to input a cooking time select the weight of food you want to cook from the Auto menu Start Quick Start Press to start a cooking program Simply press it a number of times to set a quick start cook...

Page 8: ...the display shows 08 30 Press the Clock button to confirm The clock is now set the symbol will continue to flash and the Clock symbol will stay lit Microwave cooking Cooking times between 10 seconds a...

Page 9: ...played Please note End will appear and 3 beeps will be heard every 2 minutes until the oven door is opened or the Stop Cancel button is pressed Weight defrost Weight defrost allows you to set the food...

Page 10: ...tart Quick Start knob again The oven will now start to cook the food 5 When the food has finished cooking the oven will beep 3 times to let you know and the word End will be displayed Please note End...

Page 11: ...boiling water 4 Potatoes 200g 300g 400g Prick the skins and place on a suitable plate Turn the potatoes over halfway through the cooking time 5 Auto reheat 200g 300g 400g 500g 600g 700g 800g Straight...

Page 12: ...n the oven will not operate during this time 4 When the time is complete the oven will beep 3 times to let you know and the word End will be displayed Child safety lock This function is to prevent chi...

Page 13: ...This may happen when the microwave oven is used in humid conditions If the inside of the oven smells put a cup of water with the juice and skin of one lemon in a deep microwave bowl Microwave it for t...

Page 14: ...re the door is securely closed Otherwise the microwave energy will not flow into the oven Do not use metal pans or dishes with metal handles Do not use anything with a metal trim Do not use paper cove...

Page 15: ...LIVE wire and must be connected to the terminal marked with the letter L or coloured RED Always ensure that the plug cord grip is fastened correctly If a 13A BS1363 fused plug is used it must be fitte...

Page 16: ...0844 8793277 Monday Thursday 9am until 5pm Friday 9am until 4pm...

Reviews: