INSTRUCTIONS AND WARRANTY
PORTABLE AIR CONDITIONER
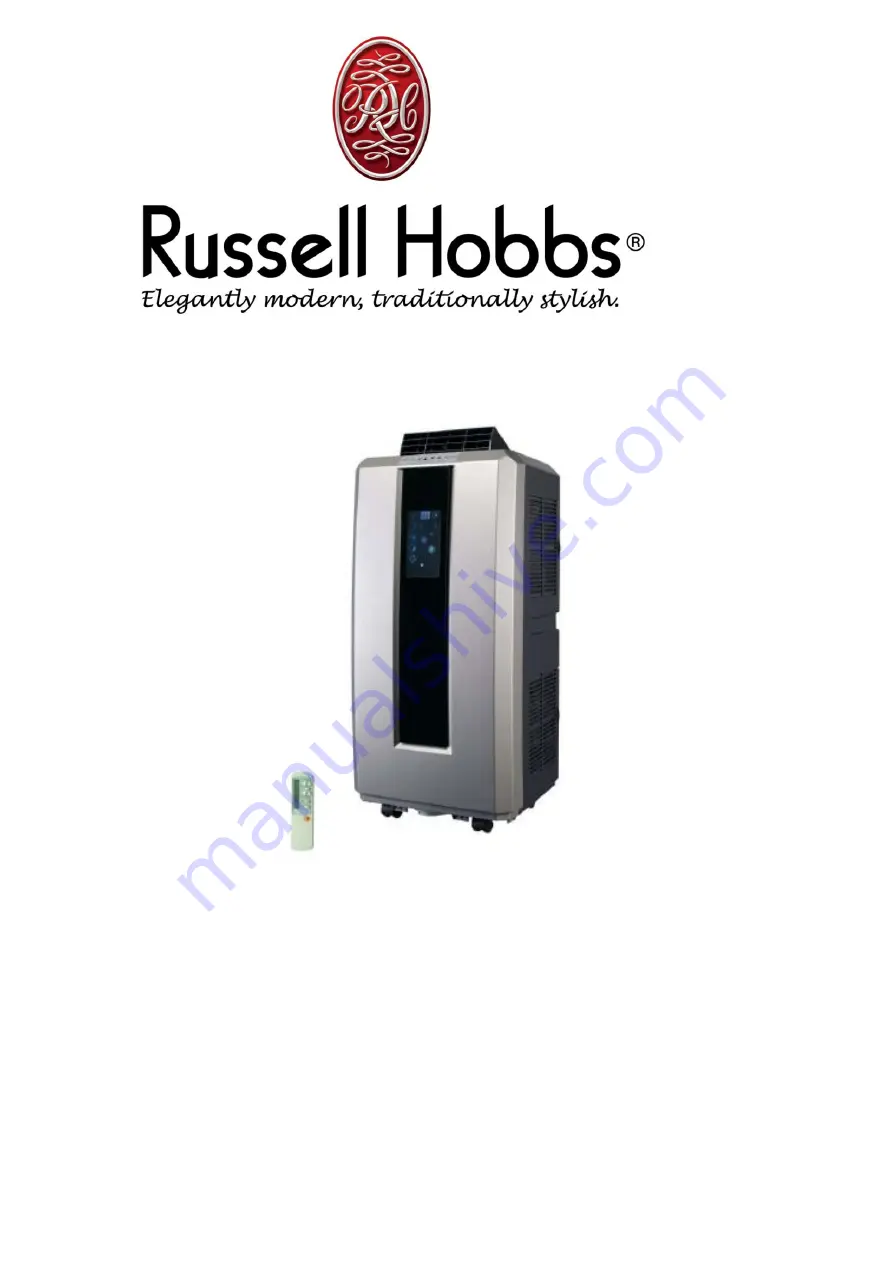
MODEL NO.: RHAC12H
DESCRIPTION: Russell Hobbs Portable Aircon 12000 BTU
Page 1: ...INSTRUCTIONS AND WARRANTY PORTABLE AIR CONDITIONER MODEL NO RHAC12H DESCRIPTION Russell Hobbs Portable Aircon 12000 BTU ...
Page 2: ...efore using this appliance for the first time please read the instruction manual carefully and keep it for future reference CONTENTS IMPORTANT SAFEGUARDS 3 PLACEMENT AND STALLATION 5 COMPONENT PARTS 7 CONTROL PANEL 8 SCREEN 9 OPERATION METHODS 9 REMOTE CONTROL 11 WATER DAINAGE 13 MAINTENANCE 14 TROUBLE SHOOTING 15 WARRANTY 16 ...
Page 3: ...lease make sure the available voltage meets the products requirements any damage caused by incorrect power supply is outside of the scope of the warranty Do not let children touch the machine Do not run the machine when no one is there even if for a short period please turn it off Do not pull the power cord when removing the plug from the mains socket or moving the machine Do not position the mach...
Page 4: ...ids Make sure there is free access of air inlet and air outlet Do not spray agents such as pesticides paint or other flammable materials near the machine otherwise the plastic may become deformed or electric damage may be caused Power supply Make sure the plug is not damaged Do not use connectors instead of plug Insert the plug into socket first then turn on the sockets switch if available and the...
Page 5: ...g 1 Installation Screw the slide bar connector into the exhaust hose first then fit the exhaust hose into exhaust connector Put the slide bar connector into adjustable slide bar as shown below fig 2 and close the window opening for a tight fit Adjust the length of slide bar to close as much of the remaining opening as possible fig 2 ...
Page 6: ...of the exhaust pipe is designed to suit the machine To avoid poor performance or malfunction please do not alter lengthen or change it with anything except an original replacement part Note maximum length of unfolding exhaust pipe is 1500mm please shorten the length as much as possible and keep it level as much as possible when installing to optimize performance and minimize energy consumption ...
Page 7: ...e Location 7 Filter frame lower 8 Water outlet Plug cap 9 Exhaust Pipe 10 Carry Handle 11 Exhaust Connector Check packing accessories read user s manual to understand how to use them fig 4 1 Exhaust hose 2 Adjustable slide bar 3 Slide bar connector 4 Remote control 5 Active carbon filter optional 6 Drain connector 7 Drain tube ID 10mm ...
Page 8: ... and heating mode 3 FAN after machine turns on press this key to select fan speed high medium and low 4 DOWN under cooling or heating mode press this key to downward setting temperature from 16 31 5 UP under cooling or heating mode press this key to upward temperature from 16 31 6 SLEEP under cooling or heating mode press this key to turn on off sleeping function 7 TIMER under power on or standby ...
Page 9: ...ds Cooling mode When the machine is switched on default value is cooling mode with 22 and low fan speed Press MODE to select cooling mode cooling mode indictor turns on Press UP or DOWN to adjust temperature from 16 31 Press FAN to select fan speed low medium high Heat pump mode Press MODE to select heating mode heating mode indicator turns on Press UP or DOWN to adjust temperature from16 31 Press...
Page 10: ...t in heating mode so that the person sleeping will feel comfortable and energy consumption will be lower Press key marked SLEEP to enter into sleeping mode default value of fan speed is low When sleeping mode turns on under cooling mode after the first hour the set temperature will increase by 1 after the second hour the set temperature will go up another 1 The higher set point will not change fur...
Page 11: ...ts to run Remote Control with LCD The functions of the remote control work the same as your air conditioner s touch controls Temperature control set button Sleep mode button Timer mode selection button A C fan speed button high medium low Mode button cool fan dehumidify or heat pump Power On Off LCD screen ...
Page 12: ...from the unit Separate the filter fixer from the back filter frame Remove the active carbon filter from its plastic bag Insert the active carbon filter into the filter frame Fix the filter by re assembling the fixer onto the filter frame Re fit the back filter frame inside the unit Re fit the side filter frame inside the unit ...
Page 13: ...ich the water can drain Pull out the rubber plug to empty out water Power off the machine and restart it The machine will run normally Special caution for heat pump function When in heating mode if you wish to operate the unit without the need to empty the water tank please connect a water drainage pipe to remove the water out continuously 1 Remove the drain knob 2 Remove the rubber plug and retai...
Page 14: ...t to continue to neutralize odours Clean the filters every two weeks if filters are blocked by dust the machine s efficiency will be reduced Clean the filters in warm water with a neutral detergent then dry the cleaned filters on a shady place Note Don t run the machine without washable filters End of Season Cleaning If the machine will be unused for a long time please do as following Remove the d...
Page 15: ...d Place it on flat and solid ground to minimize shaking and rattles Compressor cannot work Compressor s 3 minute time delay protection turns on Wait for 3 minutes for the system to cool down and rebalance and then restart the machine Note when an abnormal events occur turn off machine and pull out plug then contact a professional for help This mark indicates that this product should not be dispose...
Page 16: ...pplier will refund repair or exchange the product in terms of this warranty subject to legislative requirements This warranty shall be valid only where the customer has not broken the product himself or used the product for something that it is not supposed to be used for The warranty does not include and will not be construed to cover products damaged as a result of disaster misuse tamper abuse o...