Russell Hobbs RH47UCFF1 Instruction Manual Download Page 3

Safety Instructions

Important note: 

Please read this booklet before installing and switching on this 

appliance. The manufacturer assumes no responsibility for incorrect installation 
and usage as described in this booklet.
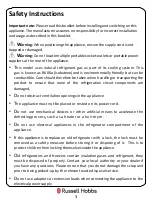
W

arning: 

When positioning the appliance, ensure the supply cord is not 

trapped or damaged.

W

arning: 

Do not locate multiple portable socket-outlets or portable power 

suppliers at the rear of the appliance.

T

his model uses natural refrigerant gas as part of its cooling system. This

gas is known as R600a (Isobutene) and is environmentally friendly but can be
combustible. Care should therefore be taken when handling or transporting the
product to ensure that none of the refrigeration circuit components are
damaged,

D

o not obstruct ventilation openings in the appliance

T

he appliance must not be placed or rested on its power cord.

D

o not use mechanical devices or other artificial means to accelerate the

defrosting process, such as a heater or a hair dryer.

D

o not use electrical appliances in the refrigerator compartment of the

appliance.

I

f this appliance is to replace an old refrigerator with a lock, the lock must be

removed as a safety measure before storing it or disposing of it. This is to
protect children from locking themselves inside the appliance.

O

ld refrigerators and freezers contain insulation gases and refrigerant, they

must be disposed of properly. Contact your local authority or your dealer if
you have any questions. Please ensure that you do not damage the scrap unit
prior to being picked-up by the relevant waste disposal service.

D

o not use adaptors or extension leads when connecting the appliance to the

electrical power supply

3

Summary of Contents for RH47UCFF1

Page 1: ...RH47UCFF1 W B R SS C For Customer Services Spare Parts please call 0345 208 8750 or visit us at mda russellhobbs com IMPORTANT RETAIN FOR FUTURE REFERENCE 47cm Wide Under Counter Fridge Freezer Instr...

Page 2: ...9 Temperature Selection 9 Door Reversal 10 13 Replacing the Bulb 14 Freezer Storage Advice 15 Food Storage Advice 15 Energy Saving Advice 16 Power Failure 16 Maintenance Cleaning 17 18 Internal Cleani...

Page 3: ...t obstruct ventilation openings in the appliance The appliance must not be placed or rested on its power cord Do not use mechanical devices or other artificial means to accelerate the defrosting proce...

Page 4: ...o not place explosive or flammable material in your appliance for your own safety Bottles containing a high percentage of alcohol must be sealed well and placed vertically in the refrigerator Do not c...

Page 5: ...must be refitted If the fuse cover becomes lost or damaged the plug must not be used until a suitable replacement is obtained If the plug has to be changed because it is not suitable for your socket o...

Page 6: ...e outer surface Do not place anything on your appliance and install the unit in a suitable place so that there is at least 30cm clearance above the appliance If placing your appliance next to kitchen...

Page 7: ...d and put in to position failure to do this will affect the cooling performance of your appliance Once the appliance has settled locate the thermostat knob on the product and set between 5 and 6 and s...

Page 8: ...eet 8 Freezer rack 9 Door racks 10 Egg rack ice cube tray 8 Product Overview Unit Parts Spare Parts Before installation check that all parts detailed in the product overview are present If any parts a...

Page 9: ...be put back to setting 5 or 6 after the food has been placed in the fridge if this is not done the temperature in the fridge compartment could fall below 0 C as the compressor will run continuously On...

Page 10: ...r own safety a minimum of 2 people should lift or tilt this product Tools Required Cross headed screwdriver and flat headed screwdriver 1 Remove the hinge cover and the screws from the hinge bracket s...

Page 11: ...or on a cushioned surface Remove the screw cap covers that are on the left of the unit and fix them on to the opposite side 4 Remove the hinge plug from the top of fridge door and fix it to the opposi...

Page 12: ...stall the hinge pin and adjustable feet and install the hinge on to the left side of the appliance Place the fridge door back on 6 Place the fridge door on to the bottom hinge Flip over the middle hin...

Page 13: ...de 8 Place the freezer door back on to the middle hinge put the pin of the top hinge into the top of the door and fix the hinge in to place by screwing it to the top of the fridge use a spanner to tig...

Page 14: ...light is an energy efficient long life LED Therefore should not need replacing throughout the life of the product however if it does it has to be replaced by a qualified engineer Please call the serv...

Page 15: ...to 6 months Fruit vegetables up to 12 months Bread cakes up to 6 months Food Storage Guidelines Refrigerator compartments Type of food Door or balconies of fridge compartment Foods with natural preser...

Page 16: ...Do not overload the appliance the cooling air that circulates to keep the appliance cold gets blocked and pockets of warm air form Do not put hot food into the fridge or freezer let it cool down firs...

Page 17: ...eaning reconnect the plug withdry hands External Cleaning Wash the outer cabinet with warm soapy water Do NOT use abrasive products There are sharp edges on the underside of the product so care should...

Page 18: ...ould be wrapped in several layers of newspaper and stored in a cool place e g fridge or larder Place several layers of new paper or towels underneath and next to the freezer door compartment Switch of...

Page 19: ...n limits of the appliance Are the doors of the appliance opened frequently Once the door is opened the humidity found in the air in the room enters the appliance especially if the humidity levels in t...

Page 20: ...in place to catch the flow of water The doors do not close properly Ensure there are no obstructions preventing door closure Check the door compartments and shelves are correctly in place Check the d...

Page 21: ...ed as follows The GREEN YELLOW wire is the EARTH and must be connected to the terminal which is marked with the letter E or by the earth symbol or coloured GREEN or GREEN YELLOW The BLUE wire is the N...

Page 22: ...tion of Product Care The following conditions apply Product Care will require a valid proof of purchase at the point of replacement or refund The product must be installed and used in accordance with...

Page 23: ...23 Technical Specification Model number RH47UCFF1 W B R SS C Rated Voltage 220V 240V 50Hz Capacity 86L External Dimensions HxWxD 845mm x 470mm x 500mm...

Page 24: ...0V 240V Rated Current A 0 5A Product Dimensions CMs H x W x D 84 5 x 47 x 50 Total Storage Volume L 86L Net Weight KG 24 5 Class Symbol Ambient temperature range C Information Extended temperate SN 10...

Page 25: ...25 Notes...

Page 26: ...26 Notes...

Page 27: ...27 Notes...

Page 28: ...te Only discard electrical electronic battery items in separate collection schemes which cater for the recovery and recycling of materials contained within Your co operation is vital to ensure the suc...

Reviews: