Ruijie Reyee RG-EW1200, Web-Based Configuration Manual
Enhance your networking experience with the Ruijie Reyee RG-EW1200. Easily set up and customize your device using the Web-Based Configuration Manual available for free download on manualshive.com. This comprehensive manual provides step-by-step instructions to optimize your network performance. Empower your connectivity with this user-friendly manual.
Share
Download


Reviews:
No comments
Related manuals for Reyee RG-EW1200

Network
Brand: Barracuda Networks Pages: 2

RabbitCore RCM4400W
Brand: Rabbit Pages: 126

ControlPoint 2000
Brand: 4Home Pages: 20

6336-STG-YX
Brand: EVOC Pages: 57

Enterasys Matrix 2G4082-25
Brand: Enterasys Pages: 58

MIM-4000F
Brand: Paradyne Pages: 6
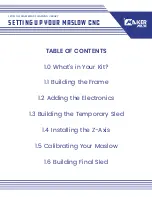
MASLOW CNC
Brand: MAKER MADE Pages: 40

I-FLY A02-WRA4-54G
Brand: Atlantis Land Pages: 3

TEG-S3M8S15
Brand: TRENDnet Pages: 2

Schoeps electret
Brand: VAMISOUND Pages: 15

Simatic S7 PG
Brand: Eaton Pages: 24

BreezeACCESS II
Brand: Alvarion Pages: 324

C52iG-5HaxD2HaxD-TC
Brand: MikroTik Pages: 23

CCR2004-16G-2S+PC
Brand: MikroTik Pages: 20

TVS- 72XU Series
Brand: QNAP Pages: 56

iSERIES NVR16
Brand: Microview Pages: 21

EC120-F5
Brand: TP-Link Pages: 107

SmartStart SL306
Brand: Advantech Pages: 42


