Ruige TL2000HDA-CO Product Manual Download Page 6

2

Preparation before  operation- lift the controller
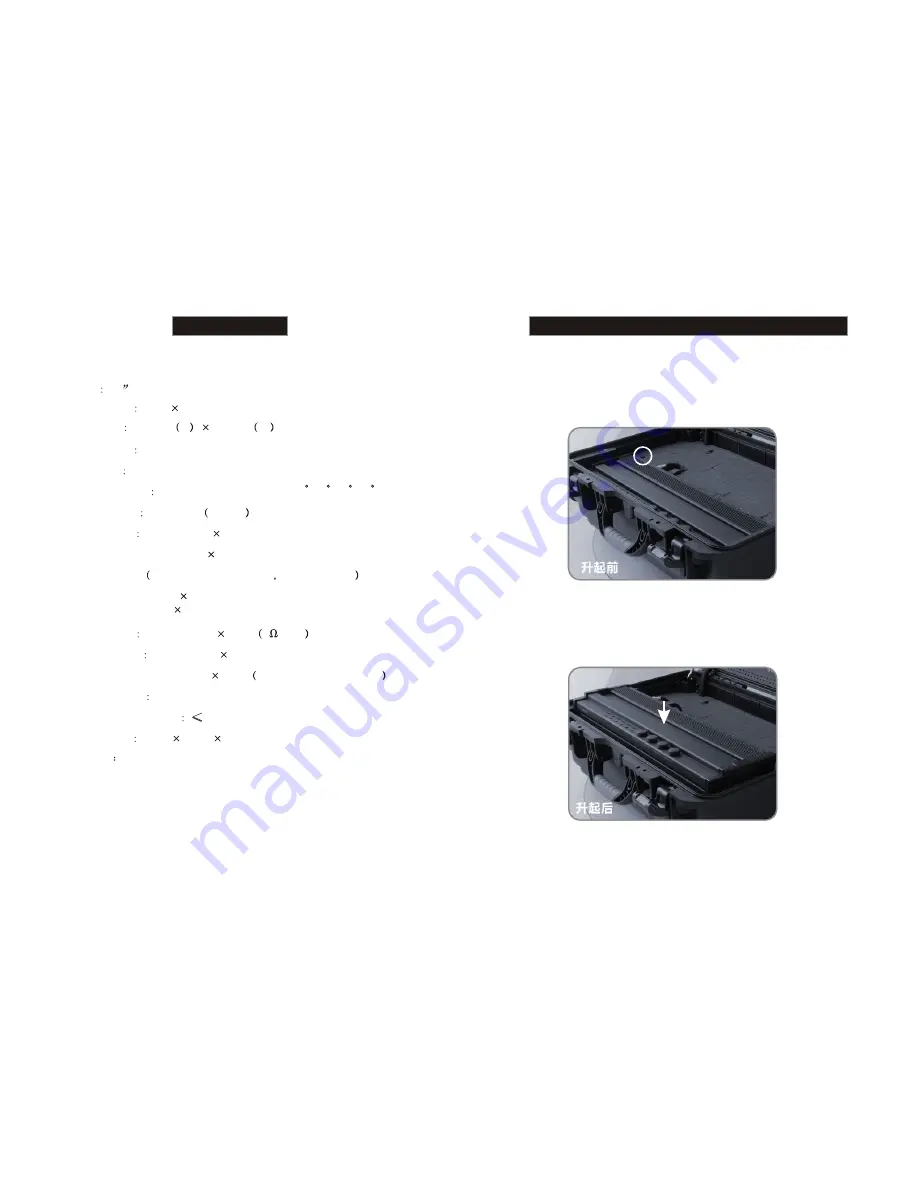
1.


Turn the switch of the audio / video controller  (  shown as below),the con-

troller automatically rise so that the user can operate the function keys

2. In order to avoid interference with the LCD screen and sun hood, the con-
trollermust return back after use , press the middle(shown as below) of the  
controller to the lock location

29

Size

20

Resolution

1600

900

Dot pitch

0.2766

H

0.2766

W

mm

Video input HD / SD-SDI

2line

                   VGA 

 1line

Audio input

Dual speaker

1line

8     2W

 0.7Vp-p

Video output HD / SD-SDI

1line

                   Composite

1line

NTSC / PAL Auto detect

Brightness

250cd/m

2

Aspect ratio

4:3 / 16:9

Switch

Viewing angle Left / Right / Up /Down     89 / 89 / 89 / 89

Voltage input

DC 12V

Power consumption

 30W

Contrast

1000 1

:

                   Composite 

 1line

NTSC / PALAuto detect

Loop through

Weight

around  7.25 Kg

                   HDMI 

 1line 

Dimension

L 550 H 430

D 210mm

Specification

Summary of Contents for TL2000HDA-CO

Page 1: ...TL2000HDA CO PRODUCT MANUAL COLOR LCD MONITOR Carry on COLOR LCD MONITOR Carry on http www ruige com...

Page 2: ...not be Higher than nominal input voltage Confirm whether power polarity is correct Liquid crystal screen is made of non rigid materials and shall not been collided or squeezed Rub the surface of disp...

Page 3: ...o voice Only 1 line audio output or not Adjust it at the proper location No image Solution 1 Video cable come off or wrong connection Checking cable quality and confirm input end 2 No signal input Che...

Page 4: ...rationr 5 6 Signal Formats 7 Functional menu 8 Color temperature 9 Scaling seting 10 Scan mode 11 Short cut Key setting 12 Mark aspect 13 Safety Setting 14 Mark line Options 15 Embedded Audio 16 Wave...

Page 5: ...h on the upper right corner to easily take away the hood Restore Setting SDI After entering the System setting interface turn the BRIGHT knobto select the Sytem restore to get the dialog box HDMI Pres...

Page 6: ...low of the controller to the lock location 29 Size 20 Resolution 1600 900 Dot pitch 0 2766 H 0 2766 W mm Video input HD SD SDI 2line VGA 1line Audio input Dual speaker 1line 8 2W 0 7Vp p Video output...

Page 7: ...When no signalinput screenmiddle will display NO SYNC prompting the user to checkthe signal source LOCK 4 3 16 9 SCALE VIDEO SDI1 HDMI F BLUE ONLY B W SCAN SDI2 VGA POWER DC IN TALLY VGA DP DC OUT HDM...

Page 8: ...below POWER DC IN DC 12V 17V Device information SDI After entering the System setting inter face turn the BRIGHT knob to select SYSTEM INFOR press the knob to display the device information Press the...

Page 9: ...age SDI After entering the system setting interface turn the knob to select Language Then press the BRIGHT knob to enter the Language interface DEVICE SYSTEM DEFAULT CHINESE Press the BRIGHT knob to e...

Page 10: ...t is in red Adjust hint LED 3 SATURATION B W Turn the SATURATION knob to adjust the SATURATION Press the SATURATION knob to switch COLOR and B W 3 F1 F6 is the system default shortcut key the function...

Page 11: ...56 R 256 D65 32 32 32 0 D65 Turn the BRIGHT knob to select color temperature press it again to confirm DEVICE SYSTEM DEFAULT D65 TALLY mode setting After entering the AUXILIARY SETTING interface Turn...

Page 12: ...SCALING F4 SETTING MARK F5 SETTING AUDIO DISPLAY F6 SETTING ASPECT FALSE COLOR OFF PEAKING FILTER OFF TIME CODE OFF SHARPNESS 0 SATURATION 32 CONTRAST 32 BRIGHTNESS 32 COLOR TEMP D65 INFOR HDMI FULL S...

Page 13: ...STANDARD 4 3 16 9 LETTER BOX V SDI 4 3 16 9 LETTER BOX SDI 4 3 16 9 LETTER BOX Turn the BRIGHT knob to select the USER press the BRIGHT knob to confirm After entering AUXILIARY SETTING interface turn...

Page 14: ...he BRIGHT knob to select the USER item press the knob to confirm TALLY connection Always being on Blink INT A High level INT B Low level Connecting the external TALLY signal with the plug DB 9 shown a...

Page 15: ...4 3 95 SDI 4 3 95 After entering the AUXILIARY SETTING interface turn the BRIGHT knob to enter the UMD SETTING pressthe BRIGHT knob again to confirm Press the BRIGHT knob to enter the main menu turn...

Page 16: ...b to confirm F1 short cut key change to new item the old setting no use SDI UMD UMD HV TALLY 15 F1 F6 shortcut key can be set as the above SDI F1 F2 F3 F4 F5 F6 SDI F1 F2 F3 F4 F5 F6 Turn the BRIGHT k...

Page 17: ...e knob to enter the AUDIO DISPLAY interface turn the knob to select the ON item and press BRIGHT knob to confirm AUDIO DISPLAY CAN BE ADJUSTED ONLY BASED ON SDI SIGNAL Press the BRGHT knob to enter th...

Page 18: ...ress the RIGHT knob to confirm turn the BRIGHT knob to select the SAFETY then press the knob to confirm SDI 4 3 95 SDI 4 3 95 SDI 4 3 95 Turn the BRIGHT knob to select WAVEFORM and press the knob to e...

Reviews: