Copyright © 2013 Ruckus Wireless, Inc.
Published June 2013, Part Number 800-70456-001 Rev D
Page 2 of 2
S
TEP
3: F
ASTEN
THE
S
HOULDER
S
CREWS
TO
THE
S
ERVER
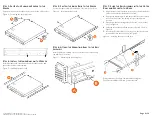
Fasten two hex head shoulder screws on each side of the server.
Figure 4: Fastening the shoulder screws
S
TEP
4: I
NSTALL
THE
I
NNER
R
AILS
ON
THE
S
ERVER
Install the inner rails onto the hex head shoulder screws, and
then slide the inner rails forward.
Figure 5: Installing the inner rails
S
TEP
5: F
ASTEN
THE
I
NNER
R
AILS
TO
THE
S
ERVER
Secure the inner rails with one #6-32 x 1/4 screw for each rail.
Figure 6: Securing the inner rails
S
TEP
6: A
TTACH
THE
M
OUNTING
E
ARS
TO
THE
R
AIL
A
SSEMBLY
Attach the rack mounting ears to each side of the server using
the #10-32 x 3/8 screws.
Figure 7: Attaching the mounting ears
S
TEP
7: S
LIDE
THE
R
AIL
A
SSEMBLY
INTO
THE
O
UTER
R
AILS
AND
S
ECURE
TO
THE
R
ACK
1
Align the inner rails (attached to the server chassis) with the
outer rail assemblies (attached to the rack).
2
Engage the matching rails, and then slide the server chassis
into the rack until the two spring safety locks snap into
position.
3
Press down the two spring safety locks (one on each side).
See 1 in Figure 8.
4
Slide the server chassis all the way into the rack. See 2 in
Figure 8.
5
Use the rack screws (#8-32 x 3/4) to secure the chassis and
rack handles into the rack. See 3 in Figure 8.
Figure 8: Securing the server to the rack
Congratulations! You have completed mounting the
ZoneDirector 5000 or SCG into your server rack.


