background image


Professional


14 

FM Transceiver


    BASIC OPERATIONS  


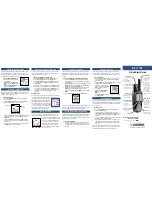
Under power-off state, turn [POWER]/ [VOLUME] clockwise to turn on the transceiver. 
Under power-on state, turn [POWER]/ [VOLUME] anticlockwise to turn off the transceiver.


Under  power-on  state,  turn  [POWER]  /  [VOLUME]  to  adjust  volume.  Clockwise-up,  anticlockwise


-down.


When adjusting the volume, user can press the key programmed as Squelch Off to monitor volume


level.


Under standby, turn channel selector knob to choose the desired channel, Turn clockwise to increase 
the channel, anticlockwise to decrease the channel. The arrow directs the operational channel.


NOTE: This transceiver has 200 channels for  use, if t h e r e  is  a null  channel between 2channels, 
when manually select channel, transceiver will skip null channel, enter into next channel directly.


Channels Selection


NOTE: Press the side key programmed as Squelch Off to monitor the background noise. Turn [POWER]


/ [VOLUME] to adjust the volume.


Adjusting Volume


Turn the Radio On & OFF


Summary of Contents for DV-3140UV

Page 1: ...A2 140708 A1 140807...

Page 2: ......

Page 3: ......

Page 4: ...hannels as well as UHF and VHF standby modes which are able to realize dual PTT functions 51 groups of CTCSS encode decode and 1 group of user defined CTCSS encode decode 1024 groups of DCS encode dec...

Page 5: ...not put the transceiver in excessively dusty or humid areas 7 Do not use harsh chemicals cleaning solvents to clean the transceiver 8 Do not transmit without antenna 9 When using this transceiver we...

Page 6: ...arging Operation 3 Charger Applied 3 NOTES 3 How to Charge 4 Normal Charging Tips 6 How to Store the Battery 6 PREPARATION 8 Installing Removing the Battery 8 Installing Removing the Antenna 8 Install...

Page 7: ......

Page 8: ...C OPERATIONS 14 Turn the Radio On OFF 14 Adjusting Volume 14 Channels Selection 14 Receiving 15 Transmitting 15 SHORTCUT OPERATIONS 16 Switch between Main Band and Sub Band 16 Call 16 Lone worker 16 M...

Page 9: ...vel setup 20 Battery Capacity Enquiry 20 Priority Channel 20 Emergency Alarm 21 CTCSS DCS Encode Decode Setup 21 FM radio 21 Optional Signal Encode list 22 Single Band Switch 22 Resume Factory Default...

Page 10: ...nu 25 LCD Back Light Setup 26 Menu 26 LCD Back Light Color Setup 26 PROGRAMMING SOFTWARE LNSTALLING STARTING TAKES WINDOWS XP AS AN EXAMPLE 27 TECHNICAL SPECIFICATIONS 28 TROUBLE SHOOTING GUIDE 29 ATT...

Page 11: ...he following table before discarding the packing material If any items are missing or have been damaged during shipment please contact dealers immediately Item Quantity Antenna 1 Li ion Battery Pack 1...

Page 12: ...r frequency band of antenna please refer to label indicated in the bottom of the antenna Note Car Charger and Charger should be used together USB Programming Cable PC03 Hand Strap GS01 Programming Sof...

Page 13: ...d personal injury After installing the battery pack if the radio displays low battery with red flashing lamp or voice prompt please charge the battery Do not short the battery terminals or throw the b...

Page 14: ...erminals are in contact with charging terminals well The Indicator turns into twinkling red Pre charging begins 3 After pre charging for about 5 minutes the indicator will stop twinkling charging begi...

Page 15: ...second None Red Light Twinkles for 5 Minutes Red Green Red twinkles for a long time NOTE Trouble means battery heating battery short circuit or charger short circuit NOTE When charging a power on tra...

Page 16: ...rn into normal charging when the battery reaches a certain electric quantity And if the red light stops twinkling it means the remnant voltage meets a certain electric quantity the charger will charge...

Page 17: ...attery terminals Never attempt to remove the casing from the battery pack Never assemble the battery in dangerous surroundings spark may cause explosion Do not put the battery in hot environment or th...

Page 18: ...r hearing a click sounds the battery has been locked 3 To remove the battery pack slide up the release latch and remove the pack away f rom the transceiver Installing the Antenna Screw the antenna int...

Page 19: ...ise screw it Removing the Belt Clip Anticlockwise turn the screws to remove the belt clip Unveil the MIC SP jack cover and then insert the Speaker Microphone plug into MIC SP jack NOTE Note The transc...

Page 20: ...eiver 11 PREPARATION Slide the loop of the hand strap through the eyelet on the upper rear of the transceiver pull the entire hand strap through the loop to secure the hand strap in place Installing R...

Page 21: ...nd CTCSS FUNC Icon The arrow points to current operational channel FM radio TX Power Priority Scan VOX Function Scan Skip Narrow band Scramble Encryption Battery Capacity Function Menu Serial No Main...

Page 22: ...GETTING ACQUAINTED Antenna Channel switch Power Volume switch LED indicator green light when receiving red light when transmitting Speaker Microphone LCD 4 3 3 1 2 5 1 4 5 3 7 5 Programming key Profes...

Page 23: ...ey PF2key programming key programming all kinds of monitor ways Left Panel Right Panel Speaker Mic rophone Jacks Reading Writing Programming Software Jack Belt Clip Battery Professional FM Transceiver...

Page 24: ...or volume level Under standby turn channel selector knob to choose the desired channel Turn clockwise to increase the channel anticlockwise to decrease the channel The arrow directs the operational ch...

Page 25: ...ess the PTT key and speak into microphone Please keep around 2 5 5cm distance between microphone and your lip And please speak in normal tone to make the receiver obtain best tone quality NOTE Press P...

Page 26: ...radio will start the Lone worker mode When reach the pre set remind time radio will emit voice prompt user can press any key to re timing otherwise when the remind time finished radio will enter into...

Page 27: ...ver will temporarily stay in this channel and LED indicator will light on Press the scan key again transceiver exits scan Under standby press the programmed key of SKIP transceiver emits DU beep LCD d...

Page 28: ...y of Squelch off the squelch circuit is not mute background noise can be heard Press this key again transceiver emits DU DU beep the squelch circuit becomes mute By using this function you can monitor...

Page 29: ...ey Lock screen displays icon key lock function is enable Repeat the above operations transceiver exits key lock function when icon disappear Under standby press the programmed key of Adjust Power Leve...

Page 30: ...tion is used for setup VOX transmit volume volume must be higher when VOX level is higher Under standby press programmed key of VOX level screen displays VOX rotate channel switch to select need VOX l...

Page 31: ...er standby state press programmed key of CTCSS SELECT LCD displays CT DEC CT and T icon rotate channel switch to choose desired CTCSS encode decode setup press PTT key save and exit Press the key agai...

Page 32: ...encode list turn channel switch to choose desire encode press PTT to transmit the encode To reduce the sub band interfere when using main band you can use the single band switch function to shut off...

Page 33: ...slave units It copies the parameters and memory program settings Connection Use optional CP04 cloning cable connect Read write frequency port on both master and slave setting and programing as the req...

Page 34: ...Professional 24 FM Transceiver 41 Master unit remain copy mode state to prepare for the next copy if reboot the master means exit...

Page 35: ...turns to normal mode and restart automatically 31 Turn off the slave s power remove the cable insert another slave which you want to copy If the data is not successfully transmitted turn off the maste...

Page 36: ...L 31 Press key to enter into next item turn channel switch to choose desired setup 00 09 total 10 SQL levels for optional 00 is the lowest always on 41 Press key to return the function menu or press a...

Page 37: ...ay 10 seconds then resume scan 15ST When scan a match signal stay 15 seconds then resume scan 2SP When scan a match signal stay until the signal disappears 2seconds then resume scan 41 Press key to re...

Page 38: ...up AUTO Automatic LCD back light will automatic turn off after a period of turn on ON Always ON OFF Always OFF 41 Press key to return the function menu or press any other keys to save and exit 21 Turn...

Page 39: ...Professional FM Transceiver 29 41 Press key to return the function menu or press any other keys to save and exit...

Page 40: ...f programming cable plugs into different USB port the COM Port number is different Before programming transceiver should be turned on fi Not turn on or turn off transceiver when it is connecting with...

Page 41: ...ty 2 5ppm Operating Temperature 20 55 Size 240 56 30mm with battery pack antenna Weight 240g with battery pack antenna Receiving Part Wide band Narrow band Sensitivity 12dB SINAD 0 25 V 0 35 V Adjacen...

Page 42: ...cannot scan The channels are not in scan list Professionals set it All band noisy after programmed or green light always lightens Turn on squelch when programmed Non professionals are advised not to...

Page 43: ...e Out of communication range or obstruct by tall buildings or in basement and so on Loudspeaker become lower or with ka ka sound after using a certain time Check whether the loudspeaker net is broken...

Page 44: ...71 9 15 103 5 26 151 4 37 186 2 48 233 6 5 74 4 16 107 2 27 156 7 38 189 9 49 241 8 6 77 0 17 110 9 28 159 8 39 192 8 50 250 3 7 79 7 18 114 8 29 162 2 40 196 6 51 254 1 8 82 5 19 118 8 30 165 5 41 19...

Page 45: ...71 072 073 074 075 076 077 100 101 102 103 104 105 106 107 110 111 112 113 114 115 116 117 120 121 122 123 124 125 126 127 130 131 132 133 134 135 136 137 140 141 142 143 144 145 146 147 150 151 152 1...

Page 46: ...360 361 362 363 364 365 366 367 370 371 372 373 374 375 376 377 400 401 402 403 404 405 406 407 410 411 412 413 414 415 416 417 420 421 422 423 424 425 426 427 430 431 432 433 434 435 436 437 440 441...

Page 47: ......

Page 48: ...634 635 636 637 640 641 642 643 644 645 646 647 650 651 652 653 654 655 656 657 660 661 662 663 664 665 666 667 670 671 672 673 674 675 676 677 700 701 702 703 704 705 706 707 710 711 712 713 714 715...

Reviews: