background image

RSH-1151/1651

10

9

9.  USING FOOT PEDAL  AND REMOTE CONTROL

10.  USING CROSS CUTTER

USING FOOT PADEL

Place the foot padel on the floor in front of the machine.
Once all correct settings are displayed, you may use the
foot padel  to operate the laminator for “Hands Free
Operation.”  To activate the machine, press the foot padel
once and then release.  Repeat to stop the rollers.    

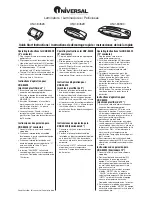
The cross cutter is located on the rear exit table of the machine.

1. After lamination, move the cutter approximately to the

center of the completed application at the desired point
of detachment (Figure 1).  

2. Grasp film with one hand, press the cutter

downward into the application and slide it first to one
end of the application, then to the other end to
complete the cut (Figure 2 & 3).   

USING REMOTE CONTROL

Located on the left hand side of the rear of the laminator, to
use press:

1. RUN : To activate the rollers.

2. STOP : To stop the rollers from turning.

3. REV : To reverse the rollers.  Press and hold the button

(useful for jams or mis-feeds of media).

1

2

3

Figure 1

11.  USING SLITTER (OPTION)

1. Adjust the left and/or right slitters by loosening the

slitter adjuster knob (located between the front and
rear rollers.) Figure 1

2. Activate the slitter by turning the slitter knob(located

on the left side of the machine) counterclockwise.
Figure 2

3. Once you activate the slitter then you can begin

lamination. Figure 3

4. To deactivate the slitter turn the slitter knob

clockwise. Figure 4

NOTE: When the slitter becomes dull break off the
blade. Pull the lock black back,then pull the slitter
out,and pull the lock black to previous position.
Figure 5 

Figure 2

Figure 3

CAUTION
When the slitters are not in use please keep the slitters
positioned at the far left and right side to avoid injury.

Figure 1

Figure 2

Figure 3

Figure 4

Figure 5

Summary of Contents for RSH-1151

Page 1: ...equipment This warranty specifically does not cover damage to laminating rollers caused by knives razor blades or any sharp objects or abrasives or failure caused by adhesives or damage caused by lift...

Page 2: ...ents 2 SAFETY PRECAUTIONS Failure to comply with any of the following safety procedures could result in serious injury Please read the instructions carefully and keep for future reference 1 Only a lic...

Page 3: ...oyal Sovereign recommends that a licensed electrician ensures proper power to your laminator in accordance with electrical codes in your area The laminator should have a dedicated power line 230V UL 2...

Page 4: ...hg 7 I X hf e N1 hf f hf e J5 hf 3 O Y hf V4 0Yhg F RSH 1151 1651 6 5 5 PRODUCT IDENTIFICATION 6 CONTROL PANEL 1 15 2 3 4 5 6 7 8 14 13 10 9 12 16 11 When the machine is initially turned on the LCD wi...

Page 5: ...rmal operation NOTE Auto stand by mode and auto power off mode Stand by mode If no activity is made within 2 hours after each use the machine will automatically switch into stand by mode Auto power of...

Page 6: ...nd side of the rear of the laminator to use press 1 RUN To activate the rollers 2 STOP To stop the rollers from turning 3 REV To reverse the rollers Press and hold the button useful for jams or mis fe...

Page 7: ...5 13 1 Lamination and Encapsulation Thermal Lamination 1 Turn the power switch on I position Power switch is located in the rear of the unit on the left side 2 Complete the steps on Loading films to u...

Page 8: ...lm e g Royal Print Pro Film and lower shaft with pressure sensitive mounting adhesive films e g Royal Sovereign White Mount or Clear Mount 2 Pull the upper laminate under the upper idle bar and separa...

Page 9: ...r 1 4 M6 hexagon bolts on each side Figure 1 Installing the Rear Rewinder Option Includes motorized winder bracket one spindle and mounting hardware 1 Remove the left and right covers by using a screw...

Page 10: ...mperature according to the recommended film temperature Curled lamination a Upward curl b Downward curl a Loosen the top roll film tension b Loosen the bottom roll film tension Unclear lamination a Th...

Reviews: