background image

8

8

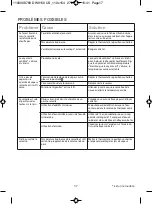
Problems

Cause

Solution

The iron is plug-
ged in, but the so-
leplate of the iron
remains cold.

No power from the outlet.

Check that the power plug is properly inserted or try
plugging the iron into a different outlet.

Temperature control set too low.

Set the temperature control to a higher temperature.

The automatic electronic auto-off* is
active.

Move your iron.

None or too little
steam is being
emitted.

Steam control set on dry position

.

Not enough water in the water tank.

Anti-Drip* is active (§ 9).

Turn the steam control to the required setting area.

Fill the water tank.

Wait for the soleplate to reach the correct temperature.

Brown streaks
come through the
holes in the sole-
plate and stain the
linen.

Residues in the steam chamber or
on the soleplate.

Use of chemical descaling agents.

Fabric fibers have accumulated in
the holes of the soleplate and are
burning.

Your linen is not rinsed sufficiently or
you have ironed a new garment be-
fore washing it.

Use of starch.

Pure distilled / demineralized or sof-
tened water is being used.

Use the Self Clean function then clean your iron.

Do not add any descaling agents to the water in the
water tank. Use the Self Clean function and clean your
iron.

Clean the soleplate with a non-metallic sponge. 
Vacuum the holes of the soleplate from time to time. 

Ensure linen is rinsed thoroughly to remove any soap
deposits or chemicals on new garments which may be
absorbed by the iron.

Always spray starch onto the reverse side of the fabric
to be ironed and clean your iron soleplate.

Only use untreated tap water or mix half tap water
with half distilled/demineralised water. Use the Self
Clean function and clean your iron.

Iron is leaking.

Overuse of shot of steam button.

Soleplate temperature too low .

Allow more time between each shot.

Set the temperature control to a higher temperature.

15 • Cleaning the iron

When the appliance has cooled down, wipe it down with a damp cloth or sponge, as required.
Remove the dirt from the soleplate with a damp cloth or sponge.

IMPORTANT Do not use sharp or abrasive cleaning agents or objects to clean soleplate
and other parts of the iron. If the appliance has been standing unused for long periods, use
the Self Clean function (see § 14).

PROBLEMS?

* depending on model

1103908769 DW9150 US_110x154  27/07/11  15:41  Page8

Summary of Contents for STEAMIUM DW9150U1

Page 1: ...da Inc 345 Passmore Avenue Toronto Ontario M1V 3N8 Tel 1 800 418 3325 Groupe SEB México S A de C V Calle Goldsmith 38 401 Piso 4 Polanco Distrito Federal C P 11560 México RFC GSM8211123P5 Instruction for use Mode d emploi Instructivo de operación EN FR ES 1103908769 DW9150 US_110x154 27 07 11 15 41 Page1 ...

Page 2: ... Steam max position 6 Spray button 7 Burst of steam button 8 Auto off indicator light 9 Cord 10 Handle 11 Thermostat control light 12 Water tank 13 Maximum water level indicator 14 Soleplate DESCRIPTION 2 depending on model 10 9 12 14 13 11 2 5 6 7 8 5a 5b 1 3 4 1103908769 DW9150 US_110x154 27 07 11 15 41 Page2 ...

Page 3: ...iron Take it to a qualified servi ceman for examination and re pair Incorrect assembly might result in a risk of electric shock when the iron is used after reas sembly 7 Close supervision is required for any appliance used by or near children Do not leave the iron unattended while the iron is connected or on an ironing board 8 Burns can occur from touching hot metal parts hot water or steam Use ca...

Page 4: ... a harmless odor and a small amount of smoke may be given off This has no effect on the use of the iron and will disappear quickly 12 This appliance is not intended for use by children and other per sons whose physical sensory or mental capabilities or lack of ex perience and knowledge pre vents them from using the appliance safely without supervi sion or instruction by a responsi ble person to en...

Page 5: ...powerful steam output a mesh type ironing board must be used to allow any excess steam to escape and to avoid steam venting sideways USE 2 Filling the water tank IMPORTANT Before filling the water tank unplug the iron and set the steam control to dry position Tilt the iron Open the filling inlet Pour in water up to the max mark Close the fil ling inlet and return the iron to the hori zontal 3 Sett...

Page 6: ...erful jet of steam Wait a few seconds between each shot before pressing the button again 7 Vertical burst of steam from temperature setting upwards TIP Hold the iron 4 to 8 inches away from the garment to avoid bur ning delicate fabrics Hold the iron in the vertical position and press the burst of steam button to remove creases from suits jackets skirts hanging curtains etc IMPORTANT Never direct ...

Page 7: ...e operational life of your iron The anti scale cartridge is an integral part of the water tank and does not need to be replaced 14 Self Clean function prolongs the life of the iron IMPORTANT Do not use sharp or abrasive cleaning agents or objects to clean the soleplate and other parts of the iron WARNING Do not use descaling agents even if advertised for steam irons They will per manently damage y...

Page 8: ...elf Clean function then clean your iron Do not add any descaling agents to the water in the water tank Use the Self Clean function and clean your iron Clean the soleplate with a non metallic sponge Vacuum the holes of the soleplate from time to time Ensure linen is rinsed thoroughly to remove any soap deposits or chemicals on new garments which may be absorbed by the iron Always spray starch onto ...

Page 9: ...y product which is not accompanied by a valid proof of purchase This warranty will not cover any damage which could occur as a result of misuse negligence failure to follow Rowenta instructions use on current or voltage other than as stamped on the product or a modification or unauthorized repair of the product It also does not cover normal tear and wear maintenance or replacement of consumable pa...

Page 10: ...try or Province to Province The consumer may assert any such rights at his sole discretion Additional information Accessories Consumables and end user replaceable parts can be purchased if locally available as described in Rowenta internet site www rowenta com MEXICO GROUPE SEB MÉXICO S A de C V Calle Goldsmith 38 401 Piso 4 Polanco Distrito Federal C P 11560 México RFC GSM8211123P5 01800 112 83 2...

Page 11: ...peur b Vapeur maximale 6 Bouton de vaporisation 7 Bouton du jet de vapeur 8 Voyant d arrêt automatique 9 Cordon 10 Poignée 11 Voyant de contrôle de la température 12 Réservoir d eau 13 Indication du niveau de remplissage maximal 14 Semelle DESCRIPTION 10 9 12 14 13 11 2 5 6 7 8 5a 5b 1 3 4 FR 1103908769 DW9150 US_110x154 27 07 11 15 41 Page11 ...

Page 12: ...mages apparents s il fuit ou présente des anomalies de fonctionnement Ne démontez jamais votre appareil faites le examiner dans un Centre Service Agréé afin d éviter un danger Ne plongez jamais le fer dans l eau Ne débranchez pas l appareil en tirant sur le cordon Débranchez toujours votre appareil avant de le remplir ou de rincer le réservoir avant de le nettoyer après chaque utilisation Ne laiss...

Page 13: ...tilisez pas l eau des sèche linges l eau parfumée ou adoucie l eau des réfrigérateurs des batteries des climatiseurs de l eau pure distillée ou de l eau de pluie Ces eaux contiennent des déchets organiques ou des éléments minéraux qui se concentrent avec la chaleur et peuvent provoquer des crachements des coulures brunes ou un vieillissement prématuré de votre appareil UTILISATION 2 Remplissage du...

Page 14: ...être réglé entre débit de vapeur minimal et débit de vapeur maximal Pour le débit de vapeur maximal nous recommandons de régler la température sur 6 Jet de vapeur à partir du réglage de température Appuyez sur le bouton pour produire un jet de vapeur puissant Attendez quelques secondes entre deux appuis 7 Jet de vapeur vertical à partir du réglage de température CONSEIL Pour éviter de brûler les t...

Page 15: ...uvrez et fermez plusieurs fois la commande de réglage de la vapeur afin d empêcher des dépôts de cal caire ou une obstruction de l orifice d écoulement dans la chambre de vapeur 12 Rangement de votre fer Laissez refroidir le fer avant de le ranger en position verticale sur le socle IMPORTANT N enroulez pas le cordon autour de la semelle chaude et ne rangez jamais votre fer à plat sur sa semelle EN...

Page 16: ...l eau commence à couler de la semelle en expul sant les saletés et les particules de tartre présentes dans la chambre vapeur Rebranchez le fer et laissez le chauffer de nouveau Attendez que l eau résiduelle se soit évaporée puis débran chez le fer et laissez le refroidir complètement Lorsque la semelle est froide essuyez la avec un chiffon humide CONSEIL Procédez à un autonettoyage environ toutes ...

Page 17: ...anti gouttes active 9 Réglez le thermostat à la position souhaitée Remplissez le réservoir Attendez jusqu à ce que la semelle ait de nouveau atteint la température voulue La semelle est sale et peut faire des taches sur le tissu Résidus éventuels dans la chambre de va peur la semelle Utilisation d additifs chimiques Utilisation d eau distillée pure ou de l eau dé minéralisée Utilisation d amidon P...

Page 18: ... couvre pas les dommages encourus à la suite d une mauvaise utilisation d une négligence du non respect des instructions d utilisation et d entretien de l utilisation avec une alimentation électrique non conforme à celle spécifiée sur la plaque signalétique ou d une modification ou d une réparation non autorisée du produit Elle n inclut également pas l usure normale du produit ni l entretien ou le...

Page 19: ... faire usage de ces droits à sa discrétion exclusive Informations supplémentaires Les accessoires consommables et autres pièces remplaçables directement par l utilisateur peuvent être achetées si elles sont disponibles localement tel que décrit sur le site internet de Rowenta www rowenta com www rowenta com MEXICO GROUPE SEB MÉXICO S A de C V Calle Goldsmith 38 401 Piso 4 Polanco Distrito Federal ...

Page 20: ... de vapor a Sin vapor b Vapor máximo 6 Botón rociador 7 Botón golpe de vapor 8 Indicador luminoso de autoapagado 9 Cable de alimentación 10 Asa 11 Luz piloto 12 Depósito de agua 13 Indicador del nivel máximo de agua 14 Suela DESCRIPCIÓN DEL APARATO 10 9 12 14 13 11 2 5 6 7 8 5a 5b 1 3 4 1103908769 DW9150 US_110x154 27 07 11 15 41 Page20 ...

Page 21: ...as o presenta anomalías de funcionamiento No desmonte nunca el aparato llévelo a revisar a un Servicio Técnico Autorizado para evitar cualquier peligro No sumerja nunca la plancha en el agua No desconecte el aparato tirando del cable Desconecte siempre el aparato antes de llenar o aclarar el depósito antes de limpiarlo después de cada utilización No deje nunca el aparato sin supervisión cuando est...

Page 22: ...efrigeradores de las baterías de los aire acondicionados agua pura destilada o agua de lluvia Estas aguas contienen resi duos orgánicos o elementos minerales que se concentran con el calor y pueden provocar salidas de vapor manchas oscuras o un envejecimiento prematuro del aparato UTILIZACIÓN 2 Llenar el depósito IMPORTANTE Antes de llenar el depó sito de agua retirar el enchufe de la red y ajusta...

Page 23: ...uede ajustar entre volu men de vapor mínimo y volumen de vapor máximo Para el volumen de vapor máximo recomendamos el ajuste de temperatura 6 Golpe de vapor Ajuste de temperatura por encima de la Pos Para eliminar arrugas rebeldes con un golpe de vapor fuerte presione el botón de golpe de vapor Respete un intervalo de algunos segundos entre dos pulsaciones 7 Chorro de vapor vertical Ajuste de temp...

Page 24: ...re su talón IMPORTE Nunca guarde la plancha en posición horizontal LIMPIEZA Y CUIDADOS IMPORTE Desenchufar de la red y dejar enfriar la plancha antes de la limpieza y el man tenimiento 13 Sistema antical La plancha está equipada con un cartucho antical que reduce notablemente la formación de cal De este modo se prolonga considerablemente la vida útil de su plancha El cartucho anti cal es un compon...

Page 25: ...rónico automático está acti vado Asegúrese de que el enchufe esté conectado correctamente o pruebe el aparato en otra caja de conexión Gire el regulador de temperatura a una posi ción más alta Mueva la plancha La luz piloto se en ciende y se apaga Proceso normal Al encender y apagar la luz piloto se indica la fase de calentamiento Cuando la luz pi loto se apague la suela ha alcanzado la temperatur...

Page 26: ...de Rowenta Detalles y dirección completa de los centros de servicio autorizados de cada país se encuentran listados en la dirección electrónica de Rowenta www rowenta com o bien llamando al nùmero telefónico de cada país indicado abajo para solicitar la dirección correspondiente Rowentanoestáobligadoarepararoreemplazarningúnproductoelcualnoseaacompañadodesucomprobantedecompra Esta garantía no cubr...

Page 27: ... comprado el producto Esta garantía proporciona al consumidor derechos legales específicos y el consumidor podrá tener tambièn otros derechos legales los cuales varian de Estado a Estado o de País a País o de Provincia a Provincia El consumidor podrá hacer valer esos derechos a su discreción Informaciòn adiciona Accesorios consumibles y piezas reemplazables pueden ser compradas si localmente se en...

Page 28: ...38 401 Piso 4 Polanco Distrito Federal C P 11560 México RFC GSM8211123P5 01800 112 83 25 U S A GROUPE SEB USA 2121 Eden Road Millville NJ 08332 800 769 3682 CANADA GROUPE SEB CANADA 345 Passmore Avenue Toronto ON M1V 3N8 1 800 418 3325 1103908769 DW9150 US_110x154 27 07 11 15 41 Page28 ...

Reviews: