9
1 • Removing packaging
Unpack your appliance and remove any unwanted stickers,
Keep your guarantee form and read the instructions carefully
before using your appliance for the first time.
2 • Advice and precautions
Each time before use, the power cord must be unwound
completely.
Do not jam it and do not allow it to rub against sharp edges.
If you’re using an electrical extension, check that it is in perfect
condition and that it is suited to the power of your vacuum
cleaner. Never unplug the appliance by pulling on the power
cord.
Never operate the vacuum cleaner without a bag in it and
without its filtration system (cassette).
For your peace of mind your vacuum cleaner is fitted with two
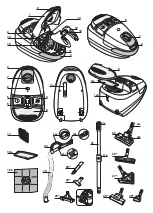
safety check systems: for the bag (13 & 14) and for the (H)EPA
filter cassette (16).
Do not move the vacuum cleaner by pulling on the power
cord, the appliance must be moved using its carrying handle.
Do not use the power cord for lifting the appliance.
Switch off and unplug your vacuum cleaner each time you’ve
finished using it. Always switch off and unplug your vacuum
cleaner before maintaining or cleaning it.
Only use original Rowenta or Wonderbag ENDURA bags and
filters.
Only use Rowenta original accessories. Check that all the
filters are correctly in place.
If you experience difficulties getting hold of the accessories
and filters for this vacuum cleaner, please contact Rowenta
customer services (you can find their contact details on the
last page).
BEFORE USING FOR THE FIRST TIME
EN
Thanks to the exclusive ROWENTA EXTREME
SILENCE SYSTEM we promise you’ll notice just
how much quieter your vacuum cleaner is.
1 • Assembling the elements of the
appliance
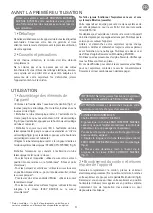
• Push the flexible hose into the vacuum inlet (fig.1) and turn
until it locks. To remove it, turn in the opposite direction and
pull (fig.2).
• Push the metal telescopic tube into the end of the power
nozzle until you hear a locking ‘click’ (fig.3) (to release it, push
the locking button on the tube and remove it).
• Push the all floor type nozzle (22) into the end of the metal
telescopic tube until you hear a locking ‘click’ (fig.4) (to
release it, push the locking button on the nozzle and remove
it).
• Adjust the telescopic metal tube to the required length using
the telescopic system (TELESCOPIC SYSTEM) (fig.5).
Fit the appropriate accessory to the end of the metal
telescopic tube or the power nozzle:
- For rugs and carpets: use the all floor type nozzle in the
retracted brush nozzle position or the Turbobrush* (fibres and
animal hairs):
- For parquets and smooth floors: use the all floor type nozzle
in the advanced position or, for a better result, use the parquet
nozzle*.
- For corners and hard to reach spots: use the telescopic
crevice tool*.
- For furniture and fragile surfaces: use the brush built into the
power nozzle (EASY BRUSH) or the upholstery nozzle*.
2 • Plugging in the power cord and
switching on the appliance
Unwind the power cord completely, turn the electronic power
control (9) to the minimum position, plug in your vacuum
cleaner and press on the Stop/Start pedal (fig.8).
Remark: you can use your vacuum cleaner in the horizontal
position (sleigh position) but also in the vertical position,
notably when you are vacuuming the stairs or removing dust
from the curtains.
USING THE APPLIANCE
IMPORTANT Never operate your vacuum cleaner without
its bag and without its filtration system (cassette).
IMPORTANT Always switch off and unplug your
vacuum cleaner before changing the accessories.
COMFORT TIPS
ERGO COMFORT SILENCE Chain
Comfortable to use, the ERGO COMFORT SILENCE
range has been designed to make using your vacuum
cleaner an easier and more enjoyable experience.
So that you can keep an upright position and avoid
bending your back, make sure you:
1. Adjust the length of the metal telescopic tube
ERGO COMFORT SILENCE to suit your body build
(Fig.6).
2. Place your second hand in front of the power
nozzle handle ERGO COMFORT SILENCE (Fig.7).
* Depending on models: either equipment specific to cer-
tain models or available as an optional accessory.
Summary of Contents for RO56 Series
Page 1: ...www rowenta com 747280 01 06 12 RO56xx RO57xx series...
Page 4: ...fig 24b fig 25 fig 27 fig 26 fig 28 fig 29 CLICK...
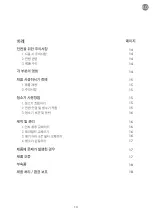
Page 17: ...13 KO 14 14 14 14 14 15 15 15 15 15 15 16 16 16 16 16 17 17 17 18 18...
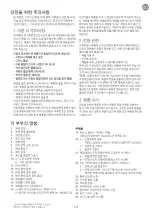
Page 18: ...14 KO...
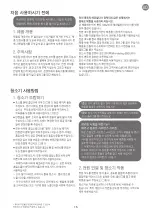
Page 19: ...15 KO...
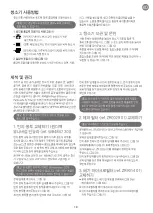
Page 20: ...16 KO...
Page 21: ...17 KO...
Page 22: ...18 KO...
Page 23: ...Notes...
Page 24: ...Notes...
Page 25: ...Notes...


