background image

DISC NOTES

5

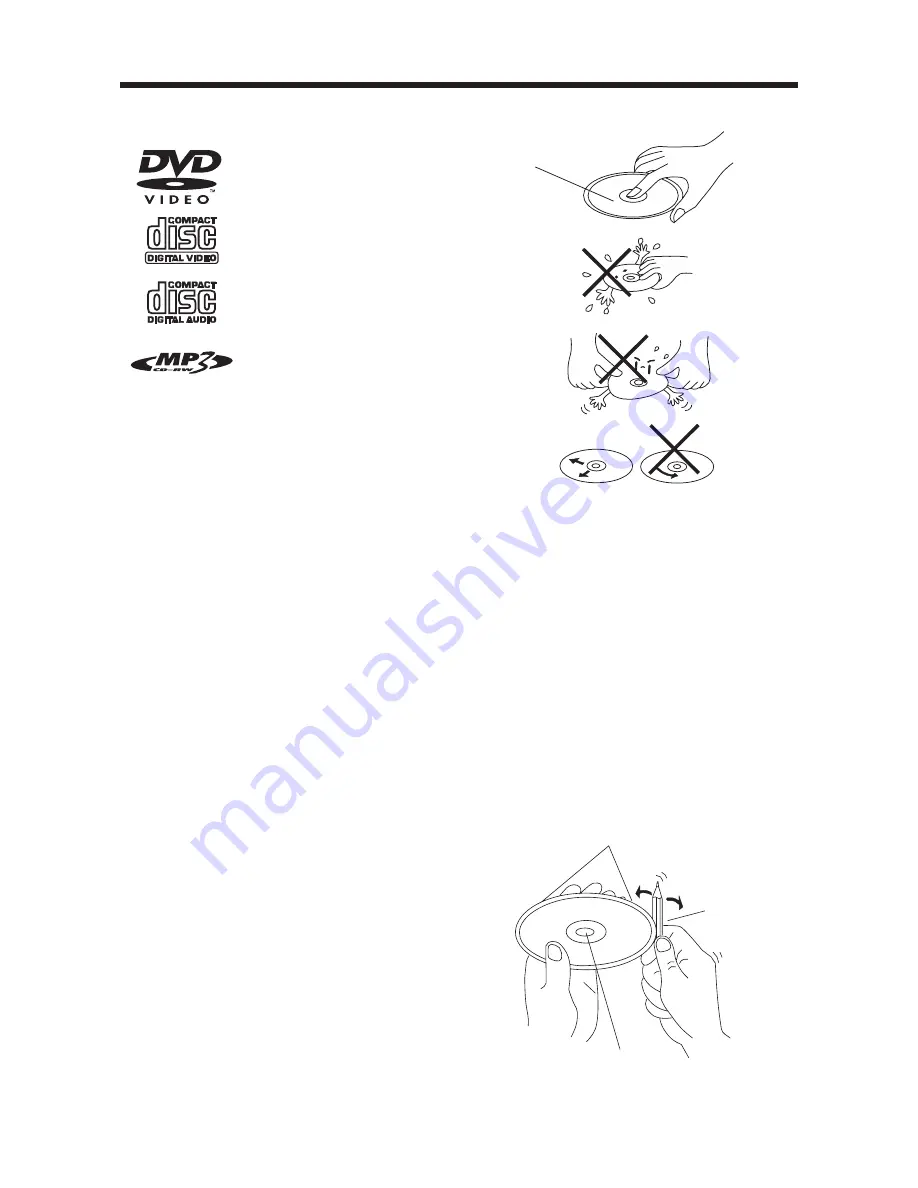
Disc formats supported by this player

DVD

12 cm disc

Video CD

12 cm disc

CD

12 cm disc

MP3

12 cm disc

Handling and Cleaning

• Dirt, dust, scratches and warping disc 

will cause misoperation.

• Do not place stickers or make 

scratches on discs.

• Do not warp discs.
• A disc should always be kept in its 

case when not in use to prevent from 
damaging.

• Do not place discs in the following 

places:
1. Direct sunlight
2. Dirty, dusty and damp areas
3. Near car heaters
4. On the seats or dashboard

Disc Cleaning

Use a dry soft cloth to wipe the surface.
If the disc is dirty, use a soft cloth slightly
moistured with isopropyl (rubbing)
alcohol.  Never use solvents such as
benzine, thinner or conventional record
cleaners as they may mar the surface of
the disc.

Note

A disc may become somewhat scratched
(although not enough to make it
unusable) depending on how you handle
it and conditions in the usage
environment. Note these scratches are
not an indication of any problem with the
player.

Preparing New Discs with Rough
Spots

A new disc may have rough edges on its
inside and outside edges.  If a disc with
rough edges is used, the proper setting
will not be performed and the player will
not play the disc.  Therefore, remove the
rough edges in advance by using a ball
point pen or pencil as shown below. To
remove the rough edges, press the side
of the pen or pencil against the inside
and outside edges of the disc.

Rough spots
on inside edge

Ball point pen
or pencil

Rough spots on
outside edge

Label side up

Do not touch
the underside
of the disc

Do not bend

Wipe the disc from center
toward the outside edge

Summary of Contents for CAR SHOW 7

Page 1: ...Integrated DVD CD MP3 Player...

Page 2: ...Ejecting a Disc 9 Operation 10 Basic Play 10 Display Adjust Function 11 On Screen Display Function 11 Multi Subtitle Language Function 12 MP3 Disc Play 13 Setup 14 Initial Setup 14 General Setup 14 S...

Page 3: ...out Registered Marks This product incorporates copyright protection technology that is protected by method claims of certain U S patents and other intellectual property rights owned by Macrovision Cor...

Page 4: ...ECTRIC SHOCK DO NOT EXPOSE THIS EQUIPMENT TO RAIN OR MOISTURE TO REDUCE THE RISK OF FIRE OR ELECTRIC SHOCK AND ANNOYING INTERFERENCE USE ONLY THE RECOMMENDED ACCESSORIES NOTICE OF INTENDED USE Rosen E...

Page 5: ...cleaners as they may mar the surface of the disc Note A disc may become somewhat scratched although not enough to make it unusable depending on how you handle it and conditions in the usage environme...

Page 6: ...ECT 3 MODE 4 PLAY PAUSE 5 Chapter Back 6 Chapter Forward 7 Disc slot 8 Speaker Enable Switch 9 AV IN Interface 10 Monitor release Button 11 TFT Color Monitor 12 Indicator LED of mode THE PLAYER 6 10 2...

Page 7: ...ONTROL LOCATION AND FUNCTION KEYS 1 2 21 3 4 5 6 22 7 8 9 10 11 12 13 14 15 16 17 18 19 20 DISPALY MODE DISC ZOOM EJECT INFO MODE SUB TITLE ENTER RANDOM DISC MENU SETUP REPEAT 3 1 2 DISPLAY ADJUST 6 4...

Page 8: ...the disc 12 DISPLAY MODE Press it to change the display mode among WIDE STANDARD and ZOOM 13 DISC ZOOM Allows the picture to be increased in size 14 INFO Display disc information during playback 15 E...

Page 9: ...ntrol Point the remote control towards the base of the unit Operation angle About 30 degrees in each the direction of the base of the unit LOADING EJECTING A DISC Ejecting a Disc Press EJECT button 3...

Page 10: ...ck 2X 4X 6X 8X FOR VCD CD Press the REPEAT button to select repeat mode as follow 1 Continuously repeat at the current chapter track when selected REP ONE mode 2 Select REP ALL mode to continuously re...

Page 11: ...the first time TITLE 01 03 CHAPTER 002 025 00 02 25 CHAPTER REMAIN 00 01 39 CHAPTER ELAPSED 00 00 24 TITLE REMAIN 01 46 58 OPERATION SINGLE ELAPSED 00 00 25 11 TURNING THE UNIT ON OFF Press OPEN butt...

Page 12: ...played at screen left top corner 12 OPERATION 2 Press INFO for the second time 3 Press INFO for the third time 4 Press INFO for the fourth time 5 Press INFO for the fifth time The message on the scree...

Page 13: ...ong over and again FOLDER REP Play all songs in the current directory in sequence over and again FOLDER Play all songs in the current directory once When select PLAY MODE press to change between the f...

Page 14: ...s SETUP in the stop mode Press the stop button twice to ensure the player is in STOP mode 2 The initial SETUP menu is displayed 3 Select the preferred item by using the buttons 4 Press OK buttons a GE...

Page 15: ...ILAIN SPANISH TV DISPLAY PIC MODE ANGLE MARK OSD LANG CAPTIONS SCR SAVER MAIN PAGE ON OFF GENERAL PAGE PIC mode setup Select AUTO the player PIC mode will depend on DVD disc Select HI RES format for b...

Page 16: ...R SAVER MAIN PAGE ON OFF AUDIO SETUP AUDIO SETUP OP MODE LINE OUT Line out mode with digital dialog normalization RF REMOD RF remodulation mode with heavy compression and digital dialog normalization...

Page 17: ...scs recorded in either PAL or NTSC format Select NTSC format when the unit is connected to NTSC TV Select PAL format when the unit is connected to PAL TV Select AUTO format the player TV output format...

Page 18: ...word now you want to use and retype again to confirm key in correctly PREFERENCES PAGE DEFAULTS Select reset to become factory initial setting TV TYPE AUDIO SUBTITLE DISC MENU PARENTAL PASSWORD DEFAUL...

Page 19: ...directly The user can adjust this item according to one s need DEFAULTS TABLE NO MENU WITH MENU TV TYPE AUDIO SUBTITLE DISC MENU PARENTAL PASSWORD DEFAULTS SMART NAV MAIN PAGE General Setup TV Display...

Page 20: ...ing See Fig 1 2 Attach the mounting bracket A to the mounting holes on the ceiling with screws matching with the screw holes on the bracket A 3 Install the ring to the DVD unit with screws Fig 1 Fig 2...

Page 21: ...WHITE VIDEO IN YELLOW AV IN 2 CABLE BLACK 25CM AV OUTPUT CABLE BLACK 25CM AUDIO R RED AUDIO L WHITE 25CM 30CM FMM 12V BLUE FMM GROUND WHITE W BLACK STRIPE BATTERY YELLOW 30CM ACC RED GROUND BLACK 35C...

Page 22: ...directions shown below for a new lamp changing 1 Be sure the lamp is off Push back the lamp cover and open it 2 Remove and discard the old lamp 3 Install a new bulb 4 Close the cover 22 Bulb Specifica...

Page 23: ...r This is not a malfunction COMPLETELY DISTORTED PICTURE The disc format is not according to the TV set used PAL NTSC NO COLOR IN PICTURE The disc format is not according to the TV set used PAL NTSC D...

Page 24: ...Less than 2A Signal System Compositive video 1 0Vp p 75 Discs Played 1 5 12 cm DVD VIDEO Disc 2 Compact Disc CD DA CD R CD RW MP3 3 5 12cm VIDEO CD Operating temp O C to 50 C Note Specifications and...

Reviews: