


VideoSplitter HDMI 4K60 Manual
7
Installation Procedure
Follow the procedure below to broadcast an HDMI signal to 2, 4 or 8 displays.
1. Switch off all devices including the video source (PC, Player, STB etc).
2. Connect the VideoSplitter HDMI 4K60 to the displays.
3. Connect an HDMI source (such as a Blu-ray Disc player or PC) to the HDMI In port.
4. Make sure the rotary switch is NOT set to “MODE 0”
5. Plug in the 5V DC power supply.
6. Power on the HDMI displays.
7. Power on the HDMI video source.
EDID Learning
Whenever a new display is connected to the VideoSplitter under modes D (auto EDID) and E or F (EDID
learning), the display will blank for a few seconds. This is normal and indicates that the VideoSplitter is doing
automatic EDID learning. The EDID from the newly connected display is analyzed to determine if a fresh EDID
table needs to be updated in the VideoSplitter.
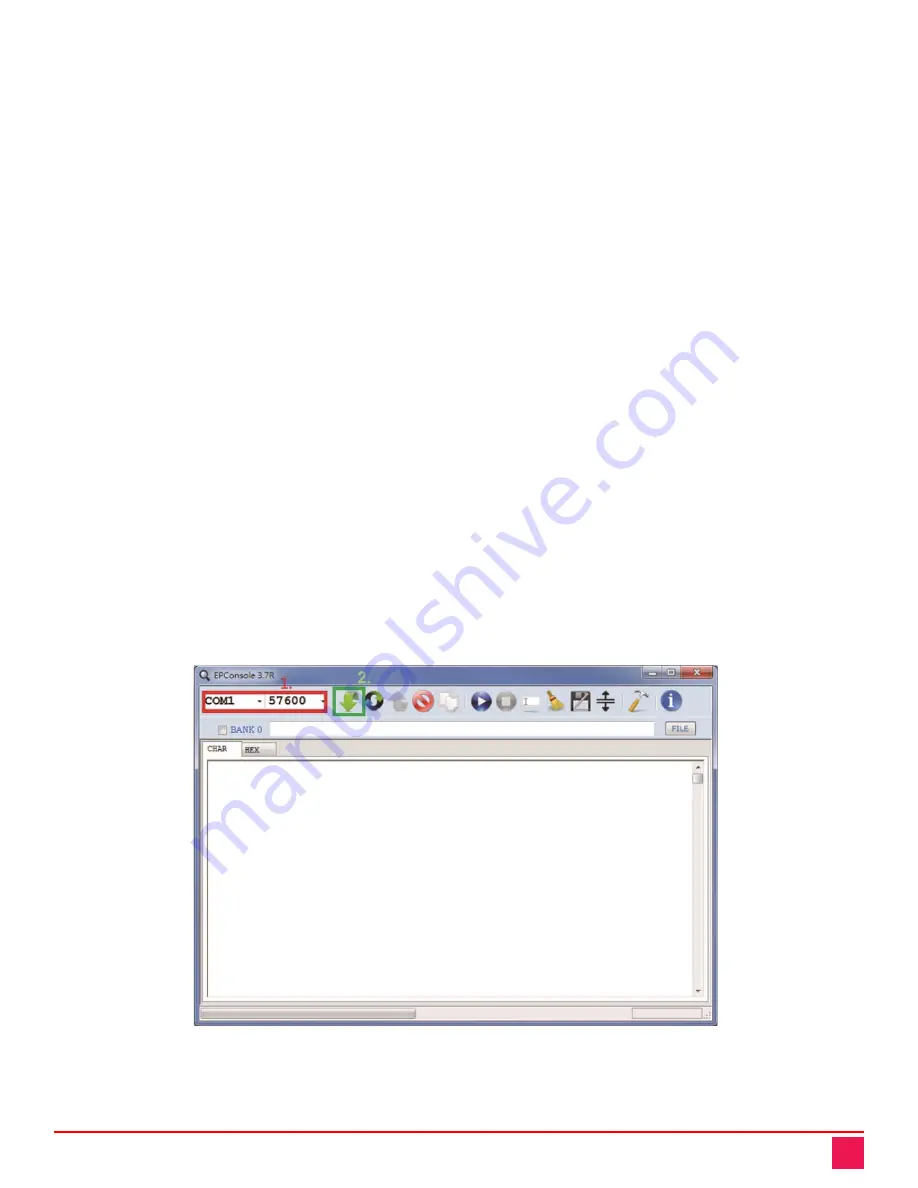
Firmware Update Procedure
Should the firmware need to be updated, this can be done through the mini USB port.
Firstly, power-off the VideoSplitter and then set the rotary dial to position ”0”.
The connect a mini USB cable between a host PC and the VideoSplitter. Install the firmware update software
to the PC and then set the correct com-port and baud rate. 57,600baud is recommended.
Click the “File” button to locate the firmware update file on the PC. This will be a HEX or BIN file.
Power on the VideoSplitter and the press the “Program MCU” symbol to start the firmware update.
Once the firmware update process is complete, power off the VideoSplitter and set the rotary dial back to the
selected operational mode (NOT to "0").
Figure 5. Firmware update software process


