Galaxy RAID GALHDX-7370S-8+12U4D Installation and Hardware Reference Manual
Drive Tray Installation
2-12
2.9.2 Drive Installation
Step 1.
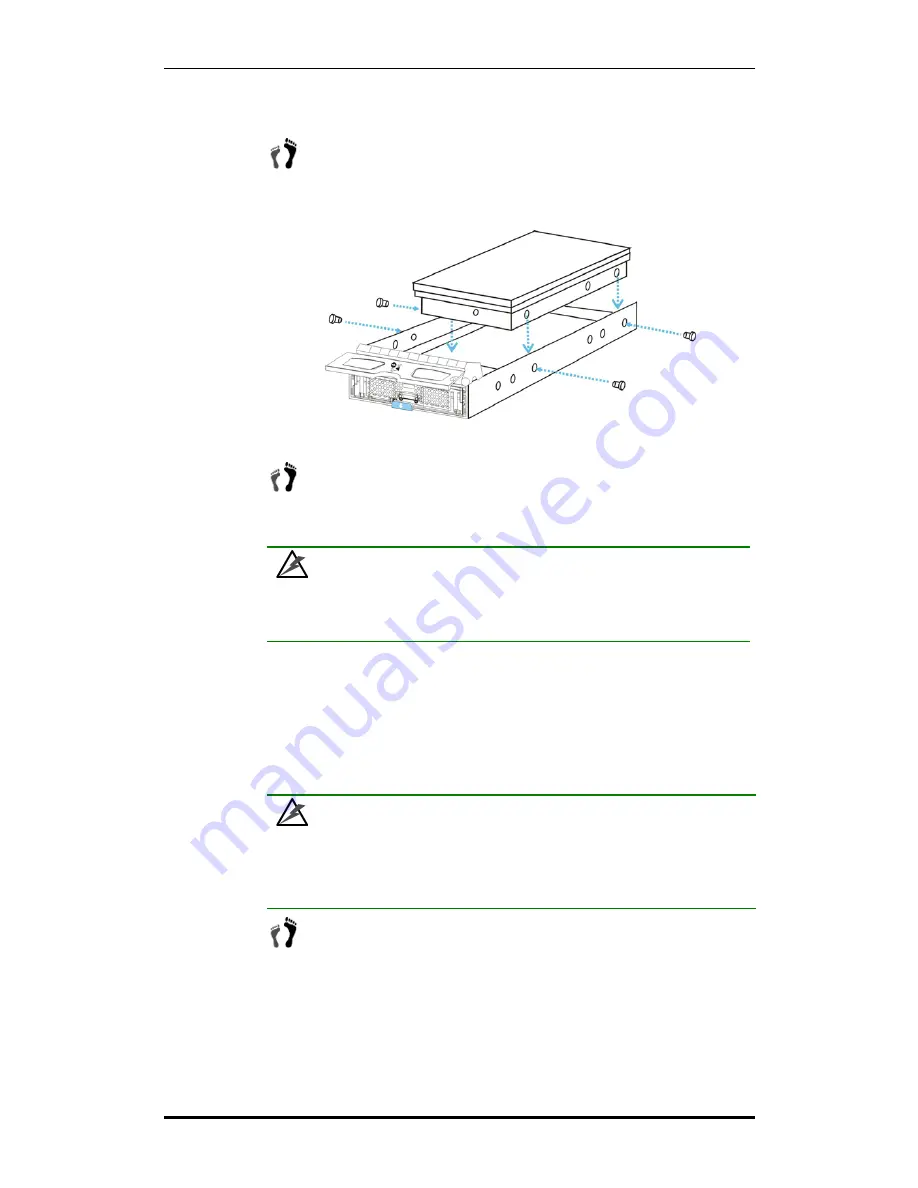
Place the SATA hard drive into the drive tray
(as shown in
Figure
2-4
) making sure that the hard drive is oriented in such a way that
the drive’s SATA connector is facing the back of the drive tray.
Figure 2-4: Installing a SATA Hard Drive
Step 2.
Adjust the drive’s location
until the mounting holes in the drive
canister are aligned with those on the hard drive. Secure the drive
with four supplied 6/32 flathead screws. (See
Figure 2-4
)
WARNING!
Only use screws supplied with the drive canisters. Longer screws may damage the
drive.
2.10 Drive Tray Installation
Once the hard drives have been installed in the drive trays, the drive trays can be
installed into the subsystem.
WARNING!
All drive trays must be installed into the enclosure even if they do not contain a
hard drive. If the trays are not installed into the enclosure, the ventilation required
for cooling will be disturbed and the subsystem will overheat.
Step 1. Make sure that the hard drive is secured to the drive tray.
Make sure
the key-lock is in the unlocked position
. The key-lock is unlocked if
the groove on its face is in a horizontal orientation. If the groove is in
a vertical position, as shown in
Figure 2-5,
then the key-lock is
locked and the front flap on the drive tray cannot be opened.
Summary of Contents for Galaxy Raid GALHDX-7370S-8U4D
Page 43: ...Chapter 2 Installation 2 15...


