


MOUNTING INSTRUCTIONS
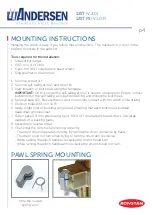
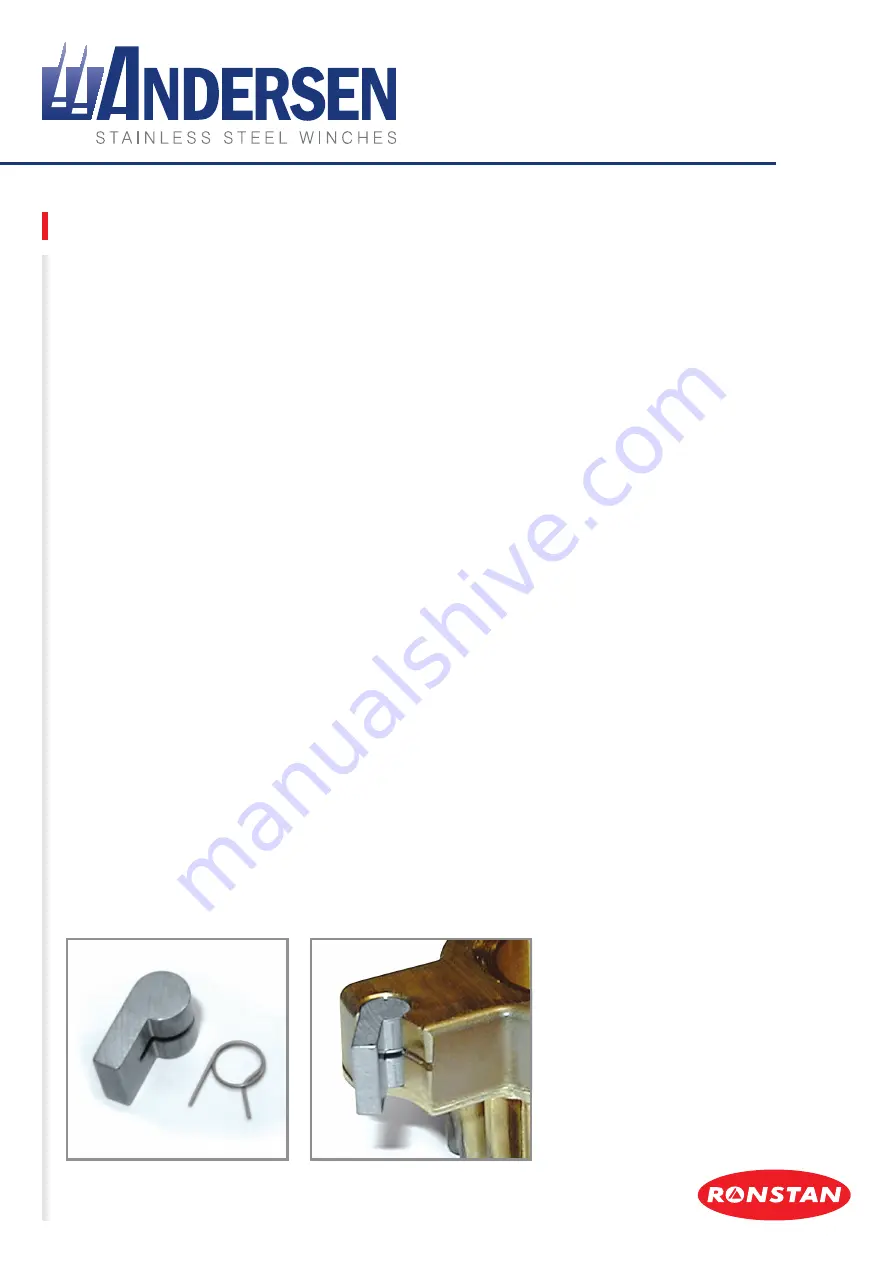
PAWL SPRING MOUNTING
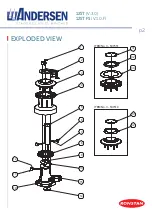
Installing the winch is easy, if you follow these instructions. The numbers in ( ) refer to the
position numbers in the parts list.
Tools required for the installation:
• Screwdriver (large)
• Ø6,5 mm. (1/4”) drill
• 6 pcs. M6 (1/4”) countersunk head screws
• Ring spanner to match nuts
1. Remove screws (1).
2. Remove self-tailing arm (2) and drum (4).
3. Mark location of bolt holes using the template.
IMPORTANT:
On this model the self-tailing arm (2) is fixed in one position. Ensure correct
positioning of the self-tailing arm, before marking and drilling the bolt holes.
4. Remove base (13). Be sure that no dust comes into contact with the winch while drilling.
5. Drill bolt holes Ø6,5mm (1/4”).
6. Apply a light coat of bedding compound, ensuring that each bolt hole is bedded.
Keep drain grooves clear.
7. Fasten base (13) into place using 6 pcs. M6 (1/4”) countersunk head screws. Use large
washers or a backing plate.
8. Assemble in reverse order.
9. Check that the winch is functioning correctly:
- The drum should operate smoothly, by turning the drum clockwise by hand.
- The drum must not turn when trying to turn the drum anti clockwise.
- While turning the winch handle clockwise the drum should turn.
- While turning the winch handle anti clockwise the drum should not turn.
Note the curved
spring “arm”
p4
12ST
(V.3.0)
12ST FS
(V.1.0.F)