Page
22
of
26
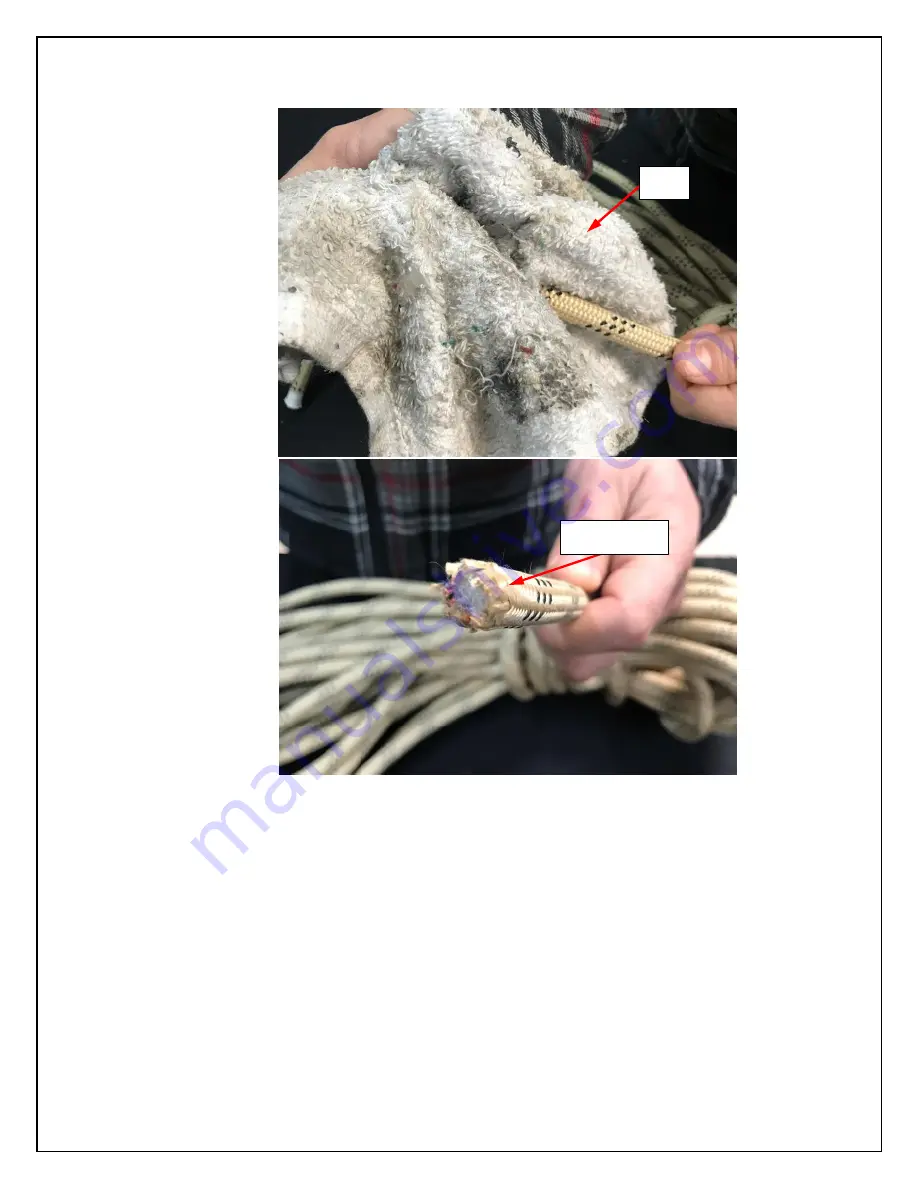
Step 8) Reapply the Perfect Burn Tip to rope end and hold for 10
– 20
sec. This time capturing the entire outer sheath.
Rag
Initial Pass
Page 1: ...Page 1 of 26 Ronin Perfect Burn Tip Kit Instruction Manual Original Instructions...
Page 2: ...ay results in injury or fire You are cautioned that any changes or modifications not expressly approved by the party responsible for compliance could void the user s authority to operate the equipment...
Page 3: ...cordless soldering iron Cat No 2488 20 have lithium ion battery used to power the product and contains Perchlorate The following statement is required by the state of California USA Perchlorate Mater...
Page 4: ...afety 5 Use and Handling 5 AC Power Cord Use 6 Moisture Condensation 6 Product Overview 7 Soldering Iron Compatibility 8 Charging the Battery 9 Perfect Burn Tip Installation 10 Kernmantle Rope Prep 13...
Page 5: ...to touch or battery becomes swollen bloated Do not handle damaged or leaking lithium ion batteries Do not allow the battery to come into contact with fire or subject to extreme temperatures such as di...
Page 6: ...r support Do not modify the cord Do not use a power cord other than the supplied AC power cord Do not touch the AC power cord with wet hands Protect the AC power cord from being walked on or pinched p...
Page 7: ...Page 7 of 26 Product Overview Perfect Burn Kit 1 Perfect Burn Adapter 2 Rope Buner Tip 2 1...
Page 8: ...ture of the soldering may not properly heat the tip to required melt temp There are many soldering irons out in the market place that are adaptable to the Perfect Burn Kit The general outline for whic...
Page 9: ...ver discharge the Lithium Ion battery Do not store the Battery connected on the device Remove the battery from the device when storing the unit Disconnect a depleted battery do not leave a dead batter...
Page 10: ...age 10 of 26 Operating Instructions Perfect Burn Tip Installation Step 1 Remove the threaded collar on the soldering iron tip Step 2 Remove the soldering iron sleeve and tip Threaded Collar Tip Sleeve...
Page 11: ...ll Perfect Burn Soldering Iron Adapter P N 200002 over the soldering iron heating filament Step 4 Install soldering iron sleeve over Perfect Burn Soldering Iron Adapter P N 200002 Soldering Iron Adapt...
Page 12: ...hreaded collar over sleeve and secure in place Step 6 Install Perfect Burn Rope Burner End P N 200001 onto Perfect Burn Soldering Iron Adapter P N 200002 by screwing it completely on Threaded Collar R...
Page 13: ...location or different type of switch Additional some solder irons do not have temperature control If your solder iron does not have temperature control i e the Milwaukee cordless solder iron Cat No 2...
Page 14: ...rfect Burn Kit P N 2000 1 is heating up prepare rope end for coning Prepare rope end for coning by applying a piece of tape around the rope end Step 3 Make a clean fresh cut to ensure the rope fibers...
Page 15: ...n aside ensuring the tip does not come into contact with anything and take a rag and wipe pull over the rope This should pull the tape off If the tape does not come off during this first wipe then man...
Page 16: ...e ensuring the tip does not come into contact with anything and take a rag and wipe pull over the rope shaping the rope tip into a cone WARNING Once the soldering iron is turned on the tip will be hot...
Page 17: ...dering iron is turned off the tip will be hot Ensure tip does not come into contact with skin or other objects as severe burns can occur or a fire to break out Some solder irons have temperature sensi...
Page 18: ...ocation or different type of switch Additional some solder irons do not have temperature control If your solder iron does not have temperature control i e the Milwaukee cordless soldering iron Cat No...
Page 19: ...erfect Burn Kit P N 2000 1 is heating up prepare rope end for coning Prepare rope end for coning by Appling a piece of tape around the rope end Step 3 Make a clean fresh cut to ensure the rope fibers...
Page 20: ...6 Step 4 Remove the excess tape left on the end of the rope Step5 The technora sheath can be a little waxy and so you can wipe the outer sheath fibers together with your hand to help initially form th...
Page 21: ...step going to take a rag and wipe the outer sheath into the melted inner core Step 7 Set the soldering iron aside ensuring the tip does not come into contact with anything and take a rag and wipe pull...
Page 22: ...Page 22 of 26 Step 8 Reapply the Perfect Burn Tip to rope end and hold for 10 20 sec This time capturing the entire outer sheath Rag Initial Pass...
Page 23: ...ping the rope tip into a cone WARNING Once the soldering iron is turned on the tip will be hot Ensure tip does not come into contact with skin or other objects as severe burns can occur or a fire to b...
Page 24: ...off the tip will be hot Ensure tip does not come into contact with skin or other objects as severe burns can occur or a fire to break out Some solder irons have temperature sensing tips i e the Milwau...
Page 25: ...hangeyourelevation com Ronin Warranty Ronin products and accessories are guaranteed against manufacturing defects 90 days from the original date of purchase Ronin s sole obligation in the event of suc...
Page 26: ...se Authorization number from Ronin Customer Support by clicking on the Contact Us link at the bottom left of the main www changeyourelevation com contact 2 Package products along with a copy of the RM...