Cup
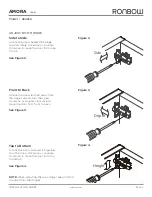
See Figure 14
REINSTALL CENTER DRAWER
See Figure 14
When the plumbing is finished, clip the
hinges back on. There are small hooks on
the bottom of the hinge (see below, left)
that catch on the plate attached to the
vanity. Align these, then press down on
the back of the hinges until you hear
a click.
Step1:
170405
ronbow.com
INSTALLATION SHEET
7
AMORA
Vanity
Model
:
054030
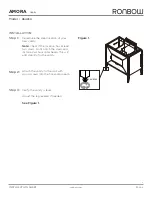
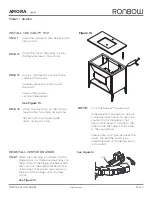
Figure 13.
Step 2:
Step 4:
Step 3:
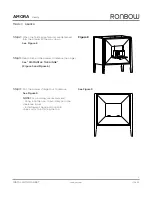
Install the sink to the vanity top per
the manufacturer’s instructions.
Follow the directions on the silicone
tube to allow for ample drying time.
Refrain from moving/using the
vanity during this time.
Apply a thin bead of silicone to the
surface of the vanity.
Carefully place the vanity top on
the vanity.
Clean off any excess
silicone immediately.
Clean the surface of the cabinet with a
damp cloth.
Step 1:
INSTALL THE VANITY TOP
See Figure 13.
NOTE:
For WideAppeal™ Countertops:
WideAppeal™ Countertops include
a wooden inner frame. To prep the
countertop for installation, first
apply a thin bead of silicone to the
inner frame, then attach the frame
to the countertop.
Please note: a 1/2" gap between the
vanity top and the vanity is an
intentional part of the design and is
not a defect.

