background image

23

E

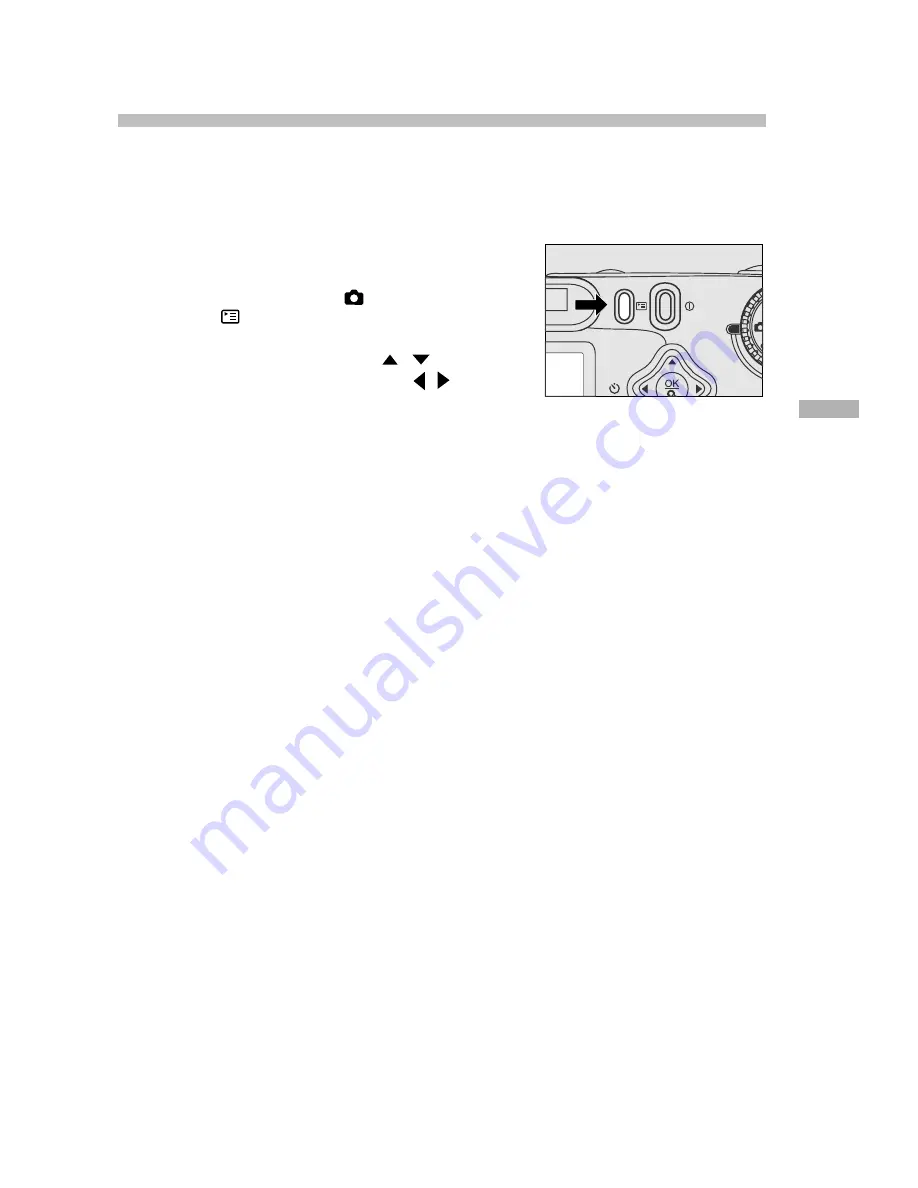
Taking pictures manually

You can manually adjust conditions such as white balance, EV compensation and
sharpness when taking pictures. For white balance, EV compensation and sharp-
ness information, refer to WHITE BALANCE, EV COMPENSATION or SHARPNESS
in Record menu.

To take pictures manually:
1. Turn the camera on.
2. Turn the mode dial to the 

 mode.

3. Press the 

 button.

4. Move to WHITE BALANCE, EV COMPENSA-

TION or SHARPNESS with the 

 button.

5. Change the settings by using the  /    but-

ton and then press the 

OK

 button.

6. Compose the picture.
7. Press the shutter button.

Summary of Contents for d210

Page 1: ...cations However there is no guarantee that interference will not occur in a particular installation If this equipment does cause harmful interference to radio or television reception which can be determined by turning the equipment off and on the user is encouraged to try to correct the interference by one or more of the following measures Reorient or relocate the receiving antenna Increase the se...

Page 2: ...s Incorporated Other names and products may be trademarks or registered trademarks of their respective owners READ THIS FIRST Please start by reading the important messages below first 1 The bundled driver software design specifications and user s manual that packaged with the camera are subject to change without notice 2 The accessories that come with the camera may vary between regions 3 For dri...

Page 3: ...or an electrical shock If the camera has been dropped or if the camera case has been damaged turn the camera off and then disconnect the power source batteries or AC power adapter If you are using the AC power adapter unplug the adapter from the AC power outlet after you have disconnected the camera Then contact your dealer or your local authorized service facility Do not continue to use the cam e...

Page 4: ...so may damage the cords or cables and cause a fire or an electrical shock When leaving the camera unused for long periods such as during a vacation always unplug the camera from the power source batteries or AC power adapter for safety if you are using the AC power adapter unplug the adapter from the AC power outlet after you have disconnected the camera Failure to do so could result in a fire Do ...

Page 5: ... monitor 18 Using the normal mode 18 Using the digital zoom 19 Using the self timer 20 Using the macro mode 21 Using the flash 21 Taking pictures manually 23 PLAYBACK MODE 24 Viewing images 24 Zoom Playback 25 Displaying thumbnail images 26 Slideshow display 26 Deleting images 27 MOVIE MODE 28 Recording video clips 28 Viewing video clips 29 TRANSFERRING RECORDED IMAGES TO YOUR COMPUTER 30 Step 1 I...

Page 6: ...EV COMPENSATION 38 SHARPNESS 38 EXIT 38 Playback menu 39 LCD BRIGHTNESS 39 SLIDE SHOW 39 COPY TO CARD 39 DELETE ALL 39 DPOF 40 EXIT 40 Movie menu 41 LCD BRIGHTNESS 41 EXIT 41 Setup menu 42 DATE TIME 42 LANGUAGE 42 SOUND 42 FORMAT MEDIA 42 VIDEO MODE 43 AUTO POWER OFF 43 RESET TO DEFAULT 44 CONNECTING THE CAMERA TO OTHER DEVICES 45 CAMERA SPECIFICATIONS 46 ...

Page 7: ...In addition to still images you can record short videos using the movie function Images you have taken can be downloaded to your computer using the USB cable USB driver required for Win98 and Mac OS 8 6 You can enhance and retouch your images on your computer by using the provided editing software or image editing software you may already own You may share your images with your friends via e mail ...

Page 8: ... view 1 Status LCD 2 Shutter button 3 Viewfinder window 4 Lens cover 5 Focus switch 6 Flash button 7 Quality Resolution button 1 2 3 4 8 9 5 6 7 10 13 11 12 8 Flash 9 Lens 10 Strap eyelet 11 DC IN jack 12 USB connector 13 Self timer lamp ...

Page 9: ...er 3 LCD monitor 4 LCD button 5 Menu button 6 Power button 7 Mode dial 8 Battery SD card cover 9 VIDEO OUT jack 10 Tripod socket 1 Arrow button up 2 Arrow button left Self timer button 3 OKOK button Digital zoom button 4 Arrow button right 5 Arrow button down Delete button ...

Page 10: ...scription Activity Sound LED Indicator Solid red The camera is powering up No LED Indicator Blinking red Camera system error Yes 3 LED Indicator Solid orange Charging the flash No LED Indicator Blinking orange Image is being recorded to No the memory card LED Indicator Blinking orange USB communication transfer in progress No LED Indicator Solid green The camera is ready to record Yes 1 images or ...

Page 11: ...tery power Medium battery power Low battery power Virtually No battery power Digital indicator This display varies according to the camera mode setting Displays the estimated shots that you can take in Record mode Displays the estimated seconds that you can record for the video clip in Movie mode Displays the current number of the recorded image in Playback mode Displays PC when connecting the cam...

Page 12: ...nformation The displayed indicators when recording still images The displayed indicators when recording video clips The displayed indicators when playing images back The displayed indicators when playing video clips back ...

Page 13: ...s or corrosion Never use manganese batteries Never use different types of batteries together or mix old and new batteries Avoid using batteries in extremely cold environments as low temperatures can shorten the battery life and reduce camera performance Using the AC power adapter optional accessory 1 Make sure the camera is off 2 Open the DC IN jack cover and connect one end of the AC power adapte...

Page 14: ...eck the orientation 4 Close the battery SD card cover To remove the SD memory card make sure the camera is off Open the battery SD card cover Press lightly on the edge of the memory card and it will eject To prevent valuable data from being accidentally erased from an SD card you can slide the write protect tab on the side of the SD memory card to LOCK To save edit or erase data on an SD memory ca...

Page 15: ...a is turned off Setting the date and time LANGUAGE Italiano The Date Time screen will be presented if when Camera is turned on for the first time after setting the language Camera is turned on after removing or replacing the batteries When the date and time setting screen appears follow these steps to set the correct date and time You may skip this procedure by pressing the OK button repeatedly 1 ...

Page 16: ...l in a report or on a web page To change image resolution and quality settings press the button on top of the camera repeatedly to select the settings that you prefer As you press this button watch the Status LCD Resolution Quality The camera provides 2 resolution modes and 3 quality modes which can be changed cyclically by pressing the button The cyclical order is repeat Resolution quality indica...

Page 17: ...e image LCD for macro shots however to avoid parallax effects The LCD image display must be used when Digital Zoom is used Using the viewfinder 1 Open the lens cover 2 Turn the mode dial to the mode 3 Turn the camera on by pressing the button 4 Compose your shot in the viewfinder 5 Press the shutter button down halfway the camera adjusts the exposure and the focus then press it the rest of the way...

Page 18: ...ded period of time will decrease the number of images you can take To increase battery longevity turn the LCD monitor off and use the viewfinder instead Always use the image LCD for macro shots The LCD monitor must be on when Digital Zoom is to be used Normal mode is used to take images where the distance to the subject is 70 cm or more Select this mode for general shooting including por traits an...

Page 19: ... and power on the camera 2 Turn the LCD monitor on by pressing the button 3 Press the OK button to activate 2X digital zoom function The 2X icon appears on the LCD monitor To cancel the digital zoom function press the OK button 4 Press the shutter button to capture a zoomed image You can only set the digital zoom at the resolution of 1600x1200 pixels digital zoom is not available at the resolution...

Page 20: ...ages 1 Secure the camera to a tripod or place it on a stable surface 2 Open the lens cover turn mode dial to the mode and power on the camera 3 Press the button The icon appears on the LCD monitor and status LCD 4 Compose the picture 5 Press the shutter button The self timer function is activated 6 After ten seconds the camera takes an image To cancel self timer photography at any time press the s...

Page 21: ...f center parallax phenomenon There is not a distinct point subject range at which normal mode is favored over macro mode take in image an both optical modes and compare the results After a macro shot is taken DO NOT FORGET to reset the lens to the normal position Using the flash The flash is designed to function automatically when lighting conditions warrant the use of flash You can take an image ...

Page 22: ...ows Also known as forced flash The flash will not fire Select this mode when taking images in a place where flash photography is prohibited or when the distance to the subject is beyond the effective range of the flash The flash fires and the shutter speed is reduced so that the subject will be exposed correctly while taking a image with dark night background The camera has five flash modes Automa...

Page 23: ...harp ness information refer to WHITE BALANCE EV COMPENSATION or SHARPNESS in Record menu To take pictures manually 1 Turn the camera on 2 Turn the mode dial to the mode 3 Press the button 4 Move to WHITE BALANCE EV COMPENSA TION or SHARPNESS with the button 5 Change the settings by using the but ton and then press the OK button 6 Compose the picture 7 Press the shutter button ...

Page 24: ...1 Turn the mode dial to the mode and power on the camera 2 Select the image that you want to view by using the button To view the previous image press the button To view the next image press the button If there is no image stored in the internal memory or on the memory card NO IMAGES message will appear on the LCD monitor You can also view your images on the TV screen Connect one end of the video ...

Page 25: ...s the image to 2X Pressing it again magnifies the image to 4X When enlarging the recorded image you will see a red frame with a red box inside The red frame indicates the entire image while the red box shows the enlarged area 4 To view the different portion of the enlarged image press the button 5 To return to the regular display from 4X en larged status press the OK button twice Pressing the OK b...

Page 26: ...age and OSD on screen display Thumbnail image display Slideshow display The slideshow function enables you to playback your images back automatically in sequen tial order as a slide show This is a very useful and entertaining feature for reviewing re corded images and for presentations 1 Turn the mode dial to the mode and power on the camera 2 Press the button and move to SLIDE SHOW by using the b...

Page 27: ...the OK button The next image video clip appears If you want to cancel the deletion select NO 3 Continue the deletion if necessary If all ima ges are deleted NO IMAGES pops up To exit this function turn the mode dial to any other mode To delete the images or video clips stored in the internal memory remember not to insert the memory card in the camera Otherwise you will delete the images or video c...

Page 28: ...he recordable movie time displays on the status LCD and the LCD monitor 2 You can start recording a video clip by press ing the shutter button The elapsed time displays on the LCD monitor while recording a video clip To stop recording press the shutter button again In movie mode resolution quality macro self timer cannot be set or activated In movie mode the flash mode is automatically set to OFF ...

Page 29: ... back the video clip will change the status as follows Movie playback starts Movie playback pause The first screen of the movie Shutter button Shutter button Arrow down button or time out Arrow down button The zoom function cannot be activated while playing the video clip back To play the video clip back on the computer we recommend that you use the Quick Time Player This software is free of charg...

Page 30: ...your family or friends via e mail or post them on the Web Before doing those things you need to connect the camera to your computer by using the USB cable and then transfer the images video clips To transfer images video clips from the camera to your computer follow the steps below Step 1 Installing the USB driver Step 2 Connecting the camera to your computer Step 3 Downloading images video clips ...

Page 31: ...er will automatically recognize the camera and load its own USB drivers 1 Insert the CD ROM packaged with the camera into the CD ROM drive 2 Select and double click Digital Camera Driver Installer 3 Select Install Location and click Install 4 Follow the on screen instructions to complete the installation and restart your computer Step 2 Connecting the camera to your computer 1 Connect one end of t...

Page 32: ... the folder s Select the images that you want then choose copy from the Edit menu Open the destination location and choose Paste from the Edit menu You may also drag and drop image files from the camera to a desired location For computers running Mac OS Open the untitled disk window and the hard disk or the destination location Drag and drop from the camera disk to the desired destination It is re...

Page 33: ... amazing program To install MGI PhotoSuite 1 Insert the CD ROM packaged with the ca mera into the CD ROM drive The welcome screen appears 2 Click Install MGI PhotoSuite Follow the on screen instructions to complete the installation To use MGI PhotoSuite to edit and retouch your recorded images please refer to the on line help of this software as a guide For Windows 2000 XP users make sure to insta...

Page 34: ...er face will let even a novice get great results in minutes To install MGI PhotoVista 1 Insert the CD ROM packaged with the ca mera into the CD ROM drive The welcome screen appears 2 Click Install MGI PhotoVista Follow the on screen instructions to complete the installation To use MGI PhotoVista to create spectacular 3600 panoramic images please refer to the on line help of this software as a guid...

Page 35: ... sections of interest 1 Insert the CD ROM that came with the ca mera into the CD ROM drive The welcome screen appears 2 Click Install Acrobat Reader Follow the on screen instructions to complete the installation For Mac users 1 Insert the CD ROM that came with the ca mera into the CD ROM drive 2 Select and double click Acrobat Reader 3 Select and double click the language that you want 4 Double cl...

Page 36: ...ader installed on your computer 1 Insert the CD ROM that came with the ca mera into the CD ROM drive The welcome screen appears 2 Click Install User s Manual Follow the on screen instructions to complete the installation For Mac users 1 Insert the CD ROM packaged with the ca mera into the CD ROM drive 2 Select and double click Manual 3 Select and double click the language that you want 4 Drag and ...

Page 37: ...OM You can take digital zoom shots by activating the digital zoom function Use the button to enable this option if necessary And then press the OK button WHITE BALANCE Your camera adjusts the white balance of each scene automatically However the images that your camera captures will appear different under different light ing conditions sun shade fluorescent tungsten lights Unlike your eyes which c...

Page 38: ...g Very bright scenes such as snowfields and highly reflective subjects Shots made up predominantly of sky Negative Compensation Spot lighted subjects particularly against dark backgrounds Imaging of printed text white characters on black paper Scenes with low reflectivity such as shots of green or dark foliage SHARPNESS This option sets the level of image sharpness Use the button to select the sha...

Page 39: ...s the OK button 2 sec 4 sec 6 sec 8 sec 10 sec COPY TO CARD This feature allows you to copy your images from the camera s internal memory to an SD memory card Of course you can only do this if you have an SD memory card installed and some images in internal memory Use the button to select YES if necessary and then press the OK button DELETE ALL This option allows you to delete all images video cli...

Page 40: ...age quantity from 1 9 PRINT SIZE Select your preferred image size standard 3x5 4x6 5x7 8x10 PRINT INDEX allows you to print the images in index format PRINT ENABLE If you select ENABLE the camera will save the DPOF settings If DISABLE is selected all the settings will be erased DPOF shortcut You can use the shutter button to quickly establish DPOF settings as follows 1 Turn the mode dial to the mo...

Page 41: ...u wish to set by using the button LCD BRIGHTNESS This option adjusts the brightness of the LCD monitor Refer to LCD BRIGHTNESS in Record menu for detailed information EXIT This option exits the movie menu and then returns to the mode Press the OK button to exit You can also press the button again to exit ...

Page 42: ...isplayed on the LCD monitor Press the OK button to enter the LAN GUAGE sub menu And then select the pre ferred language using the button and press the OK button ENGLISH Français Deutsch Español Italiano SOUND The camera produces a sound beep each time you press the camera button if this function is enabled Select ON or OFF by using the button and then press the OK button FORMAT MEDIA This utility ...

Page 43: ...WER OFF If there is no camera activity no buttons are pressed for a defined period of time while the camera is powered on the camera will switch to an idle mode and eventually turn itself off to conserve power Inactivity period Inactivity period Camera status batteries AC power adapter 90 seconds 90 seconds stay idle 3 minutes 30 minutes shut off If the camera is idle re activate the camera by pre...

Page 44: ...n press the OK button The following table shows the default setting for each item Item Description Image resolution 1600x1200 pixels Image quality Fine Flash Auto Quick view Off White balance Auto EV compensation 0 0 Slide show delay 4 seconds Auto power off Battery 3 minutes AC power adapter 30 minutes Sound On Digital Zoom Off ...

Page 45: ...45 E USB Cable Computer Computer TV PCMCIA Adapter SD Card Reader SD Card Reader VIDEO Cable SD Memory Card Printer CONNECTING THE CAMERA TO OTHER DEVICES ...

Page 46: ...ed focal length 5 6mm Focal range Standard 0 7m infinity Macro 0 3m 0 8m F number 2 8 5 6 Focus Focus range 30cm to infinity Exposure compensation Auto Manual 1 8 1 8EV 0 3EV step White balance Auto Sun Shade Fluorescent Tungsten Compressed format JPEG Motion JPEG for video clip Standards JPEG EXIF 2 1 DPOF DCF Motion JPEG Interface DC IN jack USB connector VIDEO OUT jack NTSC or PAL Operating env...

Reviews: