


Using the JM-8’s MIDI functions
100
r
VIMA JM-8
●
PROGRAM CHANGE—
Program change and bank select
(CC00, CC32) messages. These messages are used to select
sounds and Drum Sets. “Bank Select” messages are control
change messages that allow you to select sound banks (up
to 128).
●
PITCH BENDER—
Pitch Bend messages.
●
MODUL—
Modulation messages (CC01).
●
VOLUME—
Volume messages (CC07).
●
PANPOT—
Pan(pot) messages (CC10).
●
EXPRESSION—
Expression messages (CC11).
●
HOLD—
Hold (Sustain, Damper) messages (CC64).
●
SOSTENUTO—
Sostenuto messages (CC66).
●
SOFT—
Soft messages (CC67).
●
REVERB—
Reverb Send messages (CC91).
●
CHORUS—
Chorus Send messages (CC93).
●
CAF—
Channel aftertouch.
●
RPN—
Registered parameter number (CC100/101).
●
NRPN—
Non-registered parameter number (CC98/99).
●
SysEx—
SysEx messages (system exclusive).
(3) Press the
[CLOSE]
display button to close the “RX
EVENTS” window.
Leaving the ‘MIDI EDIT’ page
(1) Press the [EXIT] button repeatedly until it stops
flashing to return to the main page.
Note:
If you want to use these settings again at a later
stage, consider saving them to a MIDI Set (page 103).
MIDI parameters for the SONG
parts
The 16 SONG parts are normally used to play back the
SMF songs you select (or record using the internal SMF
16-track sequencer). You can, however, also use them
as multitimbral parts controlled by your computer or an
external sequencer.
Conversely, they can transmit the MIDI data of the SMF
song you are playing back, allowing you to record them
on your computer. However, this MIDI transmission is
only possible via the USB MIDI port (see “Connecting
your computer” on page 102).
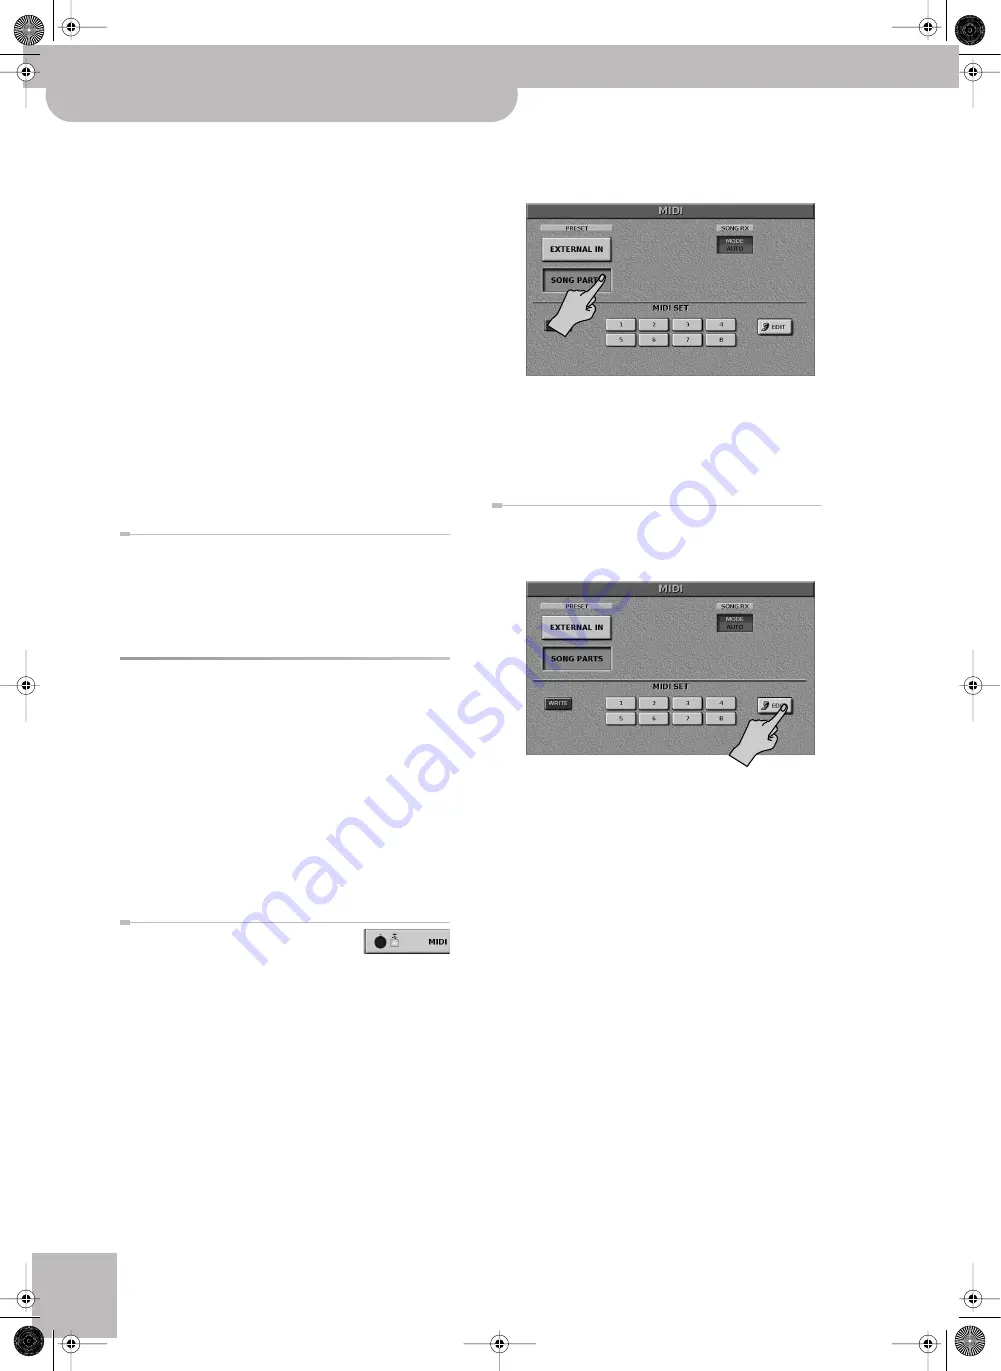
Activating the SONG section
Here is how to enable the MIDI trans-
mission and reception of the JM-8’s SONG parts. Note
that pressing the
[SONG¥PARTS]
display button will
deactivate the EXTERNAL IN parts. Only one of these two
sections can receive (and/or transmit) MIDI data.
(1) Press the [EXIT] button repeatedly until it stops
flashing to return to the main page (if necessary).
(2) Press
[MENU]
‰
[ADVANCED]
‰
[MIDI]
.
(3) Press the PRESET
[SONG¥PARTS]
display button to
load the default settings to activate the SONG sec-
tion.
The JM-8 now receives and transmits MIDI messages
for the Song parts via its USB MIDI port.
Note:
This also switches off MIDI reception for the JM-8’s
EXTERNAL IN parts and cancels any MIDI setting you have
made for the EXTERNAL IN parts.
Setting the Song parts’ MIDI parameters starting
from ‘SONG PARTS’
(4) Press the
[EDIT]
display button.
(5) Use the PART
[ø][
˚
]
display buttons in the lower
right corner to select the part you want to edit (1~
16).
Remember to always select the part you want to edit
before changing the available parameters.
(6) Press the display field of the parameter you wish to
edit and set the desired value with the dial.
Note:
Press the
[INIT¥VALUE]
display button to recall the
default setting for the parameter that is currently selected
(whose display “lights”).
■
TX ON, RX ON
These two display buttons allow you to specify
whether (lights) or not (dark) the part whose name
appears in the upper left corner should transmit (TX)
or receive (RX) MIDI data.
■
MIDI TX section
CHANNEL (1~16):
Allows you to assign a MIDI trans-
mit channel to the selected part.
Note:
Assigning the same channel to two or more parts is
usually not a very good idea.
JM-8_OM_GB.book Page 100 Wednesday, July 29, 2009 4:43 PM
Summary of Contents for VIMA JM-8
Page 1: ...r Owner s Manual JM 8_OM_GB book Page 1 Wednesday July 29 2009 4 43 PM ...
Page 174: ...174 rVIMA JM 8 JM 8_OM_GB book Page 174 Wednesday July 29 2009 4 43 PM ...
Page 175: ...For EU Countries For China For China JM 8_OM_GB book Page 175 Wednesday July 29 2009 4 43 PM ...
Page 176: ...R 602 00 0323 01 RES 736 09 JM 8 OM E JM 8 Cov 3 4 GB Page 176 Thursday July 30 2009 10 30 AM ...


