


5
Using the JUPITER-8 Model Expansion
User License
The Model Expansions are linked to the user license of the user who
downloaded them.
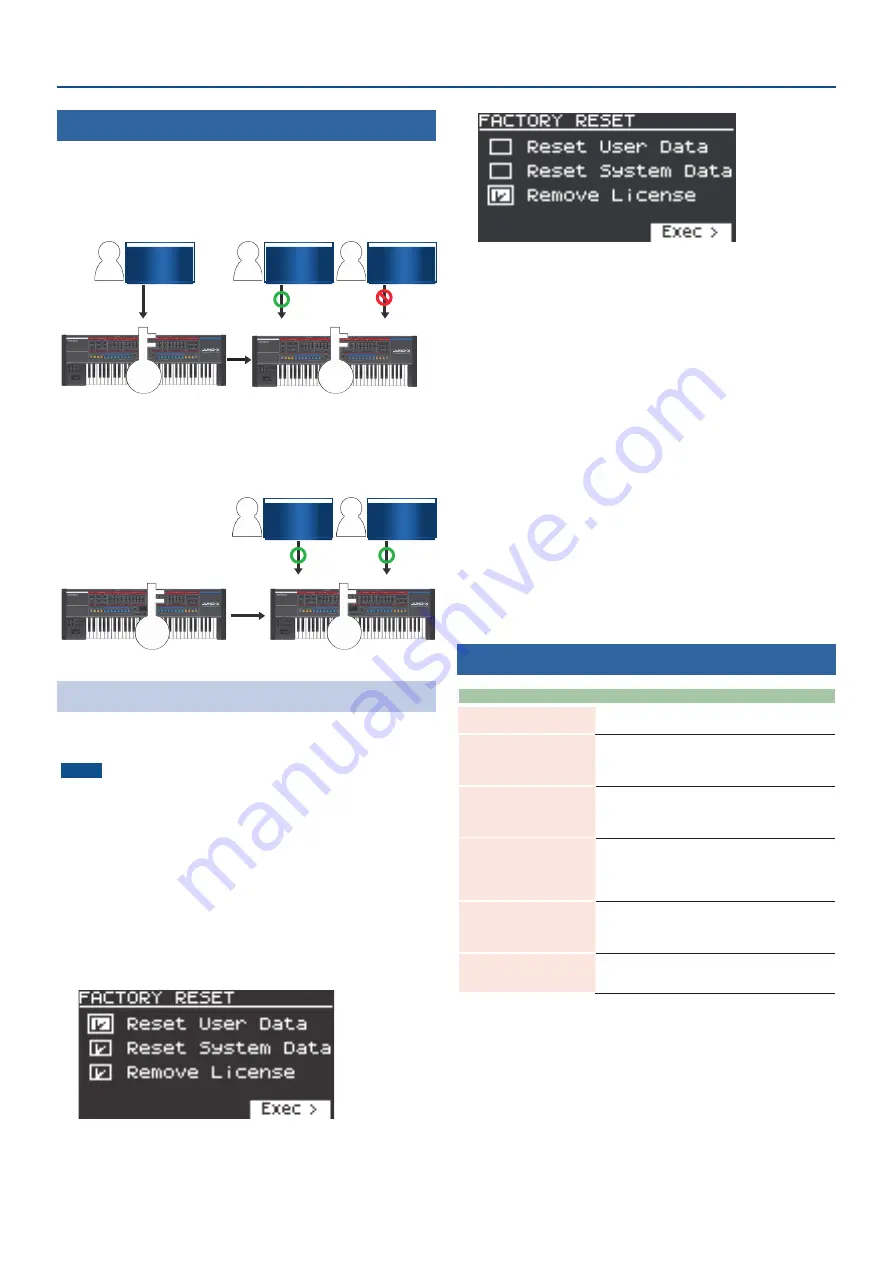
You cannot import or install Model Expansions with different user
licenses on a single JUNO-X.
User A
User B
A
B
User A
A
A
When you want to import or install a JUPITER-8 Model Expansion
that has a different user license from the Model Expansions already
registered in the JUNO-X, follow the steps to initialize the user license.
Initialize
User A
User B
A
B
A
Initializing Your User License
By initializing the user license, you can install a JUPITER-8 Model
Expansion that you’ve downloaded with a new user license.
NOTE
¹
This deletes all Model Expansions that are already installed.
¹
Never turn off the power or remove the USB flash drive while the
“Executing...” message is shown.
1 .
Press the [MENU] (WRITE) button on the JUNO-X.
2 .
Use the [
Ç
SELECT
É
] knob to select “UTILITY”, and
press the [ENTER] (INIT) button.
3 .
Use the [
Ç
SELECT
É
] knob to select “FACTORY
RESET”, and then press the [ENTER] (INIT) button.
The FACTORY RESET screen appears.
4 .
Select the item using the [
Ç
SELECT
É
] knob, and
using the [ENTER] (INIT) button to select or deselect
the items, select only the “Remove License” check
box.
* If you have not imported or installed a Sound Pack, Wave Expansion
or Model Expansion, the “Remove License” check box is not shown.
* If you select the other check boxes besides the “Remove License”
check box and execute this operation, this initializes all of the
corresponding data. See “Returning to the Factory Settings (Factory
Reset)” in the JUNO-X Startup Guide for details.
5 .
Press the [
Ë
] button.
A confirmation message appears.
If you decide to cancel, press the [EXIT] button.
6 .
To execute, use the [- VALUE +] knob to select “OK”,
and then press the [ENTER] (INIT) button.
“Completed. Turn off power” is shown on the display.
7 .
Turn the JUNO-X off.
This initializes the user license.
8 .
Follow the steps in “Installing the JUPITER-8 Model
Expansion” (p. 4) to install the JUPITER-8 Model
Expansion on the JUNO-X.
Error Messages
Indication
Action
USB Memory Not Ready!
The USB flash drive cannot be recognized. Make sure that
your USB flash drive is correctly inserted into the JUNO-X.
Expansion File Not Found!
This is shown when there is no Expansion file in the USB
flash drive.
Make sure that the file has been correctly saved and that
the file extension is “.exz”.
Incorrect File!
This is shown when the selected file is not supported by
the JUNO-X, or when the file is corrupted.
Check which instruments support the original download,
and try downloading again.
Incorrect License! Please
Remove License
This is shown when the JUPITER-8 Model Expansion is
currently linked to a different user license.
To install, provide a file that uses the same user license
as the Expansion already installed, or initialize the user
license.
Expansion Memory Full!
This is shown when there is not enough free memory to
install an Expansion.
In this case, you can uninstall Model Expansions that are
already installed to free up memory.
It has already been installed
This is shown when the JUPITER-8 Model Expansion has
already been installed.
You don’t need to reinstall.