2
Roland GS-24 Vinyl Cutter Quick Reference Guide
Part 1: Adobe Illustrator
i. Open Adobe Illustrator CC
ii. Select an image that has 2 drastically different
tones, light and dark.
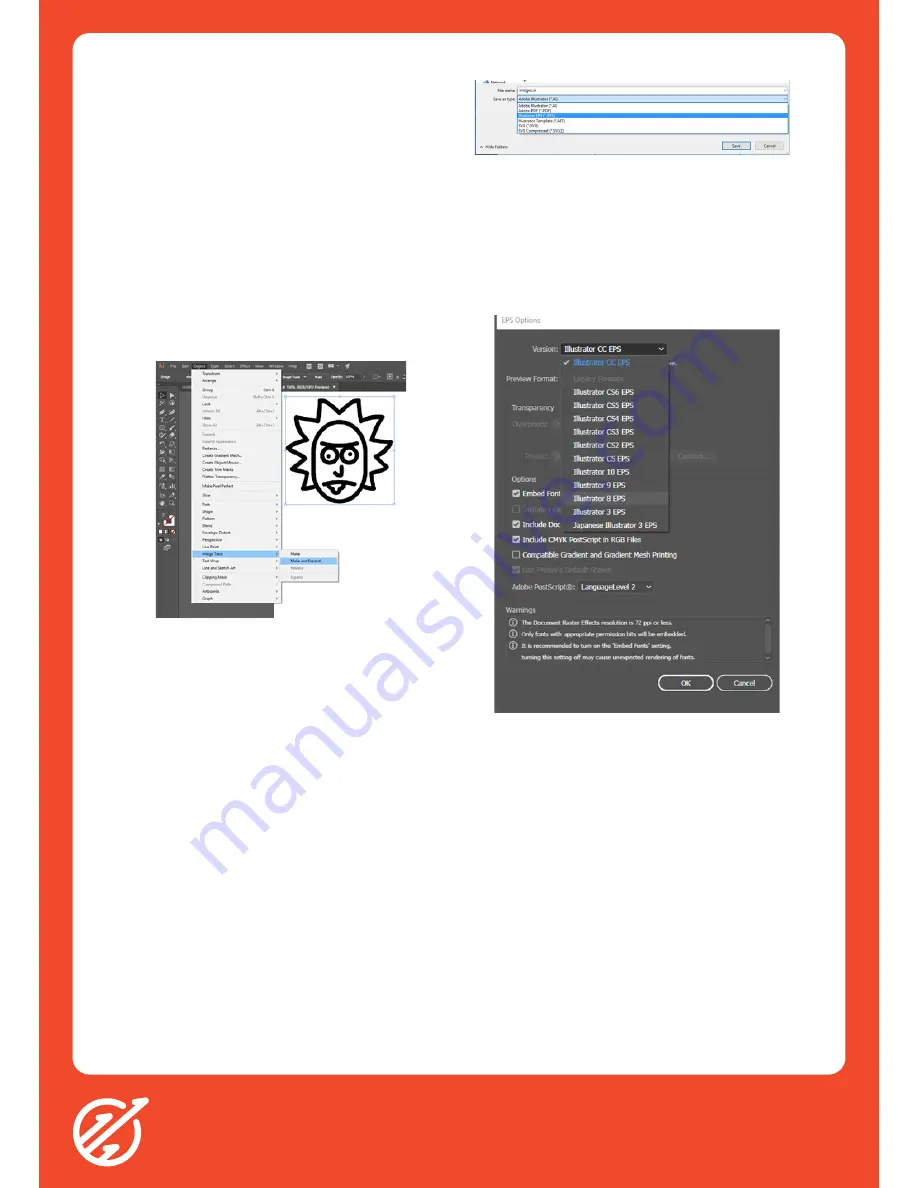
iii. Click Object > Image Trace > Make and Expand
This will gives you vector lines, which the vinyl cutter
will be able to read. To check all the available cut
lines on your image, click ‘Ctrl + Y’ to reveal all
vector lines.
iv. The lines created are what will be read by the
Vinyl Cutter and will be cut. If you would like to
remove some lines/curves, click the ‘Ctrl + Shift
+ G’ command to ungroup the lines.
v. Select individual lines and delete them.
Figure 1: The drop down menu which contains the ‘Make and Expand’
Command
Entering Text
i. Type out your text in illustrator using the type
tool
ii. Select the arrow (Selection Tool) in the top left of
the left hand menu.
iii. Click on your text
iv. Click Object > Expand
v. Your text is now a vector which can be read by
the Vinyl Cutter.
Saving your Design
i. Click the ‘File’ button in the Menu Bar and click
‘Save As’. Or simply click ‘Ctrl + Shift + S’
ii. Under ‘Save as type:’ select the ’Illustrator EPS
(*.EPS)’ option. Also rename your file to whatever
you like, and click ‘Save’.
Figure 2: Drop Down Menu with the Illustrator EPS (*.EPS) Option
Highlighted
iii. A new window will option named ‘Illustrator
Options’. Under the Version section, select the
‘Illustrator 8’ Option.
iv. Click the ‘OK’ button on the bottom right next to
‘Cancel’
Figure 3: Illustrator Options with the ‘Illustrator 8 EPS’ Option
Highlighted
Tips for a Successful Design
i. The larger the single mass of vinyl, the easier it
will be to weed and adhere
ii. The more detailed and smaller the cuts are, the
more likely it is to move and fall off
iii. When Image Tracing, larger sized files will pick
up more details, and thus clarity
iv. The more cut lines there are, the longer your
weeding process will take (The Unleash Space
record is close to an hour!)


