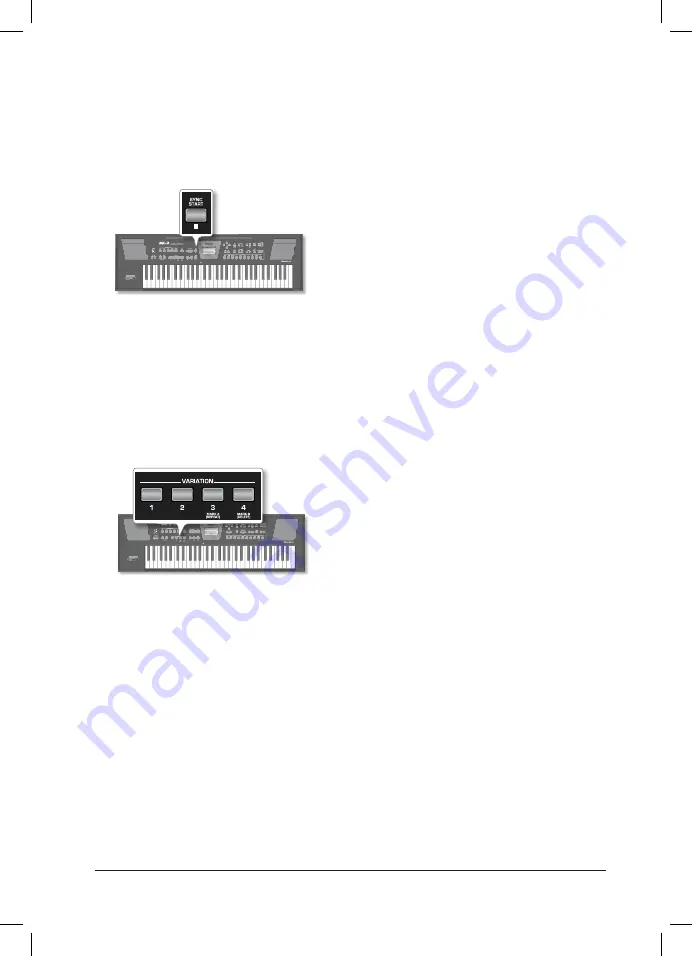
background image

QUICK GUIDE

      25

Sync Start 

Denne knap aktiverer Automatisk Start, [SYNC START] eller Automatisk Stop, [SYNC 
STOP]. Hvis lampe lyser rødt, så starter rytme når tangent eller akkord aktiveres på 
tangenterne. Lyser knap grøn, vil rytme stoppe når tangenter slippes. Når lampen 
ikke lyser, så er funktionen slået fra og rytme startes og stoppes ved hjælp af [START/
STOP] knappen, eller med en tilsluttet fodpedal (ekstra tilbehør).

Variation [1], [2], [3], [4] 

Disse knapper bruges til at vælge forskellige variationer på akkompagnementet. 

Hvis knap [1], lyser spilles et simpelt akkompagnement.

Knap [2] spiller et mere komplekst akkompagnement, typisk som en variant af  
variation [1].

Knap [3] er velegnet til f. eks. omkvæd i sangen og knap [4] som er det mest  
komplekse kan anvendes til afsluttende omkvæd i sangen. 

22

10. Playing with Automatic Accompaniments

The BK-3 contains a function that plays back automatic accompaniments 

called “rhythms”. This section explains how to take advantage of the BK-3’s 

accompaniments

About the Rhythms

The BK-3 can generate interactive accompaniments based on the rhythm 

you select. Each rhythm is a typical accompaniment for a given musical 

genre. The BK-3 comes with 250 internal rhythms divided over 5 families 

(see the RHYTHM FAMILY section on the front panel).
Unlike a drum machine, a BK-3 Rhythm not only contains the rhythm part 

(drums & percussion) but also a melodic accompaniment, such as piano, 

guitar, bass and strings lines. The melodic accompaniment parts of the 

selected Rhythms follow the chords you play on the keyboard.
You can also record both your playing and the accompaniment (“16. 

Recording your performance as audio data” p. 41).

Structure of the Rhythm 

Accompaniments

Each Rhythm comprises several patterns that you can play back using the 

following buttons:

Button

Explanation

VARIATION  [1], [2], [3], [4]

If the VARIATION [1] button lights, the rhythm 

function plays a simple accompaniment 

(usually with fewer instruments).
The  other VARIATION’s become gradually 

more complex  up to the  VARIATION [4], that 

plays the most complex accompaniments.

INTRO

If you switch on this button (indicator lights) 

and press [START/STOP]/

*/, 

 button the 

rhythm playback begins with an introduction.
Depending on the type of VARIATION button 

lighted you will have either a simpler or a 

more complex introduction.

ENDING

If you press this button while a Rhythm is 

being played back ([START/STOP]/

*/, 

but-

ton flashes), the BK-3 starts playing a closing 

phrase (“Ending”) on the next downbeat. At 

the end of this phrase, playback stops.
Depending on the type of VARIATION button 

lighted you will have either a simpler or  a 

more complex closing phrase.

The available Rhythm patterns could be used as follows:


INTRO

VARIATION 

1 or 2

Beginning of the song.

First verse (simple accompaniment).

First chorus (richer accompaniment).

Last verse (simple accompaniment).

Closing section.

VARIATION 

3 or 4

VARIATION 

1 or 2

ENDING

If the [AUTO FILL IN] button lights, the BK-3 plays a transition before 

switching to the newly selected VARIATION pattern. Example: if 

the VARIATION [1] pattern is running, pressing the [4] button will 

not switch to that pattern right away. The BK-3 first plays a fill-in to 

announce the new song section.

NOTE

While the four Variation patterns are repeated indefinitely until 

you stop Rhythm playback, the Intro and Ending phrases are 

played only once.

Using Rhythms

The “interactive” aspect about the rhythms is that you can change the 

key of the accompaniment simply by playing different notes or chords. 

Additionally, you can select different variations (more or less complex
arrangements) for the active rhythm. The BK-3 provides several buttons 

for this.

[START/STOP] / [ 

*

/

]


This button is used to start and stop rhythm playback. While a 

rhythm is running, the button’s indicator flashes red on the first 

beat of each bar, and green on the remaining beats.

MEMO

You can also start (and stop) rhythm playback simply by playing 

on the keyboard. See the next function. (The Start/ Stop 

function can also be assigned to an optional footswitch.)

[SYNC START] / 

]

This button activates and switches off the “Sync Start” or “Sync 

Start/Stop” function. Pressing it several times allows you to select 

one of the following options:

Function

[SYNC START]

indicator

Explanation

Sync Start

Lights red

Rhythm playback can be started by playing a 

note or chord. Press [START/STOP]/

*/, 

]

 to stop 

rhythm playback.

Sync Start/Stop Lights green

Rhythm playback can be started by playing 

a note or chord. Playback will stop when you 

release all keys.

Dark

Rhythm playback needs to be started and 

stopped using the [START/STOP]/

*/, 

]

button 

(or the assigned optional footswitch).

Using Rhythms

23

 VARIATION [1], [2], [3], [4]

These buttons are used to select the complexity (number of parts) 

of the rhythm arrangement:

[VARIATION]

Explanation

[1]

The simplest accompaniment pattern. A good choice for 

the first of the songs you play.

[2]

A slightly more complex pattern you may want to use for 

subsequent verses.

[3]

This pattern would be a good choice for the first chorus

[4]

This is the most complex arrangement. Consider selecting 

it for the bridge or the final chorus sections of a song.

MEMO

The VARIATION patterns are repeated (played back in a loop) 

until a different pattern is selected or rhythm playback is 

stopped.

[INTRO] / [ 

'   

]

Selects an introduction, which is usually used at the beginning of 

a song. You can, however, also select this pattern for other song 

sections. The behavior of the Intro pattern depends on when you 

press the [INTRO] button:

[INTRO]

Explanation

Pressed before 

starting rhythm 

playback

The indicator lights.
When you start rhythm playback, the BK-3 first plays a 

musical introduction. (This pattern is played back only 

once).

Pressed 

during rhythm 

playback

The indicator flashes to signal that the INTRO pattern will 

begin on the next downbeat.
When the intro is finished, the BK-3 returns to the 

previously selected VARIATION pattern.

There are, in fact, four different INTRO patterns, that can be 

selected using the VARIATION [1], [2], [3] and [4] buttons. Again, 

the VARIATION buttons determine the complexity of the intro 

arrangement.

[ENDING] / [ 

&  

]

This button allows you to end your songs with a suitable closing 

section if you don’t want to simply stop playback. The behavior 

of the Ending pattern depends on when you press the [ENDING] 

button:

[ENDING]

Explanation

Pressed before 

starting rhythm 

playback

The indicator lights.
When you start rhythm playback, the BK-3 plays a musical 

ending. At the end of the phrase, playback stops.

Pressed 

during rhythm 

playback

The indicator flashes to signal that the ENDING pattern 

will begin on the next downbeat.
When the ending is finished, rhythm playback stops.

There are four different ENDING patterns, that can be selected using 

the VARIATION [1], [2], [3] and [4] buttons.
Again, the VARIATION buttons determine the complexity of the 

arrangement

[BASS INV]

This button is used to switch the “Bass Inversion” function on or 

off. While the button is dark, the rhythm bass part always plays the 

fundamental of your notes or chords. Example: if you play a chord 

consisting of the notes C, E and G (which is recognized as a C major 

chord), the bass part plays a C.
If the [BASS INV] button lights, the rhythm bass part uses the lowest 

notes of the chords you play.
Example: if you play a chord consisting of the notes E, G and C (still 

a C major chord), the bass part plays an E. This function therefore 

gives you more artistic licence.

Summary of Contents for BK-3

Page 1: ... DK NO BK 3 ...

Page 2: ......

Page 3: ...f de førende produ center indenfor mange forskellige instrumentkategorier Uanset om du spiller klaver keyboard orgel synthesizer guitar trommer bas eller er indehaver af et større eller mindre studie så har Roland det rigtige produkt På Rolands hjemmesider og via Rolands nyhedsmail kan du læse om de mange produkter og læse artikler om brug af MIDI og computer Hvis du har brug for hjælp så har Rola...

Page 4: ...g lyde i Favorit listen 22 Lav dine egen Favorit lydliste 23 Spil med Automatisk akkompagnement Rytmesektion 24 Musikstilarter 24 Start Stop 24 Sync Start 25 Variation 1 2 3 4 25 Intro 26 Ending 26 Bass Inv 27 Auto Fill In 27 Vælg Rhythms 27 Indstil balancen mellem arrangement og liveparterne 28 Afspil Rhythms 29 Brug af One Touch Registreringer 31 Slå One Touch funktion fra 32 BK 3 som USB afspil...

Page 5: ...et Når du tilslutter instrumentet til en stikkontakt så vær opmærksom på at spændingen svarer overens med de krav der står på instrumentet Det er ikke alle Roland instrumenter der har eks tern strømforsyning Faktisk er der mange der har indbygget strømforsyning og som der for kun leveres med et netkabel Placering Alle elektriske apparater påvirkes af den place ring apparatet har og det gælder natu...

Page 6: ...orhandler Roland giver 2 års garanti på alle produkter og reparation og service skal ske på et Roland autoriseret værksted Kontakt Ro lands tekniske afdeling på telefon 39 16 62 40 for yderligere information Du må under ingen omstændigheder selv forsø ge at åbne og reparere dit instrument hvis det går i stykker Husk at din garanti bortfalder hvis du alligevel gør det Data Mange af Rolands instrume...

Page 7: ... strømnettet må du være sikker på at spenningen stemmer overens med de krav som står på instrumentet Det er ikke alle Roland instrumenter som har ekstern strømforsyning Det er mange som har innebygget strømforsyning og som derfor bare leveres med en nettkabel Plassering Alle elektriske apparater påvirkes av den plasse ringen apparatet har og dette gjelder naturlig vis også ditt nye instrument Du k...

Page 8: ...ulle uhellet være ute så husk å kontakte din forhandler Roland gir 2 års garanti på alle pro dukter og reparasjon og service skal skje på et Roland autorisert verksted Du må under ingen omstendighet selv forsøke å reparere ditt instrument hvis det går i stykker Dette vil kunne resultere i at din garanti ikke len ger gjelder Data Mange av Rolands instrumenter har innebygget minne til lagring av dat...

Page 9: ... der Keyboardet indeholder over 850 lyde som du kan vælge at spille med og ved hjælp af Favorit pladserne er det også muligt at fastlåse 10 af dine personlige lyde så de er lige ved hånden BK 3 har tilslutning for USB hukommelse også kaldet USB Flash memory så instru mentet kan afspille Styles MIDI filer SMF kar samt lydfiler mp3 Wav direkte fra USB hukommelsen Det er også muligt at indspille sit ...

Page 10: ...ressing them together recalls the rhythm or song stored tempo value MEMO You can also use the TAPTEMPO button to set the desired tempo 6 SYNC START button This button is used to activate or switch off the BK 3 s Sync Start or Sync Stop function If it is on rhythm playback can be started or stopped by simply playing a note or chord on the keyboard See also p 22 While a song file is selected this bu...

Page 11: ...fspilles inden den nye Rhythm Variation fortsætter 10 VARIATION 1 2 3 4 knapper Disse knapper bruges til at skifte mellem Rhythmvariationerne dvs enten en mere simpel eller en mere kompleks udgave af stilarten 11 INTRO knap Når der trykkes på denne knap så spilles der en introduktion inden Rhythm afspil ning starter Hver stilart har 4 forskellige introduktioner som vælges ud fra kompleksi teten af...

Page 12: ...n locks the key see p 39 20 TRACK MUTE CENTER CANCEL button This button lets you mute the accompaniment parts of the selected rhythm so that only the bass and drum parts are played back It also lets you mute the melody part of the selected MIDI File or attenuate the vocal part at the center of an audio file WAV or mp3 allowing you to sing or play that part yourself Pressing and holding this button...

Page 13: ...lume på metronome 22 USB MEMORY knap Tryk på denne knap for at se en liste over filer som er gemt på den tilsluttede USB hukommelse 23 AUDIO REC knap Med denne knap startes lydoptageren af dit spil Denne funktion optager alt hvad du hører i hovedtelefoner eller hvad som kommer ud af BK 3 s PHONES OUTPUT bøsnin ger Indspilning gemmes på den tilsluttede USB hukommelse 24 MENU knap Ved at trykke på d...

Page 14: ...ke SPLIT DUAL knapperne samtidigt viser displayet volumeindstillingen hvor du kan indstille styrken for Upper og Lowerlyden 29 OCTAVE knap Denne knap kan hæve eller sænke den valgte instrument lyd UPP LWR i oktav interval 30 MELODY INTELL knap Når den knap aktiveres bliver der automatisk lagt flere stemmer på melodistemmen til din solo eller melodi Hvis knappen holdes nede så vises en menu i displ...

Page 15: ...ELODY INTELL button This buttons is used to add an automatic countermelody second or third voice to your solos or melodies Pressing and holding it calls up a display page where you can view the Melody Intelligent parameter 31 FAVORITE button Press this button if you want to use the TONE buttons to recall your favorite sounds see p 21 32 NUMERIC button Press this button if you want to use the TONE ...

Page 16: ...y before the BK 3 shuts down automatically the display starts counting down the seconds If you want to keep using the BK 3 at this stage press any button When the BK 3 is turned off by the Auto Off function the POWER button s position doesn t change which means that you need to press it once wait a few seconds then press it again to switch the BK 3 back on If you don t want the power to turn off a...

Page 17: ...UPP LWR Navn på den sidst spillede akkord Wireless ikon Den valgte lyd Toneart Taktart 18 About the Display and Cursor Operation This section introduces the information that appear on the main page in BK 3 s display and how to navigate the menu Main page Current measure or remaining time Selected or linked file type stl SMF WAV mp3 Time signature Tempo setting or time stretching Current Key settin...

Page 18: ...ttons directly 6 Use the INC or DEC button to change the value 7 Press the ENTER button again to deselect the field r he main page in mpo setting or time retching Current Key setting Octave settings of the Upper and Lower parts Touch memory cation Wireless icon Setting select the setting n of the BK 3 This page allows you to select the function group that contains the setting you want to change NO...

Page 19: ... sound selected is displayed in reverse MEMO You can also select one of the favorite sounds See 9 Favorite Tones p 21 2 Play the keyboard You ll hear the sound of the selected instrument 3 Press the INC or DEC button to select another desired Tone in the list MEMO Tones can also be selected by simply pressing the NUMERIC key and entering their number p 20 4 You can also use the UP or DOWN button t...

Page 20: ...RIC n to move the select the Tone e ENTER button 3 s Real Time Parts Playing the BK 3 s Real Time Parts The BK 3 is now in Split mode note numbers below the split point are used to transpose rhythm playback in real time and to play the Lower part if it is active Note numbers above the split point can be used to play melodies using the Upper part C4 default Lower LWR Upper UPP Split Point 2 Press t...

Page 21: ...your entry The Numeric pop up disappears and the display jumps to the Tone and family you selected 5 Press the EXIT button to return to the main page Setting the volume of the real time parts Upper and Lower The BK 3 provides an easy way to change the volume balance of the Upper and Lower parts 1 Simultaneously press the SPLIT and DUAL buttons to call up the Parts Volume page 2 Use the UP or DOWN ...

Page 22: ... associated favorite memory number 0 9 3 If you want to memorize another tone select the tone and repeat from steps 2 4 See Recalling a Favorite Tone to recall a favorite tone NOTE The list of Favorite Tone is automatically saved to the BK 3 s global memory This function allows you to create a list of 10 frequently used sounds and recall them instantly Recalling a FavoriteTone 1 Press the FAVORITE...

Page 23: ...ress and hold FAVORITE and press a TONE buttons 0 9 to memorize the previous sound selected to the associated favorite memory number 0 9 3 If you want to memorize another tone select the tone and repeat from steps 2 4 See Recalling a Favorite Tone to recall a favorite tone NOTE The list of Favorite Tone is automatically saved to the BK 3 s global memory a list of 10 frequently used sounds and iteT...

Page 24: ...o select one of the following options Function SYNC START indicator Explanation Sync Start Lights red Rhythm playback can be started by playing a note or chord Press START STOP to stop 22 selected Rhythms follow the chords you play on the keyboard You can also record both your playing and the accompaniment 16 Recording your performance as audio data p 41 Structure of the Rhythm Accompaniments Each...

Page 25: ...START STOP to stop rhythm playback Sync Start Stop Lights green Rhythm playback can be started by playing a note or chord Playback will stop when you release all keys Dark Rhythm playback needs to be started and stopped using the START STOP button or the assigned optional footswitch Using Rhythms VARIATION 1 2 3 4 These buttons are used to select the complexity number of parts of the rhythm arrang...

Page 26: ...s There are four different ENDING patterns that can be selected using the VARIATION 1 2 3 and 4 buttons Again the VARIATION buttons determine the complexity of the arrangement BASS INV This button is used to switch the Bass Inversion function on or off While the button is dark the rhythm bass part always plays the fundamental of your notes or chords Example if you play a chord consisting of the no...

Page 27: ...ythms no longer change when you select Performance memories see p 39 The display shows a list of the rhythms that belong to this family If the currently selected rhythms belongs to the family whose button you pressed its name is displayed in reverse and the indicator of the button you pressed lights If you press a different RHYTHM FAMILY button the display shows the beginning of the associated lis...

Page 28: ...switched off by Auto Off you need to press the POWER button wait a few seconds then press the button again to switch the BK 3 back on Do not switch it on too quickly Adjusting the SoundVolume Here s how to adjust the volume of your keyboard playing or the playback volume of an internal song If headphones are connected use the Volume knob to adjust the headphone volume 1 Turn the Volume knob to adj...

Page 29: ... in See Fill Ritardando on p 49 ms Y button to select the rhythm one of these buttons you activate the selection which means that rhythms you select Performance memories see he rhythms that belong to this family If ms belongs to the family whose button played in reverse and the indicator of ts THM FAMILY button the display shows ated list but the indicator of the esn t light 2 Press the INC or DEC...

Page 30: ...select the complexity of the INTRO pattern For example press the VARIATION 3 The VARIATION button pressed at the step 6 lights and the VARIATION button pressed at the step 4 flashes to indicate the verse complexity that will be played back at the end of the Intro pattern 7 Play a chord on the keyboard 8 The main page displays the name of the last chord the BK 3 recognized 9 Press the START STOP bu...

Page 31: ... and buttons STANDARD to return to the rhythm s preset tempo TIPS You can press and hold the TAP TEMPO button to lock the tempo setting see p 39 14 Press the ENDING button to end rhythm playback with a suitable closing section You could also stop playback simply by pressing the START STOP button or by releasing all keys on the keyboard see SYNC START p 22 While rhythm or SMF song playback is stopp...

Page 32: ...UCH function press the TONE 1 4 button whose indicator lights steadily Its indicator flashes along with the other three TONE buttons 2 Press the ONE TOUCH button to leave ONE TOUCH memory selection mode The TONE buttons stop flashing Only the indicator corresponding to the last Tone family you selected lights steadily You can now select different Tones for real time part without actually leaving t...

Page 33: ...e is followed by a number 1 4 the ONE TOUCH function is currently on If the ONE TOUCH field is followed by a dash the ONE TOUCH function is off OneTouch 1 ON OneTouch OFF H memory since switching ttons 1 2 3 and 4 flash alls the last ONE TOUCH number of the last ONE flash ssigned to the desired ights while the indicators of button than the one oard ory has recalled a different he ONE TOUCH functio...

Page 34: ... and rhythm files can be copied to the USB memory using your computer as you purchase them Getting Ready to Use the BK 3 as a USB Player 1 On your computer copy the new song and rhythm files to an optional USB memory memory stick NOTE Use USB memory sold by Roland M UF series We cannot guarantee operation if any other USB memory is used 2 Connect the USB memory to your BK 3 NOTE Carefully insert t...

Page 35: ... or lower limit for an mp3 or WAV file playback may sound a little strange Press the TAP TEMPO button at least three times at the desired tempo This function is not available if you selected an audio file WAV or mp3 TheBK 3 calculates the intervals between your presses and sets the corresponding tempo value MEMO Simultaneously press the TEMPO and buttons STANDARD to return to the rhythm s preset t...

Page 36: ...eral times This function is available for both audio and SMF songs You can also use it to practise difficult song passages Setting and using the loop positions 1 Select the song you want to play back See Selecting a Song or Rhythm on a USB Memory p 28 2 Press the START STOP button to start playback 3 When the BK 3 reaches the beginning of the passage you want to play back in a loop press the VARIA...

Page 37: ... You can use this function to mute tracks of rhythms or the melody part of the selected Standard MIDI File SMF After selecting a WAV or mp3 audio file you can attenuate the vocal part at the center of the stereo image Center Cancel The Mute function behavior depends on the selected file type 1 Select a song SMF or audio or a rhythm See Selecting a Song or Rhythm on a USB Memory p 28 2 Press the ST...

Page 38: ... chords you play in the chord recognition area The counter melody is played by the Melody Intelligent part There are 18 harmony types to choose from See Melody Intelligent settings p 50 1 Press the MELODY INTELL button so that it lights This adds a harmony to the notes you play If you want you can change the Melody Intelligent Parameters 2 Press MENU button Performance Edit Melody Intelligent For ...

Page 39: ...or Lower LWR 3 Use the OCTAVE or button to select the desired Octave setting Octave setting 4 0 4 semitone units MEMO You can also change the octave setting using MENU button Performance Edit Tone Part View Octave Shift p 45 Using the Melody Intell igent Function The automatic accompaniment can add a counter melody to the notes you play with the Upper part UPP Those automatic harmonies are based o...

Page 40: ...s the AUDIO REC or START STOP button to stop recording Rhythm or song playback and recording stop The following message appears MEMO The name suggestion displayed here depends on the first recording It will however be followed by an incremental number You can now X Save the song under a new name a Use the UP or DOWN button to select the desired character then use the INC or DEC button to change th...

Page 41: ...sker at gemme din optagelse Hermed afsluttes den Quick Guide Hvis du ønsker yderligere information så henvises der til den engelske vejledning hvor du kan læse mere om de forskellige muligheder i instrumentet Du er også velkomme til at kontakte vores danske Support telefon 45 39 16 62 29 som har åbent mandag torsdag 14 16 samt fredag 9 11 Held og lykke med instrumentet ...

Page 42: ...42 QUICK GUIDE NOTER ...

Page 43: ...QUICK GUIDE 43 NOTER ...

Page 44: ... roland fi NORWAY Lilleakerveien 2 P O Box 95 Lilleaker NO 0216 Oslo support roland no www roland no SWEDEN Mårbackagatan 31 4tr SE 123 43 Farsta roland support roland se www roland se DENMARK Skagerrakvej 7 P O Box 880 DK 2100 Copenhagen support roland dk www roland dk ROLAND SCANDINAVIA AS ...

Reviews: