27
EN
27
17
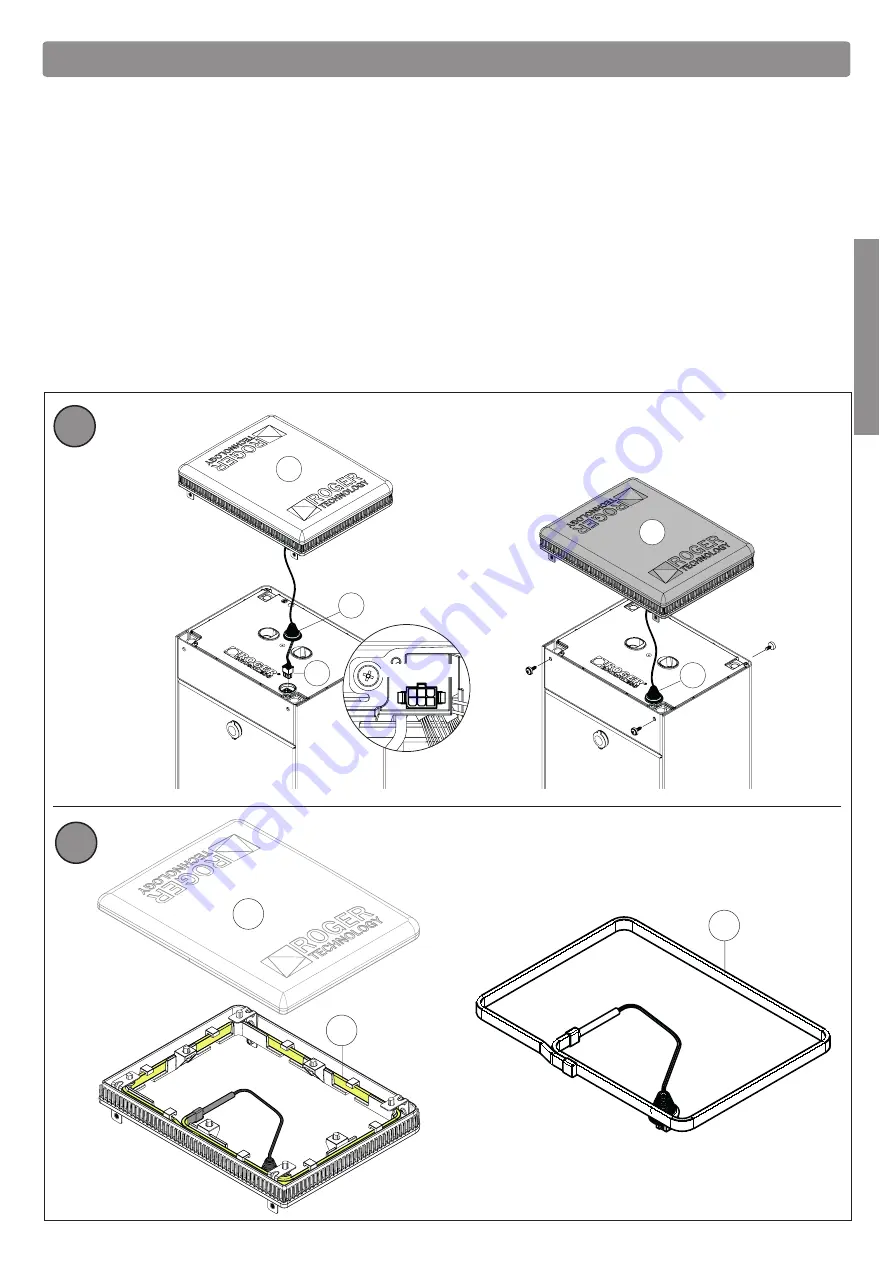
INSTALLING THE BI/BLED LED FLASHING LIGHT
1. The
BI/BLED
flashing lamp unit is factory supplied already pre-installed in the head [
A
], packaged separately inside the BIONIK package.
2. Insert the connector [
B
] in the LIGHT terminal of the control unit.
3. Refer to the control unit manual for the flashing lamp unit settings.
4. Fasten the cable grommet [
C
], making sure it is positioned correctly.
5. Position the head [
A
] on the barrier.
6. Tighten the fastening screws.
In case of replacement:
1. Disconnect the mains and battery power supplies (if applicable).
2. Unscrew the screws that fasten the head [
A
] to the barrier.
3. Lift the cable grommet [
C
].
4. Disconnect the connector [
B
].
5. Remove and overturn the head [
A
].
6. Remove the
BI/BLED
flashing lamp unit [
D
] from the diffuser.
7. Insert the new LED circuit in the diffuser, paying attention to the installation direction (fig. 18).
8. Insert the connector [
B
] in the LIGHT terminal of the control unit.
9. Refer to the control unit manual for the flashing lamp unit settings.
10. Fasten the cable grommet [
C
], making sure it is positioned correctly.
11. Reposition the head [
A
] on the barrier.
12. Tighten the fastening screws.
13. Reconnect the mains and battery power supplies (if applicable).
17
18
B
C
A
B
A
LED LIGHT
A
D
D
Summary of Contents for BI/004
Page 1: ......


