B. The control comes preset with the “empty bowl
timer” (or parts jam timer) disabled. Once
enabled, the bowl will stop feeding when parts
have not passed the sensor for the set time. The
empty bowl timer can be adjusted from 5 to 255
seconds under the “timer settings” menu. Press
the “1/0” key or toggle the parts sensor to restart
the control. The auxiliary output can be set up to
turn on a signaling device. See the section that
describes the auxiliary output for more details.
20. Auxiliary Output Settings
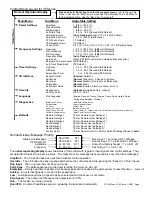
The “Aux Output Mode” menu contains the menu that
controls the auxiliary output (Aux Out) operation.
A. The factory-default “Normal” setting allows the
auxiliary output to turn on and off with the output
of the feeder.
B. The auxiliary output can be set to have its signal
inverted from the output of the feeder. Set the
“Aux Out” parameter to “Invert” to activate it.
C. The auxiliary output can be set so that the alarm
signal can indicate when the “Empty Bowl” timer
has timed out. Set the “Aux Out” parameter to
“Alarm” to activate it.
D. The auxiliary output can be set so that the alarm
signal can be inverted when the “Empty Bowl”
timer has timed out. Set the “Aux Out” parameter
to “Inv Al” to activate it.
E. The auxiliary output can be set so that an air
solenoid can be activated 1 second before feeding
begins and continue for 4 seconds after feeding
ends. This feature is helpful for parts orientation.
Set the “Aux Out” parameter to “Air Jet” to activate
this feature.
21. Diagnostics
A. The first menu item under the diagnostic menu
shows the control type and feeder’s load current.
B. The next five items show certain software registers
and the software versions which may be helpful to
Rodix staff while troubleshooting over the phone.
22. Security Settings
The “Security” menu contains the portion of the menu
that controls access to the program menu settings.
When enabled, the security code is a number from
0.0 to 99.9. The preset code is 0.0. It may be
changed.
A. The control comes with the security setting
“Unlocked” so the control can be set up. The
amplitude can be adjusted from the normal
operating display. Press and hold “Enter” to enter
the program menu and adjust the software
settings.
B. The amplitude only (Ampl. Only) adjustment
allows operators to adjust the amplitude through
the normal operating display, but not get to the
program menu settings without the security code.
C. The “Lock” setting locks the control from any
adjustment without the use of the security code.
If the security code has been forgotten, enter the
security code #13.5, then press “Enter”. Once in
the programming menu be sure to set the security
code.
23. Default Memory
Occasionally it is nice to get back to a known setting.
Once a feed system has been set up properly, the
setting should be manually saved into the “Save
Settings1” memory. If an operator disturbs the
settings, the “Restore Settings1” feature can restore
the control to a known good set up. When different
parts are used on the same feed system, two other
memory locations called “Save Setting2” and “Save
Settings3” can be used for other parts. Operators can
recall settings 1, 2 or 3 based on the part being used.
The “Factory Reset” selection will put the original
factory settings into the memory.
24. Language
The run display and programming menus can be set
to display in English, Spanish (Espa
ñ
ol), French
(Français), or German (Deutsch).
25. CFR Set Point
The CFR set point sets the amplitude vibration level
that the control regulates to. The VF Series control
adjusts the amplitude automatically to match the
CFR set point. The CFR set point can be adjusted by
the depression of the “UP” and “DOWN” arrows keys.
Holding an arrow key down will adjust the amplitude
setting instead of the CFR set point. The CFR set
point can also be controlled by a 4-20mA signal.
The CFR set point only appears on the display when
the “Amplitude Source” menu under power settings
is set to “Auto Track” and the CFR sensor is attached.
26. Fault Messages
The VF control has error and warning messages
that relate to “Over-Amps”, “Over-Temp” and Bowl
out of parts timers. To clear the message or fault,
press the “1/0” button twice. “Coarse and Fine Scan
Error” mean not enough vibration was measured
during an Autoscan. Reduce Resonate Threshold.
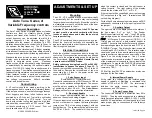
WARNING:
Fuses should be replaced with Littelfuse 3AB or
Buss ABC "Fast Acting" type or equivalent of
manufacturer's original value.
Mounting this control on a vibrating surface will
void the warranty.
Warranty
Rodix Control Products are Warranted to be free from
defects in material and workmanship under normal use
for a period of two years from date of shipment.
For
the full description of the warranty, terms, and software
license, please contact the factory.
For assistance installing or operating your Rodix Feeder
Cube® please call the factory or visit our web site.
Technical help is available to answer your questions and
email any needed information. To return a control for IN or
OUT of warranty service, please ship it prepaid to:
Rodix Inc., ATTN: Repair Department
If under warranty, Rodix will repair or replace your control
at no charge; If out of warranty, we will repair it and you will
be billed for the repair charges (Time and Material) plus the
return freight. Quotes for repairs are available upon
request. A brief note describing the symptoms helps our
technicians address the issue.
Feeder Cube® and Auto Tune® are registered TM of Rodix Inc.
Banner
is a registered Trademark of Banner Engineering Corp,
9714 10th Ave, Minneapolis, MN 55441
RODIX, INC.
2316 23
rd
Avenue, Rockford, IL 61104
Toll Free (800) 562-1868
E-mail [email protected]
www.rodix.com
1 VF Set Up V2_01.docx 12/23/20 Page 7


