


2
3
Functions
(continued)
Operation
TWS
The Go Party X10 features true wireless stereo (TWS) Bluetooth linking. This means you
can purchase 2 of these speakers and link them together to play in stereo wirelessly.
1. Make sure both speakers are OFF.
2. Go to your phone's Bluetooth interface and make sure that it is not connected to either
of the speakers. If your phone is connected, choose to forget or remove the speakers
from the list of available devices.
3. Turn both speakers ON. Press the MODE button on both speakers. The word “bLUE”
should appear on both LCD screens and flash intermittently.
4. Press the NEXT button on either one of the speakers for 5 seconds. Both units will
enter pairing mode.
5. One of the units will show the word “bLUE” on the LCD display. This is the master unit
and will act as the left channel. The other unit will show the word “tOt.” This will be the
slave unit and will act as the right channel.
6. Go to your phone's Bluetooth interface and select "Go Party X10" from the list of
available devices. If pairing is successful, the word bLUE on the master unit will
stop flashing.
7. To disconnect the speakers, select any other mode on either one of the speakers.
Please note, in TWS mode, both units will operate independently. For example, if you turn
down the volume on the master unit, it will not affect the slave unit.
19
20
28
25
24
26
27
21
23
22
14. Mode button: Press to switch between input modes: Bluetooth, USB/SD,
and AUX input.
15. Echo slider: Used to adjust echo effect.
16. Mic volume: Use this slider to adjust the volume level of all mic input.
17. GT volume: Use this slider to adjust the volume level of guitar input.
18. USB/SD input ports.
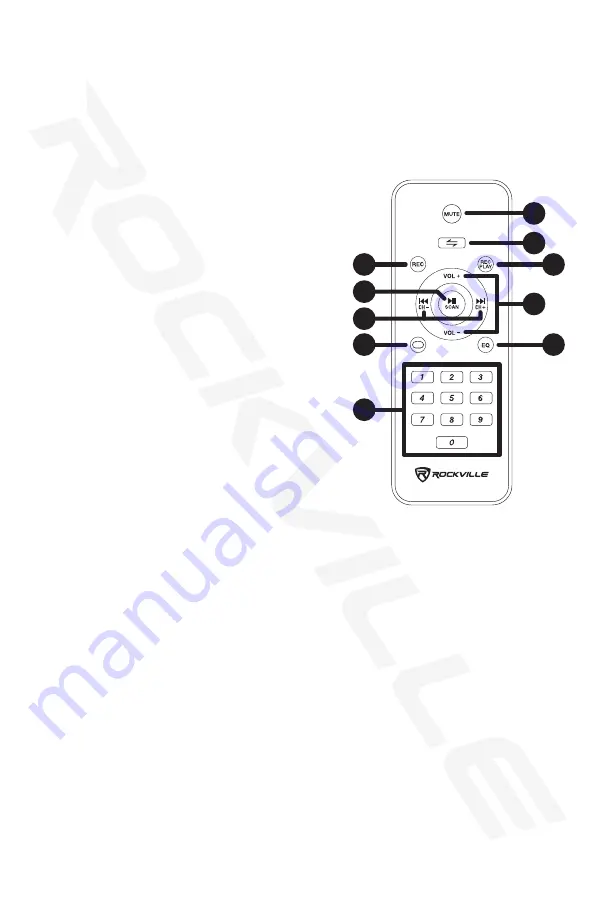
19. Mute
20. Mode button (see item 13 above)
21. Rec Play button: Use this button to play back
any recordings made using the record button.
22. Vol+/Vol-: Use to adjust the speakers volume.
23. EQ button
24. Number pad: In USB/SD mode, use
the number pad to direct select tracks.
25. Repeat button (see item 12 on page 2)
26. Previous/CH- and Next/CH+ (see items 8 and
10 on page 2)
27. Play/Pause/Scan button (see item 9 on page 2)
28. Rec button: allows for recording of input from
the wireless mic as well as any wired mics
connected to the speaker.


