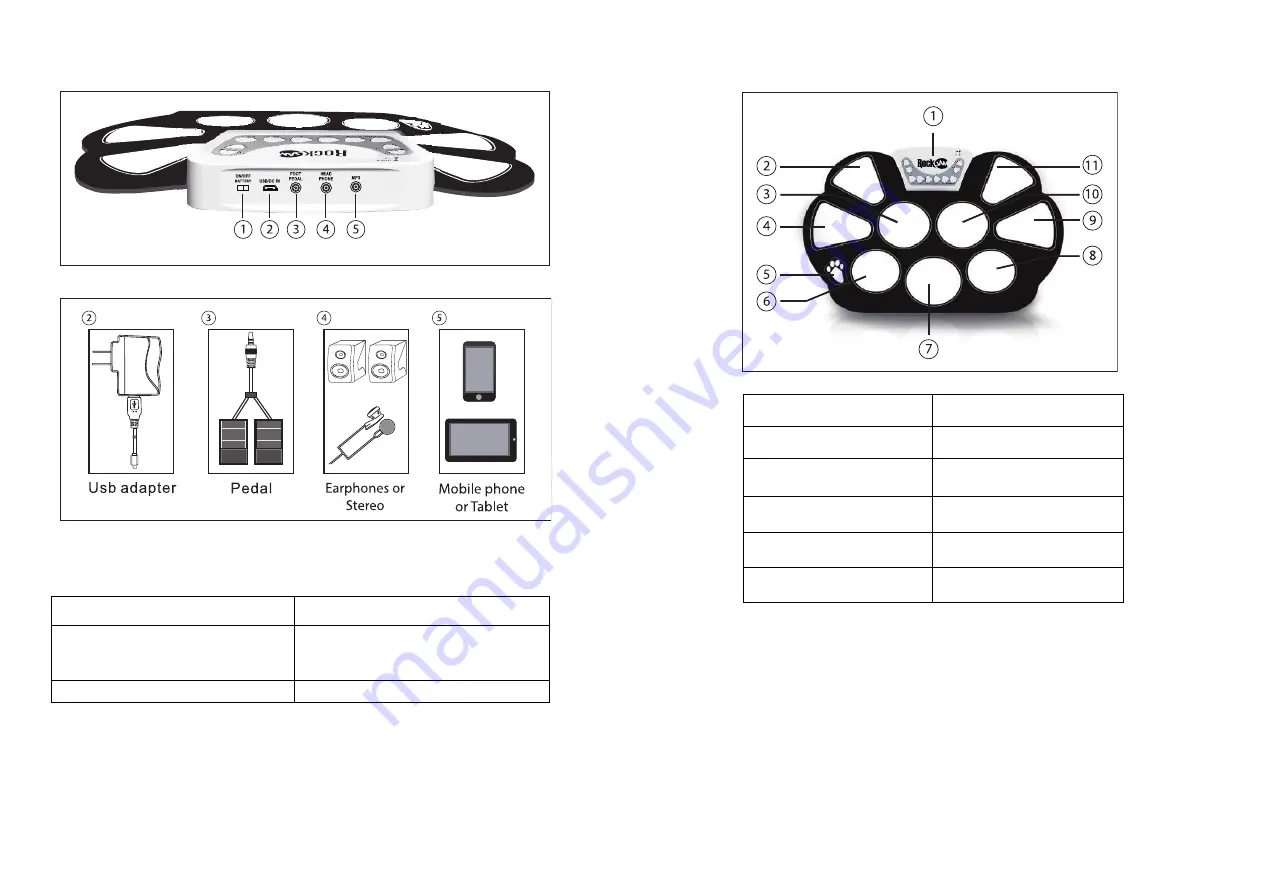
5. Rear panel switches and connections
Make connections to the rear of the drum kit as follows before switching on:
6. Drum pad layout
7. Operation
Switching the unit on
Just connect the USB power cable to the DC input socket on the rear of the unit to power up. If using battery power, slide
the on/off switch at the rear of the drum kit to the left to switch on. The power indicator LED will light up red.
Volume control
Press the VOL-/VOL+ buttons to adjust the volume of the drum sounds, demo songs and rhythms. There are 9 Volume
settings available plus an off setting. The default setting at power up is level 6.
Drum kit selection
Press the STYLE button to cycle through the 7 different drum kit sounds. Hit the drums to test out the sounds available
until you find the one that you like. The default setting at power up is STYLE 1.
1 –
Power On/Off Switch. Used to switch the drum
kit on or off
when using battery power
.
4 –
Connect Headphones, Earphones or to amplified
speakers.
2 –
Power adapter connection. Use the USB power
adapter supplied or power from a computer USB
port.
5 –
Auxiliary input for iPod, iPhone, Smartphone or
MP3 player. Use the 3.5mm cable supplied to connect
the external device.
3 -
Pedals for Bass Drum and Hi-hat.
1 – Control box
7 – Bass drum
2 – Crash cymbal (1)
8 – Low floor tom
3 – High tom
9 – Ride cymbal
4 – Open/Close Hi-hat
10 - Low-mid tom
5 – Pedal Hi-hat
11 - Crash cymbal (2)
6 – Snare


