8
rev. 02/29/16 © 2016 Robern, Inc.
209-1242-B-Balletto
800.877.2376
www.robern.com
NOTE:
Do not install the drawers or side kits
to the vanity until after legs system and vanity
frame have been properly assembled and
installed firmly to the bathroom wall.
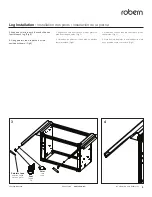
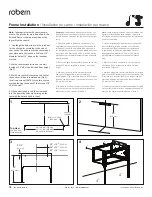
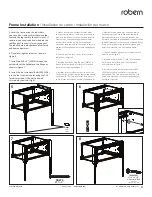
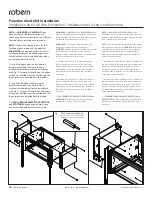
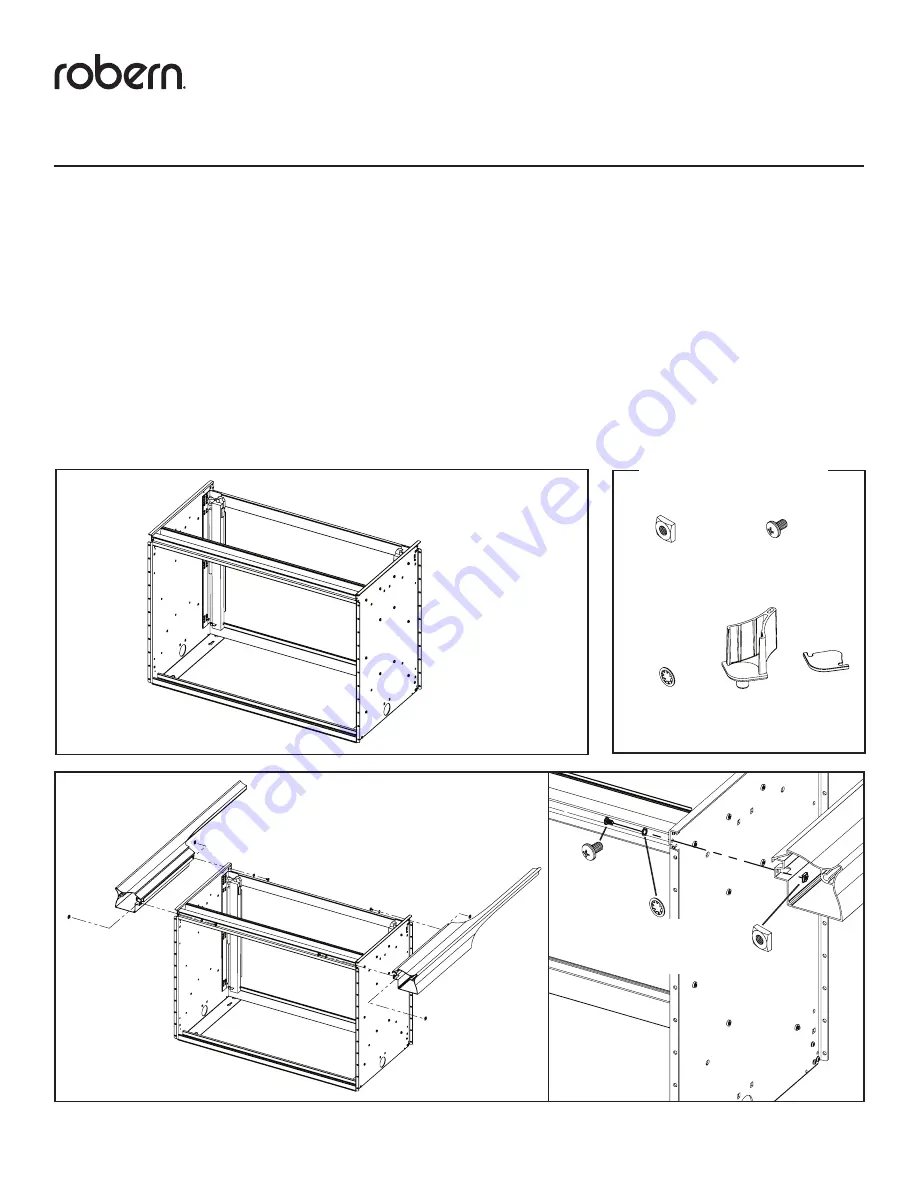
1. Place the vanity on its back as shown (Fig 1).
2. Align the legs with the top of the frame and
permanently mount the legs in the location
shown, using the hardware provided. (Fig 2)
REMARQUE:
Ne pas installer les tiroirs ou des kits
secondaires à la vanité qu’après système de jambes
et le cadre de la vanité ont été correctement
assemblé et installé solidement au mur de salle de
bains.
1. Placer la vanité sur son dos comme indiqué (Fig 1).
2. Aligner les jambes avec la partie supérieure du
châssis et monter de façon permanente les jambes
à l’endroit indiqué, en utilisant le matériel fourni.
(Fig 2)
NOTA:
No instale los cajones o kits secundarios a la
vanidad hasta después de sistema de piernas y el
marco de la vanidad han sido montadas e instaladas
correctamente firmemente a la pared del baño.
1. Coloque la vanidad en su parte posterior como se
muestra (Fig 1).
2. Alinear las piernas con la parte superior
del bastidor y montar permanentemente las
piernas en el lugar indicado, usando el hardware
proporcionado. (Fig 2)
1
2
Leg Installation
/ Installation des pieds / Instalación de la pierna
[216-1144]
Leg System Hardware Bag
Système Leg Bag Hardware
Bolsa de hardware del sistema Pierna
[SS267]
(4) 10-32 Nut
(4) écrou
(4) tuerca
[203-1390]
(4) #10 Washer
(4) rondelle
(4) arandela
[SS268]
(4) 10-32 Screw
(4) Vis
(4) tornillo
[211-1142]
(2) Foot (6) Shim
(2) le pied (6) cale
(2) Pie (6) calce
[SS267]
(4) 10-32 Nut
(4) écrou
(4) tuerca
[SS268]
(4) 10-32 Screw
(4) Vis
(4) tornillo
[203-1390]
(4) #10 Washer
(4) rondelle
(4) arandela

