RMS caddy Installation And User Manual Download Page 1


Thompson House 

Unit 10 Styles Close, Sittingbourne, Kent, ME10 3BF 
Tel: 01795 477280     Fax: 01795 229692 


E-mail address: 

[email protected]


www.ineedawheelchair.co.uk 
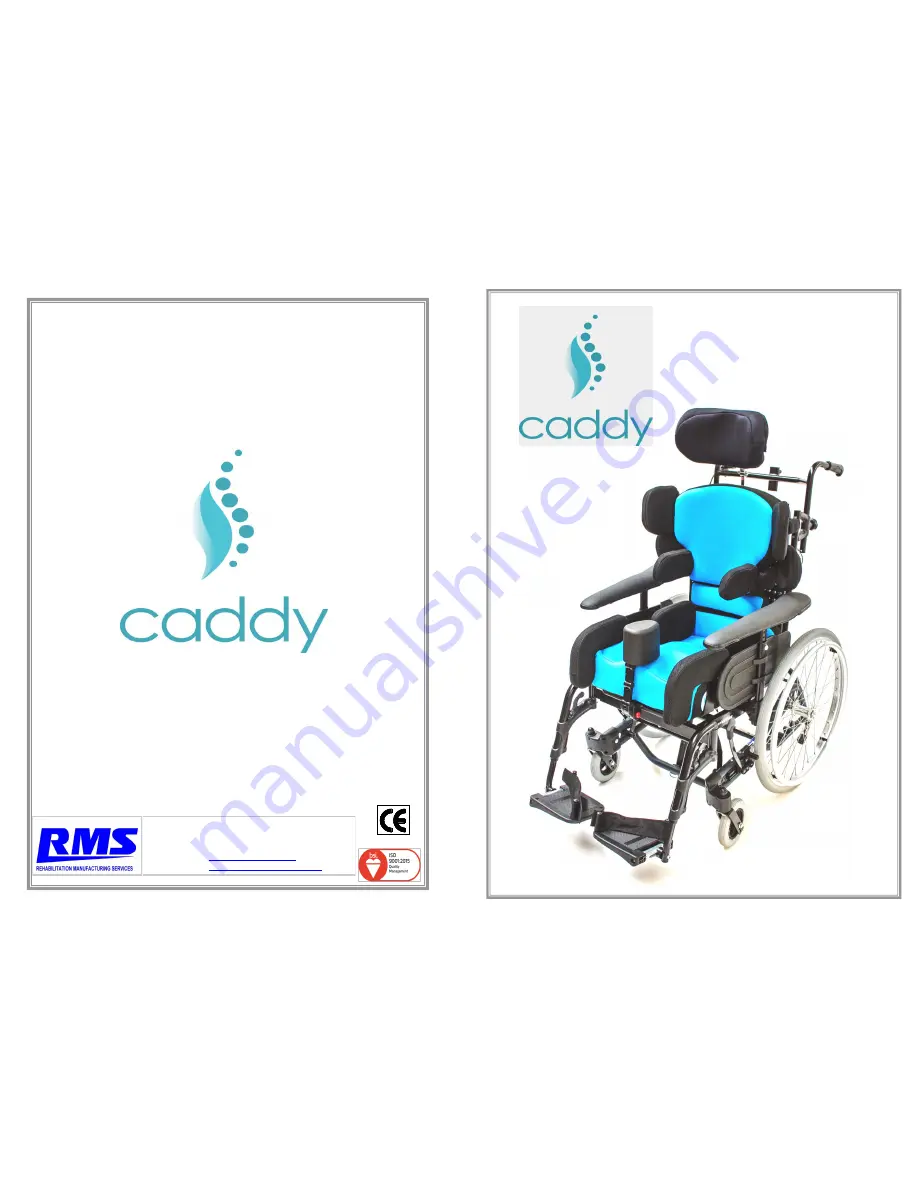
 

The 

Manufactured  

by 

Seating System 

The 


Seating System


Installation and User Manual 


EDITION 3 May. 2017 

Summary of Contents for caddy

Page 1: ...Close Sittingbourne Kent ME10 3BF Tel 01795 477280 Fax 01795 229692 E mail address sales rms kent co uk www ineedawheelchair co uk The Manufactured by Seating System The Seating System Installation and User Manual EDITION 3 May 2017 ...

Page 2: ...iders such changes will serve to improve the product quality or become necessary to meet any changes in device legislation Should the reader have any concerns regarding the installation set up adjustment or use of the caddy Seating System please contact the RMS Ltd Technical Help Line on 01795 477280 CONTENTS Page Introduction 2 Safety Guidelines 3 Component Identification 4 Initial Installation 5...

Page 3: ...e installation of a caddy Seating System may raise or position the user further forward in their wheelchair an appropriate stability test should be carried out prior to final commissioning After the caddy Seating System has been initially adjusted to suit the individual user any settings should not be subsequently affected by the removal and refitting of the Seat Base or Backrest to allow the whee...

Page 4: ...anufacturer or the manufacturer s approved repairer for inspection The failed part may then be repaired or replaced at the manufacturer s discretion or that of their approved repairer In the latter case any displaced parts must be returned to the manufacturer for inspection Any part component or accessory repaired or replaced during the twelve month warranty period will continue to be covered for ...

Page 5: ...ctory none of the Backrest or Seat Base Support Brackets have been fully and finally tightened This has been done to allow the installer ease of correctly positioning the interface brackets to suit the intended surrogate base It is therefore the responsibility of the installer to ensure that all Interface Mounting and Component Screws and Nuts are correctly tightened before handover to the user Th...

Page 6: ...raking accelerating and cornering on the wheelchair user Effects of the occupant restraint on the user both in normal vehicle movement and on impact Effects of the seating unit wheelchair and or any accessories being used on the action of a vehicle anchored occupant restraint in an impact Suitability of any interface that connects the seating unit to the wheelchair Postural support or belt harness...

Page 7: ...hat the cause is rarely attributed to a piece of faulty equipment The majority are the result of inappropriate inadequate or incorrectly used equipment which can pose as much a risk to wheelchair users as a vehicle impact The main areas where problems are identified Lack of communication between the parties involved notably with transport service providers before a wheelchair seating unit is presc...

Page 8: ...tachment screws is from the underside 21 UPHOLSTERY CARE and MAINTENANCE Unless otherwise requested your caddy Seating System will be finished in 100 Polyester 3mm Spacer fabric Alternative surfaces may be textured or smooth reversed Zip removable covers enable easy removal for cleaning or machine washing The Spacer fabrics have the following qualities Flame Retardant to BS5852 2006 Ign source 5 C...

Page 9: ...ck and Latch Brackets install both Lock Brackets onto the seat rails one each side Locate each Lock Bracket with the rear edge of the clamp in line with the previously marked front Support Hook position With locating lugs uppermost and pointing rearwards as Fig 7a install clamping screws and tighten sufficient to maintain the Bracket positions on the seat rails Install the Latch Brackets onto the ...

Page 10: ...ailable see the caddy prescription form QMF100 for details and can be mounted to the Seat Panel as per the Fixed style These will enable each Support to be positioned inboard by 2 5cm or 5cm Alternative brackets are available from RMS Sales When replacing Pelvic Support brackets on Seat Units with sufficient clearance under the seat the mounting screws can be accessed from the underside by tilting...

Page 11: ...vement Re secure the Backrest Height Adjustment Panel in it s previous position and re attach the Backrest Upholstery Headrest height adjustment can be made at both the Mounting Boss and Link pivots Fig 25 Forward adjustment can also be made at the Link pivot points Swivel adjustment can be made at the Headrest Ball Mount Fig 26 With the Headrest Stem inserted into the Mounting Boss to the require...

Page 12: ...m adjustment links whereas Shoulder Pads will be supplied with 50mm adjustment links The devices are intended to give additional support to the user s shoulder areas and the muscle areas at the rear of the upper arms 2 5mm and 4mm Hexagon Keys The Backrest Panel is manufactured with a matrix of holes to enable the attachment of accessories to either the front or rear face see Fig 23 Both Tricep an...

Page 13: ... fixing points Fig 20 Fig 21 Fixed and Swing away Wrap around and Swing away Swing away Lock Release Tension strap with buckle Fig 22 13 With both Safety Locking Pins removed from their Brackets Fig 11 position each Backrest Support Bracket in turn with it s Locating Pin inserted into a Lock Pin Bracket By holding these Brackets in a level position against the Backrest Panel Fig 12 will indicate t...

Page 14: ...er forwards or further backwards from its previous position Backrest angle locking screws Fig 14 Op 1 Op 2 Op 3 15 BACKREST HEIGHT ADJUSTMENT 4mm Hex Key To enable the Backrest height to be adjusted a Height Adjustment Panel is attached to the upper front face of the Backrest Panel by two screws inserted through the rear of the Panel screwing into threaded key washers Figs 3 5 and 15 Detach and re...

Reviews: