background image

Riverdi STM32 Evaluation Board User Manual Rev. 1.4 

© 2021 Riverdi 

Page 8 of 

16


www.riverdi.com


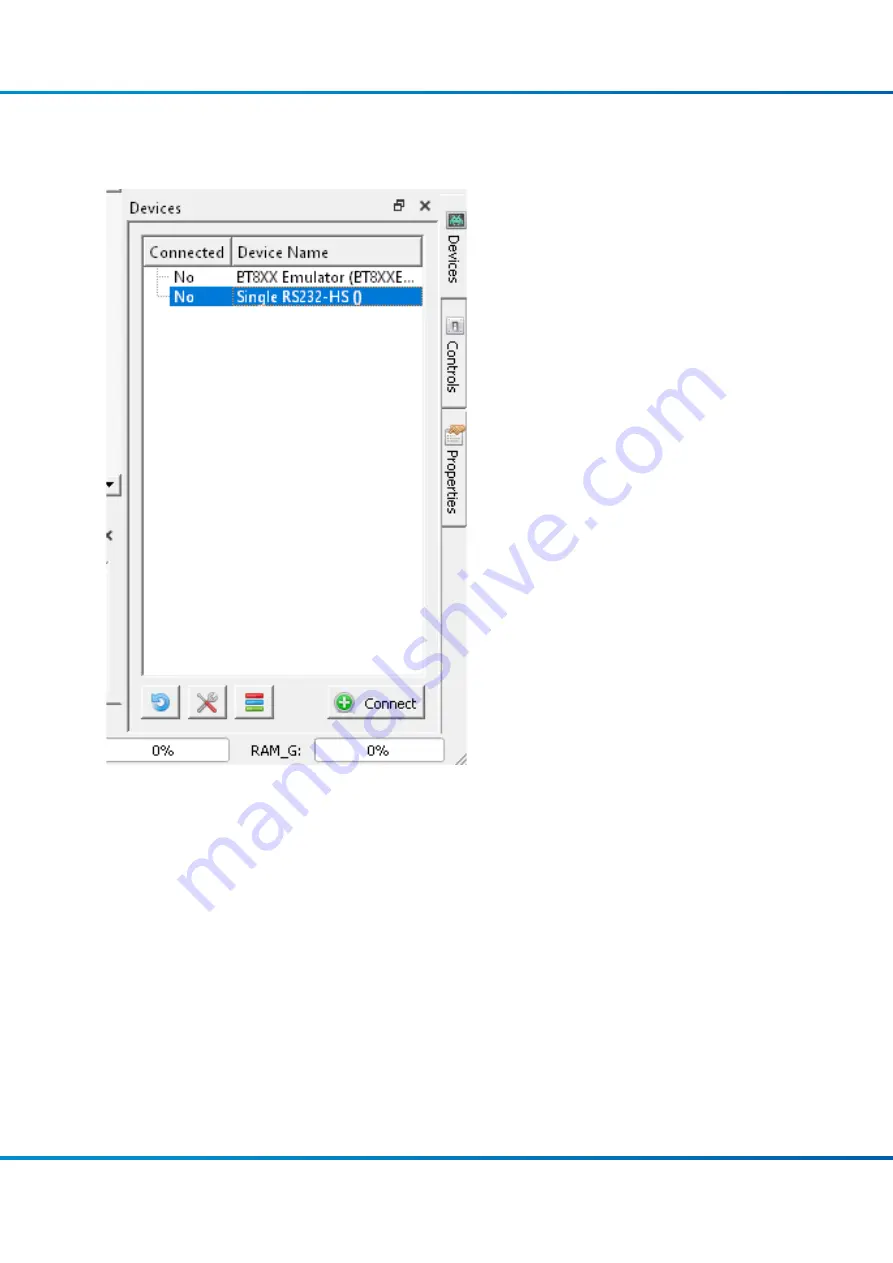
Use a USB cable to connect the “USB Direct” port to your computer, when running the EVE 

Screen 

E

ditor application. Click the “Refresh” button afterwards and 

your dev board should show up like in 

the picture below: 


Select "Single RS232-

HS ()” entry by clicking on it and use the ‘Connect’ button to let EVE 

Screen Editor 

try and boot up your display. 
 
If everything works properly, your display should show a blue screen with some text. 


Summary of Contents for STM32

Page 1: ...User Manual RIVERDI STM32 Evaluation Board Rev 1 4 2021 06 02 Riverdi Evaluation Board User Manual...

Page 2: ...nformation updated 1 2 2021 03 09 Pictures updated 1 3 2021 03 31 Document adjusted into standard template 1 4 2021 06 02 Corrections on description related to jumper P7 P8 P9 CONTENTS REVISION RECORD...

Page 3: ...Riverdi STM32 Evaluation Board User Manual Rev 1 4 2021 Riverdi Page 3 of 16 www riverdi com Additional literature 14 Warranty limitation 14 Legal information 14 Appendix 15...

Page 4: ...development platform for Riverdi s EVE and IPS displays lines driver technology The Riverdi evaluation board features an STM32F469II Cortex M4 microcontroller with LCD parallel interface including 808...

Page 5: ...e connected to RiBUS SPI Use the FT232 serial to SPI bridge by connecting a micro USB cable to the connector labeled Direct USB and using the EVE Screen Editor to quickly generate graphical user inter...

Page 6: ...ll the EVE screen Editor from the FTDI homepage https www ftdichip com Support Utilities htm EVEScreenEditor Setup Configuration To connect the FTDI SPI bridge to the EVE display the configuration jum...

Page 7: ...the screen similar to the one below On the lower right hand side of the window click on the Devices tab On the lower left hand side you will find 3 buttons This button refreshes the devices list abov...

Page 8: ...r when running the EVE Screen Editor application Click the Refresh button afterwards and your dev board should show up like in the picture below Select Single RS232 HS entry by clicking on it and use...

Page 9: ...coprocessor commands are shown in the yellow box and the button to send the data to the EVE display is seen inside the red box What you see now is the preview of what will be drawn on the physical sc...

Page 10: ...favorite tool to flash the onboard STM32 assuming that you use STM32CubeProgrammer together with an STLink v2 compatible ISP Programmer Installation Use the provided source code or the pre compiled b...

Page 11: ...al For display sizes from 3 5 to 5 0 the USB port gives enough power to get adequate backlight level Such backlight power supply configuration jumper is in higher position connects BL to 5V on P4 is s...

Page 12: ...L to EXT it must be placed in lower position and connect the external DC voltage source to neighboring connector BL PWR Refer to the picture and below Caution There is no reverse polarity protection o...

Page 13: ...his slot after being formatted in FAT32 format microSD card s memory space can be used by microcontroller as the regular filesystem RiBUS FFC connector Support for FT80x FT81x BT81x max SPI speed 30MH...

Page 14: ...s to the unit which brings the potential threats to the Eval Board and display Riverdi cannot be held responsible for actions beyond its control and consequently the warranty DOES NOT cover the effect...

Page 15: ...l up 40 PA0 STL_TX UART UART4 TX 41 PA1 STL_RX UART UART4 RX 95 PB15 R_MOSI SPI2 SPI2 MOSI 94 PB14 R_MISO SPI2 MISO 93 PB13 R_CLK SPI2 SCK 92 PB12 R_CS SPI2 NSS 86 PH9 R_INT GPIO Input 84 PH10 R_RST G...

Page 16: ...TX UART TX I2C 17 BLVDD Backlight Power Supply 5V 18 BLVDD Backlight Power Supply 5V 19 BLGND Backlight Ground GND on display 20 BLGND Backlight Ground GND on display P3 pinout GND 1 2 3 3V VCC MOSI 3...

Reviews: