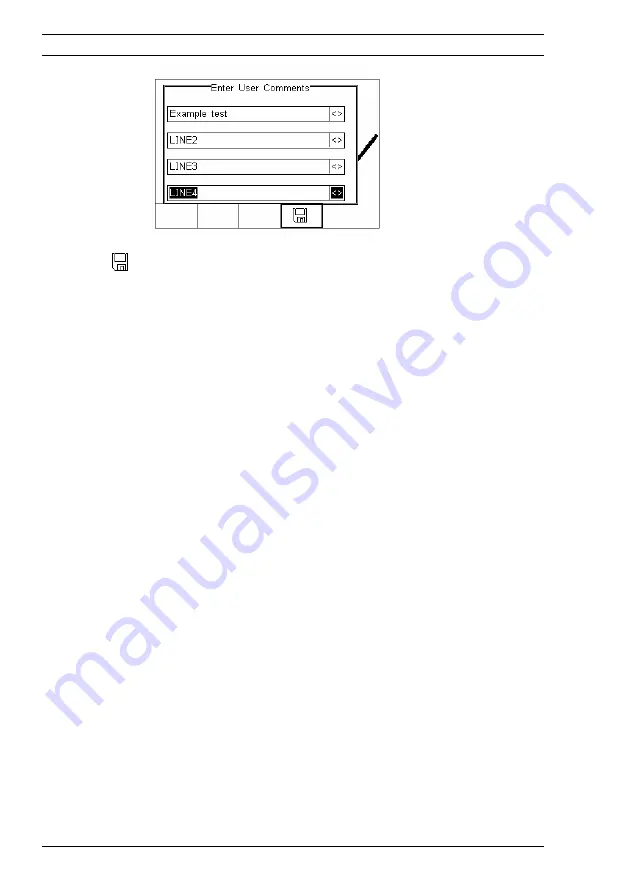
Rigel Medical Rigel BP-SIM Instruction Manual Download Page 42

Press the

button (F4) to store the comments.

Depending on the settings in Menu - Setup - System Config (see 3.3.2) , a number of
After Test options are possible;

New Test

– Automatically brings up the next test screen.

No further options or viewing of results available

Download

– Automatically down loads the test results to the PC (see 7.1)

No further options or viewing of results available. The tester will return to the
home screen.

Print Label

– Automatically prints the test results to a thermal printer.

No further options or viewing of results available. The tester will return to the
home screen.

Test ‘n Tag

– Automatically prints a Test ‘n Tag label. (see 4.2)

No further options or viewing of results available. The tester will return to the
home screen.

Options Menu

– Provides a menu to allow further choices after a test. (see 4.3)

4.2.

Test ‘n Tag

The Rigel BP-SIM is compatible with the Seaward Test ‘n Tag and Test ‘n tag Elite
system To use the Test ‘n Tag printer, add your T’nT printer to the BlueTooth Favorites.
See 3.4

A detailed application note is available from the Rigel website on the used of Test’ n
Tag printers with the Rigel BP-SIM.

Please visit; http://www.rigelmedical.com/knowledgebase/

Operating Instructions

Rigel BP-SIM

42

Summary of Contents for Rigel BP-SIM

Page 1: ...Rigel BP SIM Hand Held Non Invasive Blood Pressure Simulator InstructionManual 370A550 Issue 1 0 October 2008 2008 Seaward Group Issue 1 0...

Page 2: ...cally by photocopying recording or in any manner without prior written consent from the SEAWARD GROUP This also applies to accompanying drawings and diagrams Due to a policy of continuous development...

Page 3: ...ces 15 3 1 3 Edit individual Test 17 3 1 4 Insert an individual test 18 3 1 5 Insert Custom Tests or Instructions 20 3 1 6 Create a new Test Sequence 22 3 2 Asset Trace Variables 24 3 3 System Config...

Page 4: ...52 6 1 View Results 54 6 2 Search the database 55 6 3 View Data Options 56 7 DATA TRANSFER 57 7 1 Download to PC 57 7 2 Upload from PC 58 7 3 Configuration Data 59 7 3 1 Receive Config Data 61 7 4 Loa...

Page 5: ...Laboratory Use EN 61326 1 2006 EMC Requirements for Measurement Control and Laboratory Equipment The tests have been performed in a typical configuration This Conformity is indicated by the symbol i...

Page 6: ...o persons Important follow the documentation This symbol indicates that the operating instructions must be adhered to in order to avoid danger If the BP SIM is used in a manner not specified by the ma...

Page 7: ...tem leak tests and over pressure tests An integral digital manometer also enables highly accurate static pressure measurements to be taken using a wide range of selectable pressure units The new Rigel...

Page 8: ...c leaks and over pressure valves Prepared for PPM Protocols Configured for automatic performance testing of a variety of parameters Full Keyboard Easy data capturing and asset management Intuitive Use...

Page 9: ...2 Larger Red key Stop Off Key 3 Larger Green Start On key 4 4 Programmable soft keys below display 5 Alpha Numeric keyboard Up Down and Left Right cursor control 6 Power Supply inlet 7 Pneumatic inter...

Page 10: ...Elite system Our Test n Tag systems allows you to print customised Thermal PASS FAIL labels The benefits of using the Test n Tag printers are Robust and durable labels Resistant to most solvents used...

Page 11: ...to follow menu structures but also allows the user to operate the tester using intuitive icons to speed up their test routines Below are of some of the icons used in the Rigel BP SIM Escape Add Copy...

Page 12: ...ssword is set for the new user please enter the password case sensitive In case a password is lost and the unit is blocked please call our helpdesk on 44 0 191 5878701 or contact your local distributo...

Page 13: ...ace Variables Generate default list of variables see 3 2 Systems Config Configure default test options see 3 3 Blue Tooth Favourites Setup your Blue Tooth devices see 3 4 User admin Setup users and pr...

Page 14: ...etc are available 3 1 2 View Delete or Copy an existing Test Routine Preset test sequences cannot be deleted or changed by the user however alterations are possible by producing a copy of the default...

Page 15: ...l provide an overview of the Test Sequence on the Favourite Blue Tooth Printer See 3 4 for help on setting up Blue Tooth devices Delete Sequence will remove the highlighted test sequence from the memo...

Page 16: ...and enter the Name and or Class required To change to upper or lower case or use language specific characters press the button F1 and select the required entry To Delete a character press the button...

Page 17: ...ow keys and press the button F2 To go back to the previous menu highlight the test using the Up Down arrow keys and press the button F3 To modify an individual test highlight the test using the Up Dow...

Page 18: ...ous menu without changes Repeat this action for every test that requires editing Once all the requires tests are programmed press F3 to exit 3 1 4 Insert an individual test To insert an individual tes...

Page 19: ...nce the desired test has been highlighted confirm using the OK button F4 and finally confirm to insert into the test Sequence Pressing the button F3 will return to the previous screen without changes...

Page 20: ...t Custom Test as the nature of the test This will create a unique test sequence The maximum number of characters in the test description or instruction is 255 To insert a Custom Test highlight the pla...

Page 21: ...press the button F4 or exit using the button F3 and return to the previous screen without changes being made Further tests can be inserted or deleted by following the steps described herein To exit an...

Page 22: ...Setup followed by Test Sequences from the menu The following screen displays the list of default and customised tests available Copied Test Sequences will appear in the list with an pre fix From this...

Page 23: ...ss the button F2 To return to the previous menu without changes press the button F3 To confirm the entry press the button F4 Next step is to save the name of the newly create Test Name by pressing the...

Page 24: ...Asset trace variables may consist of a maximum of 25 characters and can be selected prior to each test when using the Rigel BP SIM in automatic mode The following variables can be added to the test r...

Page 25: ...below The System Config menu provides the following features 3 3 1 Asset ID Provides automatic Asset ID configuration Use the Left Right Keys to select between Each variable entered during the automa...

Page 26: ...uccessful or failed tests Use the left and right keys to select from the following Always Comment field is displayed after each passed or failed test On Pass Comment field is displayed after a passed...

Page 27: ...Blue Tooth Favourites In order for the Rigel BP SIM to automatically connect to the correct Bluetooth accessory details of that accessory must be entered into the Bluetooth Favourites list The Bluetoo...

Page 28: ...l search for all discoverable Bluetooth devices within a 10m range The time taken to perform the search will vary depending on the number of Bluetooth devices in range A progress bar will show during...

Page 29: ...ites Turn off or disable unused Bluetooth devices when configuring Favourites Use the up down keys to highlight the required device in this case SELLT023i and press the button F4 SELLT023 is now place...

Page 30: ...by pressing the button F4 Press the button F4 to save Bluetooth Favourites settings All Bluetooth devices have a unique ID The Bluetooth ID is shown when a device is added to the Favourites list Repea...

Page 31: ...ary to select another device Press F4 button to save changes When all your favourite devices have been set up press F4 and they will be saved 3 5 User Admin The User Admin feature allows the user to p...

Page 32: ...minutes Note 0 minutes will deactivate the AutoSwitch Off feature Data Entry Sets the tester up to take data entry from Barcode or Keypad only Use the up down left and right keys to select Barcode or...

Page 33: ...user Admin rights are required for this feature Alternatively new users can be created in the User Profile menu see below Note A brand new Rigel BP SIM will automatically default to admin rights so n...

Page 34: ...all users have FULL User Rights Select the applicable user name use the Up Down Keys to navigate through the menu use the Left Right Keys to activiate yes or de activate no certain features See menu...

Page 35: ...ature of Flash memory is such that when records are deleted only the reference to the data is removed The data still remains and will use memory space The memory must be erased in order to release mem...

Page 36: ...ings including All Asset Trace Variables Test Sequences User Admin Test Codes and System Config Warning Restore Factory Settings cannot be undone and will remove all the customised items described abo...

Page 37: ...ate time of test Multiple entries can be applied using the same Asset ID number In this case the memory will hold all entries and differentiate using the test date Test Sequence The Rigel BP SIM comes...

Page 38: ...ta has been entered and confirmed See next chapters for more details 4 1 Performing an Automatic Test The automatic mode provides an option to test all available tests NIBP simulations Leak Test Overp...

Page 39: ...ys to select the required Test Sequence 4 Enter the required test period in months 5 Returning to the Asset Details screen the button F2 provides the user with the option to modify or create a new Tes...

Page 40: ...bles that are de activated set to NO in the Setup menu section 3 2 will not appear during the automatic tests Note that a maximum of 40 individual entries are available for each Trace Variable Additio...

Page 41: ...ng the STOP button F3 during any test will bring up the failure menu see 4 1 1 At the end of the test the user has the ability to enter comments See 3 3 3 for more information on how to activiate comm...

Page 42: ...s or viewing of results available The tester will return to the home screen Test n Tag Automatically prints a Test n Tag label see 4 2 No further options or viewing of results available The tester wil...

Page 43: ...tions F3 To view the options menu select the button F4 from the test details screen The options menu provides the following sub menu View Results will display the results of the test see section 4 4 U...

Page 44: ...on to review the data Use the Up and Down keys to scroll through the screen Use the button F2 to return to the Test Details screen The button F4 provides extra option to print results label or Test n...

Page 45: ...ction of NIBP tests Leak tests Static pressure calibration Pop off valve test Manometer function Press NIBP F3 from the start screen When NIBP is selected a number of options will be available NIBP Te...

Page 46: ...ic to a manufacturer for example Additional manufactures will be developed and can be uploaded through new firmware revisions from our website http www rigelmedical com downloads asp Adult Infant Togg...

Page 47: ...the required pulse strength to simulate different volume strength Note that the settings Low Medium High are not directly linked to any physiological condition Once the selections are complete select...

Page 48: ...pulse symbol will be shown 5 2 NIBP Leak Test In the NIBP leak test the user is able to test the pneumatic leakage within the system The settings available are Start Pressure Timer seconds Note Prior...

Page 49: ...nds ie 7 2 mmHg Press START F4 to repeat the test Press F2 to return to start menu 5 3 NIBP Pop off Test The Pop off test allows the user to verify the correct operation of the protection valve within...

Page 50: ...the BP SIM will show the set point of the protection valve ie 331 mmHg Press START F4 to repeat the test Press F2 to return to start menu 5 4 NIBP Manometer Mode The BP SIM has a built in manometer fu...

Page 51: ...he engineering unit from the drop down box using the left and right keys The manometer will automatically convert the pressure to the desired pressure unit Press F2 to return to start menu 5 5 Set Zer...

Page 52: ...view of all available records in the memory identified by Asset ID Site and Pass or Fail Use the up and down arrow keys to scroll through the database When the desired record is highlighted press the...

Page 53: ...eturn to the main View Data screen In the Test Details screen press the button F4 to view the following options View Results will display the results of the test see section 6 1 View Sequence will dis...

Page 54: ...roll See Appendix B 6 1 View Results From the Test Details screen select button F4 Use the up and down keys to select the view results option Press the button F4 to display the view text results scree...

Page 55: ...Use the up down left and right keys to navigate this screen The default setting is which includes all records that Passed To search for more specific criteria fill in the required fields by either us...

Page 56: ...F3 to leave this screen 6 3 View Data Options From the main View Data screen press the button F2 This will present an options menu to allow the user to Print All Labels Will download all records with...

Page 57: ...feature is used to download records to a PC Select Download to PC and press the button F4 to accept The Rigel BP SIM will now attempt to make a Bluetooth connection with the Computer that has been con...

Page 58: ...umber of records that will be downloaded Ensure that the PC application is ready to receive data then press the Send button F4 A progress bar as shown below will now follow the data transfer until dow...

Page 59: ...rigelmedical com knowledgebase 7 3 Configuration Data This feature can be used to transfer store or modify the current Trace Variables User Profiles and Comment lists to from a PC It can be used to co...

Page 60: ...fer exe application on your PC and check that the Com Port is correct for the Bluetooth USB adaptor being used with the P C The baud rate will default to the correct value of 57600 In the application...

Page 61: ...u in the task bar See below Close down the Application and open the text file using word pad or equivalent The downloaded information can be used to clone other Rigel BP SIM s or modified to add addit...

Page 62: ...the format of the configuration file exactly matches that specified Note The Config file must be ASCII text and the last entry must be the END statement 7 4 Load TnT Logo A bitmap logo can be transfer...

Page 63: ...menu in the task bar This will open a window allowing you to select the Bitmap file Select the required Bitmap and click on Open The Bluetooth Downloader will now transfer the file to the Rigel BP SIM...

Page 64: ...IM s Firmware version Hardware version Calibration status Last Calibration Date Serial Number Blue Tooth ID Select ABOUT from the menu below Use the scoll keys F3 to toggle between the different infor...

Page 65: ...u have this information available when contacting Rigel Medical for Technical Support or Service See chapter 9 for more information on Service and Calibration Procedures Operating Instructions Rigel B...

Page 66: ...should always be taken when using transporting and storing this type of equipment Failure to treat the product with care will reduce both the life of the instrument and its reliability If the Rigel B...

Page 67: ...l com calibration seaward co uk www seaward co uk www rigelmedical com Prior to returning your unit for service please contact our service department to obtain a Returns Number By obtaining a Returns...

Page 68: ...omatic max 410 mmHg Digital Manometer 0 410 mmHg Pressure Accuracy 0 5 FS Pressure Units mmHg inHg kg cm2 cmH2O mBar PSI inH2O and kPa General Operation Battery cell insitu charge Battery charger 110...

Page 69: ...ode View Data Data Transfer Download to PC Upload fro PC Configuration Data Load T nT Logo Setup Test Sequences Test Codes Asset Trace Variables System Config Bluetooth Favourites User Admin Preferenc...

Page 70: ...lease refer to section 3 5 of the Rigel BP SIM instruction manual rint functions are available directly after a test when the options menu is selected in the System Configuration See section 3 4 of t...

Page 71: ...see below To change the label title default is Rigel Test n Tag Label highlight the text field using the up and down arrow keys Use the keyboard to enter your text To select the required printer selec...

Page 72: ...Seawar d Test n Tag Label s Labelm at er i al Pol yest er LabelSi ze 1 x 3 5 25 x 90 mm PASS Layout FAI L Layout Bar code Layout Operating Instructions Rigel BP SIM 72 Seaward Test n Tag System The S...

Page 73: ...l logo or text on the top part of the label This can either be programmed in the printer or in the Rigel BP SIM A custom layout monochrome bmp file can be uploaded in the Rigel BP SIM See paragraph 7...

Page 74: ...ration See section 3 4 of the Rigel BP SIM manual or from the View Data menu see section 6 of the Rigel BP SIM manual To select the correct printer select the printer in the Setup screen as shown belo...

Reviews: