8 – English
nano
TM
1
2
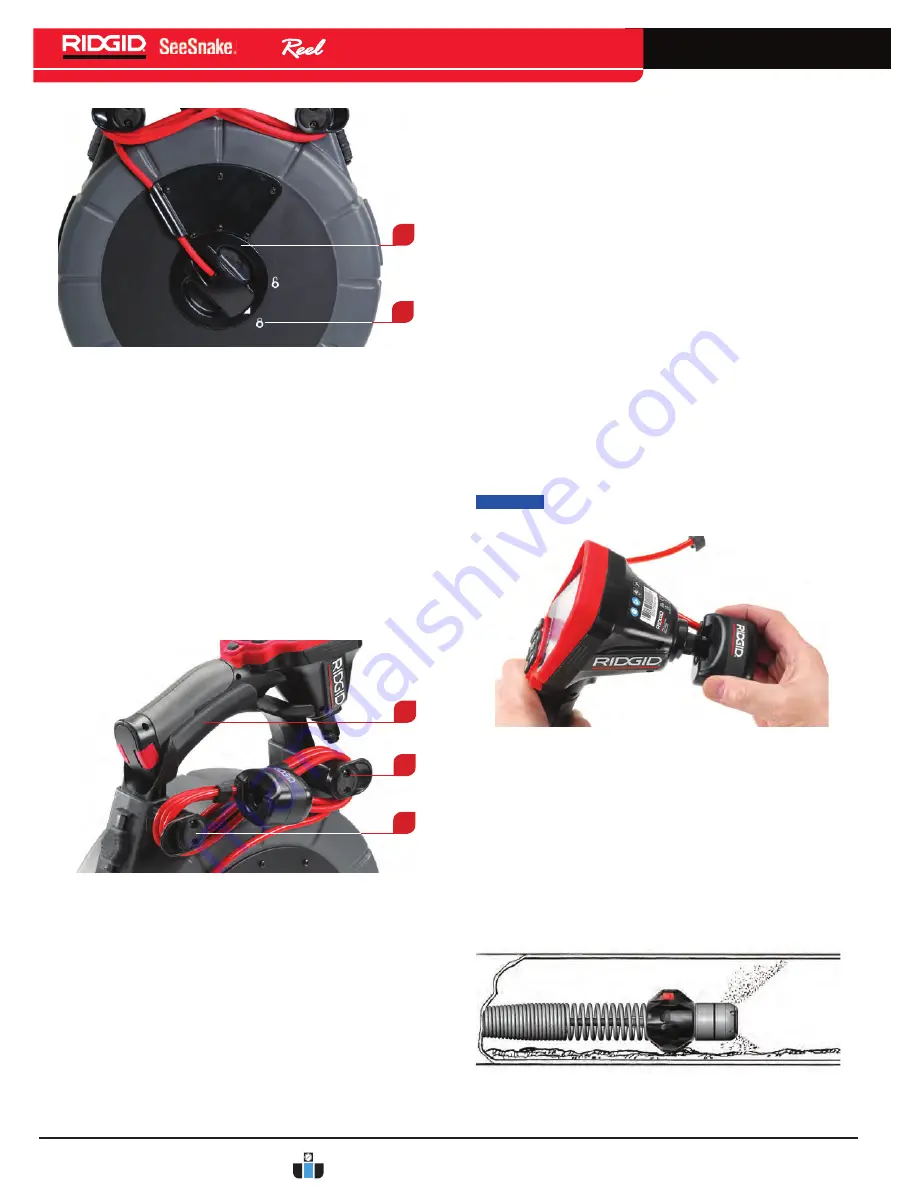
Figure 8 – Locking the Slip-Ring Module Cover
Reversing/Installing the Display Cradle
(micro CA-300 Inspection Camera)
If using the nanoReel with the micro CA-300, it may
be more convenient to face the micro CA-300 display
the other way when seated in its cradle. To reverse the
orientation of the cradle, perform the following:
1. Remove the micro CA-300 from the cradle
(See
Item 1, Figure 9)
. Use a Philips screwdriver to
remove the four screws holding the cord wrap arms
and the cradle’s support arms to the case openings
(See Item 2 and Item 3, Figure 9)
. Remove the
cord-wrap arms after removing the screws.
1
2
3
Figure 9 – Cradle Support and Cord-Wrap Arms
2. Use one of the screws to remove the nuts from
the backside of the cradle. The nuts are friction-
fitted into the holes on the opposite side of the
cradle from the cord-wrap arms. Extract the nut by
inserting a screw from the back and threading it
two or three turns into the nut.
3. Without taking the nut off, insert the screw and nut
into the hole on the opposite side of the case. Tap
the screw firmly with the handle of the screwdriver
to seat the nut into the friction-fit at the bottom of
the hole.
4. Unthread the screw. Repeat for each of the
remaining three nuts.
5. Position the cord-wrap arm and cradle on the same
side of the case, facing in the opposite direction.
Make sure the cord-wrap horns point outward.
6. Start each screw into its nut by hand. Tighten the
screws hand-tight with a screwdriver.
7. Replace the display unit in the cradle.
Install the display cradle using a similar process.
Connecting the micro CA-300 Inspection
Camera to the nano
Reel
System
Align the micro CA-300 Camera Connector Plug with the
plug on the micro CA-300 Camera, slide it straight in,
and seat it squarely. The curved face of the connector
plug on the system cable faces upward, sliding under
the forward edge of the micro CA-300 camera monitor
when fully seated (
See Figure 10)
.
NOTICE
To prevent damaging the plug, do not twist
the connector plug.
Figure 10 – Connecting the micro CA-300 Camera
Monitor
nanoReel
Ball Guides
Ball guides help center the camera in pipes and keeps
the camera clear of bottom sludge in the pipe. Ball
guides also improve picture quality, allows the camera
to see equally in all directions, and keeps the lens free
of sludge by bringing the camera closer to the center of
the pipe.
Figure 11 – Ball Guide in Use
www.calcert.com
1.800.544.2843
0
5
10
15
20
25
30


