background image

SubliJet-R: Ricoh SG 7100DN – Installation Guide

Step 1 of 2: PowerDriver V4 Download & Installation

PAGE 14

 of 15 >>

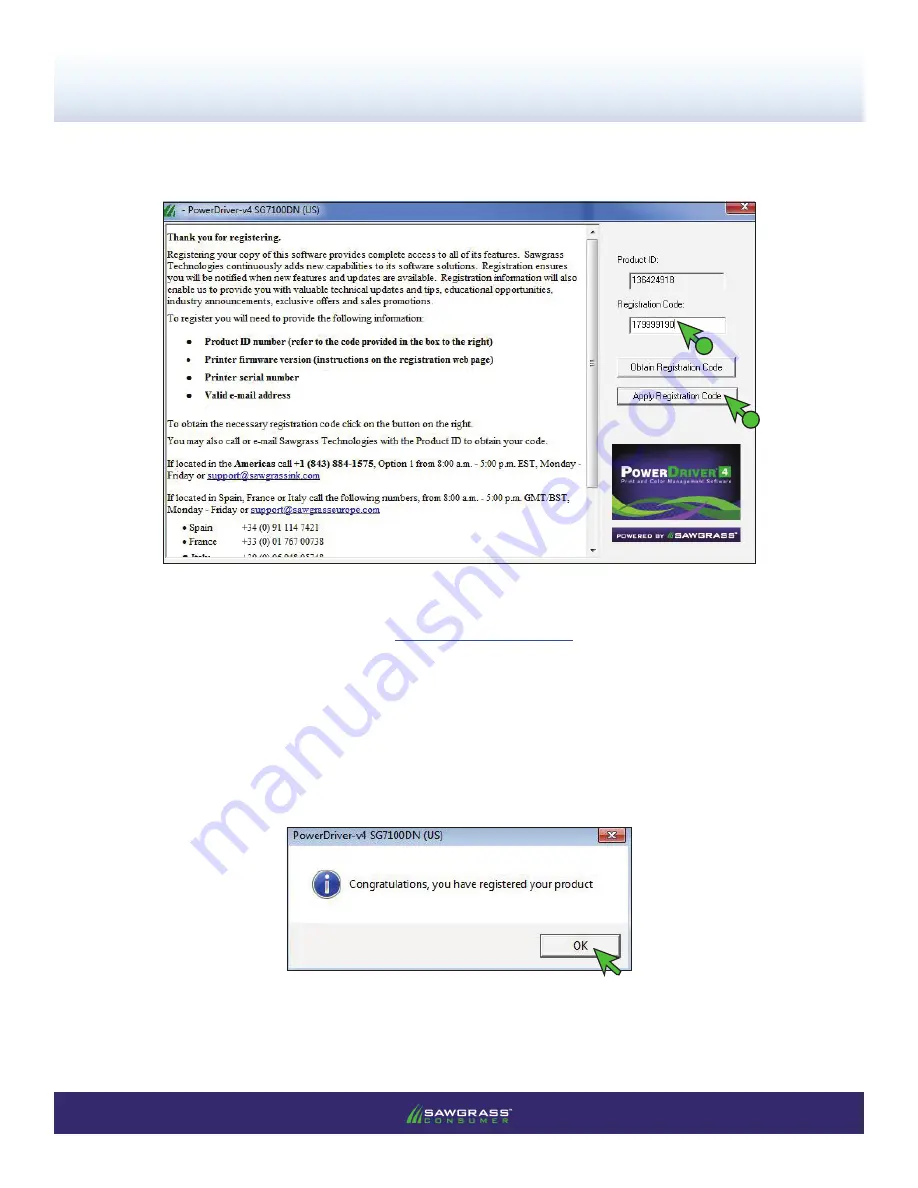
27)  When the email with the 

Registration Code

 is received, enter it into the Registration Code text box and 

click 

Apply Registration Code

 (see 

FIGURE 27

). 

FIGURE 27

A

B

28)  The message pictured below, confirming that registration was successful, will appear.  Click 

OK

 to  

continue (see 

FIGURE 28

). 

FIGURE 28

Note:  

If you have difficulties with registering online, note the Product ID described in step 25 above 

and call 

843-884-1575, Option 1 

or email 

[email protected]

.  Registration codes via phone 

or email are provided 8:00 am – 5:00 pm EST, Monday – Friday.  Also, separate registration codes are 
required for every machine on which the PowerDriver is installed.  

Summary of Contents for SG 7100DN

Page 1: ...THE PRINTER BEFORE INSTALLING SAWGRASS SUBLIJET R INK CARTRIDGES DURING DOWNTIME IT IS HIGHLY RECOMMENDED TO LEAVE THE PRINTER POWERED ON TO ALLOW THE RICOH AUTOMATIC MAINTENANCE UTILITIES TO KEEP THE...

Page 2: ...located on the Sublijet R SG7100DN PowerDriver V4 Installation and Configuration webpage on sawgrassink com and can be accessed by the link provided above Steps 1 Download install and register the Su...

Page 3: ...m the drop down list that appears select SubliJet R Ricoh SG 7100DN then Windows 7 and 8 see FIGURE 1 FIGURE 1 B A C D 2 Click on the Installation Configuration Instructions button see FIGURE 2 FIGURE...

Page 4: ...on the link in Step 3 Download and install the Ricoh Driver and Sawgrass PowerDriver V4 see FIGURE 3 FIGURE 3 4 On the webpage that appears click the link for the Ricoh SG 7100DN in the PowerDriver se...

Page 5: ...begin downloading into the Downloads folder on your computer When complete the download message at the bottom of the screen will give you the option to Run Open or View downloads Click Run see FIGURE...

Page 6: ...e Step 1 of 2 PowerDriverV4 Download Installation PAGE 4 of 15 7 Select the appropriate language and click OK to continue see FIGURE 7 FIGURE 7 A B 8 Verify that the PowerDriver is for the correct pri...

Page 7: ...2 PowerDriverV4 Download Installation PAGE 5 of 15 9 If you agree with the terms of the License Agreement click I Agree see FIGURE 9 FIGURE 9 10 Click Install to allow PowerDriver to be installed into...

Page 8: ...displayed during this process see FIGURE 11 FIGURE 11 FIGURE 12 12 Once the download has complete the Ricoh OEM driver will be installed You will need to accept the Software License Agreement for inst...

Page 9: ...DriverV4 Download Installation PAGE 7 of 15 13 Select Add a new printer and click Next see FIGURE 13 FIGURE 13 A B 14 Select how the printer is connected to your computer and click Next see FIGURE 14...

Page 10: ...ownload Installation PAGE 8 of 15 15 The following screen will appear asking you to select your printer see FIGURE 15 Highlight RICOH AficioSG7100DN RPCS R and click Next FIGURE 15 B A 16 Ensure your...

Page 11: ...the files are finished copying ensure your printer is powered ON and the computer will begin auto detecting the port see FIGURE 17 FIGURE 17 18 In the following screen you are asked to customize the S...

Page 12: ...iJet R Ricoh SG 7100DN Installation Guide Step 1 of 2 PowerDriverV4 Download Installation PAGE 10 of 15 19 Click Set Now to continue see FIGURE 19 FIGURE 19 20 Click OK to continue see FIGURE 20 FIGUR...

Page 13: ...PowerDriver installation see FIGURE 21 FIGURE 21 22 The following screen may or may not appear If it does you will need to accept the software license terms for the installation to continue If you agr...

Page 14: ...nstallation PAGE 12 of 15 23 Once this portion of the installation is complete the following screen will appear Click Close to continue see FIGURE 23 FIGURE 23 24 Click Yes when prompted to Register t...

Page 15: ...r it will be needed to register your software Click the Obtain Registration Code button see FIGURE 25 FIGURE 25 26 On the Product Registration web page that automatically opens fill in the required in...

Page 16: ...e message pictured below confirming that registration was successful will appear Click OK to continue see Figure 28 FIGURE 28 Note If you have difficulties with registering online note the Product ID...

Page 17: ...ation Save and close any work that may be open and click Finish see FIGURE 30 FIGURE 30 1 of the 2 steps of the installation and configuration process are now complete It is very important to complete...

Reviews: