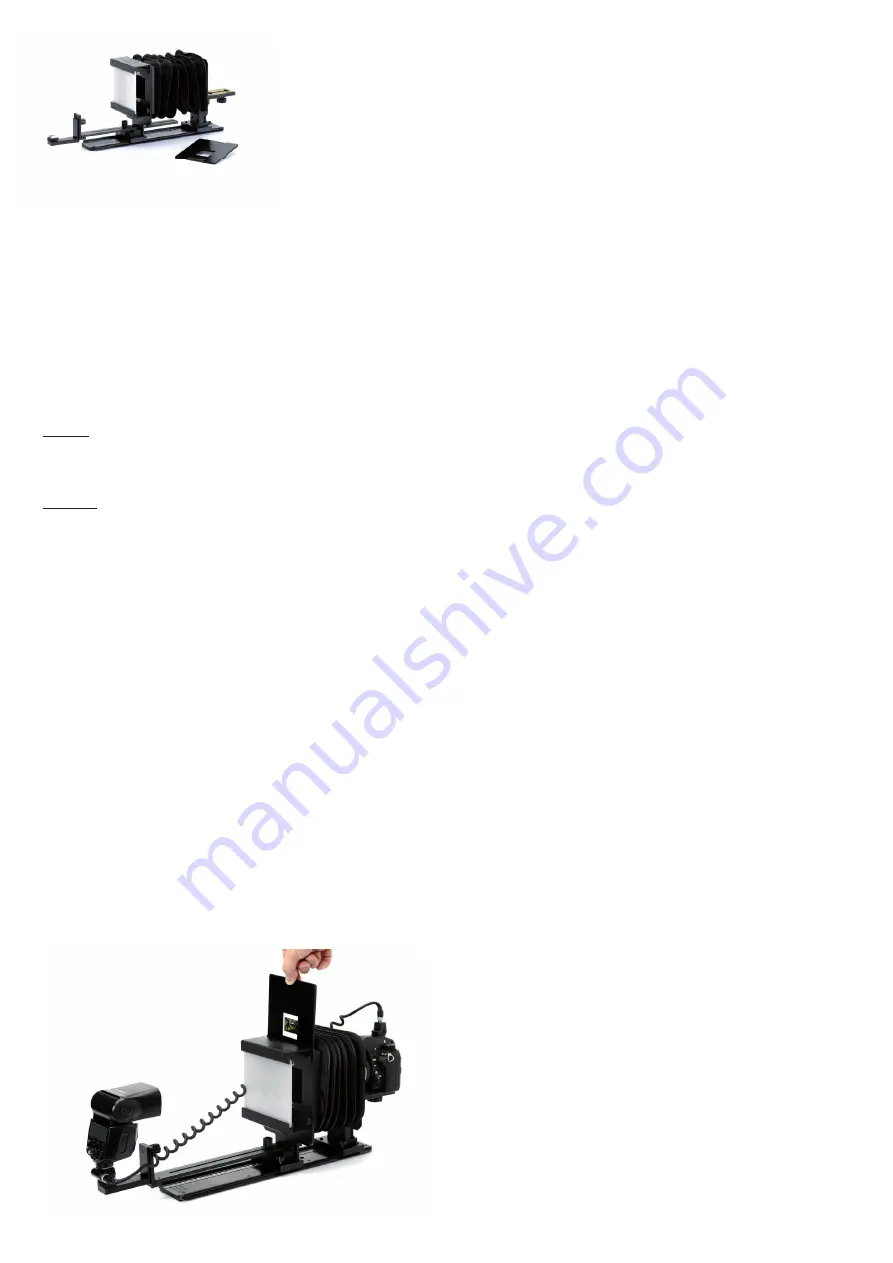
Pentax Film Duplicator is a product with which you can make a digital copy of
fi lms from 24x36 to 6x9 format by using your already owned digital SLR camera
and fl ash.
the kit includes a 24x36 format slide mount holder. other format slide mount holder
and sleeve holder are sold as optional accessories.
Features
Compatible camera:
Digital SLR camera with interchangeable lens (High resolution camera
recommended)
Recommended camera:
K-3, 645Z etc.
*When distance from camera bottom surface to optical axis is more than 95mm cannot be used.
Compatible lens:
With high resolution close-up lens (macro lens recommended)
Recommended lens:
With K-3
HD peNtaX-Da 35mm F2.8 Macro Limited
smc peNtaX-D Fa Macro 50mm F2.8
smc peNtaX- D Fa Macro 100mm F2.8 WR etc
With 645Z
smc peNtaX-Fa645 Macro 120mm F4
*Lens which diameter is over 90mm cannot be used.
Compatible Lighting:
Recommended model:
peNtaX aF540FgZ ii
peNtaX aF360FgZ ii
peNtaX aF200Fg
Bellows maximum length : approx. 328mm
Maximum length during usage: approx. 900mm
Dimensions: approx. 530mm (length) x 165mm (width) x 230mm (hight)
Weight: approx 2,200g
Attached accessory:
Mount holder 24x36mm (For 35mm slide mount)
Optional Accessories:
Mount holder 4.5x6/6x6 (645 format, 66 format compatible with slide
mount)
Mount holder 6x7/6x9 (67 format, 69 format compatible with slide mount)
Sleeve base mount (used to insert the sleeve holder to original fi lm
mounting position)
Sleeve holder 24x36 (for 35mm format sleeve)
Sleeve holder 4.5x6 (for 645 format sleeve)
How to use
1. Mount the camera
Set the camera to the camera mounting stage and lock it with a screw.
When you set the camera, be careful to adjust the optical axis of lens to
come to the center of the lens mount position placed on bellows back
board.
*after adjusting the height of the camera, screw the camera height adjustment tightly.
2. Connect the camera and fl ash with the cable
By connecting the peNtaX DSLR and aF540FgZii, we will use hot shoe
adapter Fg, hot shoe adapter F and exten-sion cord F5p. For connection,
please see the operating manual of camera and fl ash.
*When you are using wireless compatible camera and fl ash, you are not necessary to use the cord
but please confi rm that fl ash is under control before using.
*When you are using camera built-in fl ash for wireless control, please be aware the light will not
come around the bel-lows.
3. Mount the fl ash
Set the fl ash on the accessory shoe of the mounting stage after the fl ash
connection with the camera is confi rmed. please adjust the center of the
fl ash light to come to the center of the fl ash light diffusion board by using
the fl ash height adjust-ment.
4. Set the original fi lm on the mount holder and insert
to the fi lm duplicator
Using slide mount:
insert the mount holder from the upper part of original fi lm mounting
position
Using sleeve mount:
place the original fi lm which is set to the sleeve holder to sleeve mount.
Set the sleeve holder from the side part of original fi lm mounting position..
5. Adjust the position of bellows front board and
bellows back board
to decide the size, adjust the length of the bellows. to adjust the length
of the bellows, adjust the position of bellows front board and bellows
back board. When you adjust, continuously in-focus to come up with the
appropriate position.
*after the adjustment of bellows front and back board is done, please screw it tight to fi x the
position.
*You can fi x the either side of the bellows.
Shooting
confi rm the power of fl ash, adjust focus and shoot.
*as it becomes close up copy shooting, we recommend you will use a shooting mode which you
can manually change the aper-ture. We also recommend you to close 2-steps from open aperture
as it is generally said there is an advantage in resolution per-formance.
*We recommend you to use the fl ash mode which you can change at camera side, such as p-ttL
fl ash mode
*Depending on the image of your original fi lm, exposure might not match. use exposure
compensation or bracket shooting mode to adjust the exposure.
*to compensate the color of the image, use a image editing software.
FILM DUPLICATOR


