SURVIVOR OTR Flattop Truck Scale
14
Visit our website
4.3 Mount Block and Grout Installation (Option 2)
Use the following steps to install mount blocks and baseplate grout:
• Adjust leveling bolts until radius of block comes in contact with rocker link radius
• Jack the weigh module and remove setting blocks
• Slowly lower the weigh module until it rests on the load cell links
After the weigh module is lowered into final position, check each load cell mount assembly to ensure that the link is
plumb and that there is no binding or misalignment.
1. Use an industrial hammer drill to drill a 3/4'' hole into the concrete at least 6'' deep on one side of the mount frame
).
2. Drill a second anchor bolt hole on the opposite side of the baseplate. Each mount requires two anchor bolts to prevent
longitudinal motion of the baseplate (
).
• Anchor bolts (7'' x 3/4'') with expansion heads are supplied with the scale
3. Insert bolts into holes drilled in foundation.
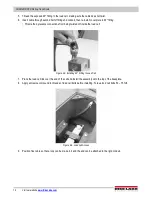
4. Install one washer and one nut on each anchor bolt. Place a driver pipe on top of the anchor bolt and use the long
punch to seat anchor bolts against baseplate (
).
Do not apply excessive force to the anchor bolts-- bending of the baseplate could occur.
When installing anchor bolts, make sure that there is adequate bolt length to extend into the concrete foundation.
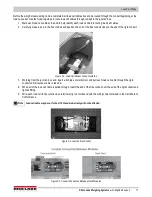
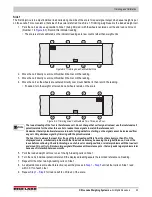
Figure 4-12. Temporary Wooden Forms Around Baseplate
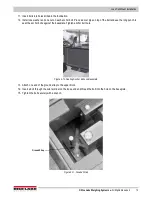
5. Attach one end of the ground strap to the upper block.
6. Insert a bolt through the wire terminal on the loose end and thread the bolt into the hole on the baseplate.
7. Tighten the bolt securely with a wrench (
).
8. Erect temporary wooden forms around each baseplate and pour 9000 PSI, non-shrinking, epoxy or cement grout into
the forms beneath the baseplate (
). A funnel with a long tube can be used to pour grout into the forms while
working from above the access hole.
Figure 4-13. Completed Baseplate Grouting
9. After pouring the grout, tap the form several times with a hammer to remove any air voids beneath the baseplate.
• It must have even support from continuous grout contact
10. Remove the temporary wooden forms when the grout is set (
).
• Grout should be allowed to set for at least 24-hours before removing the wooden forms
11. Tighten anchor bolt nuts after the grout has hardened.
Note
Note


