CLS Series Wired to Wireless Conversion Instructions
© Rice Lake Weighing Systems
●
All Rights Reserved
3
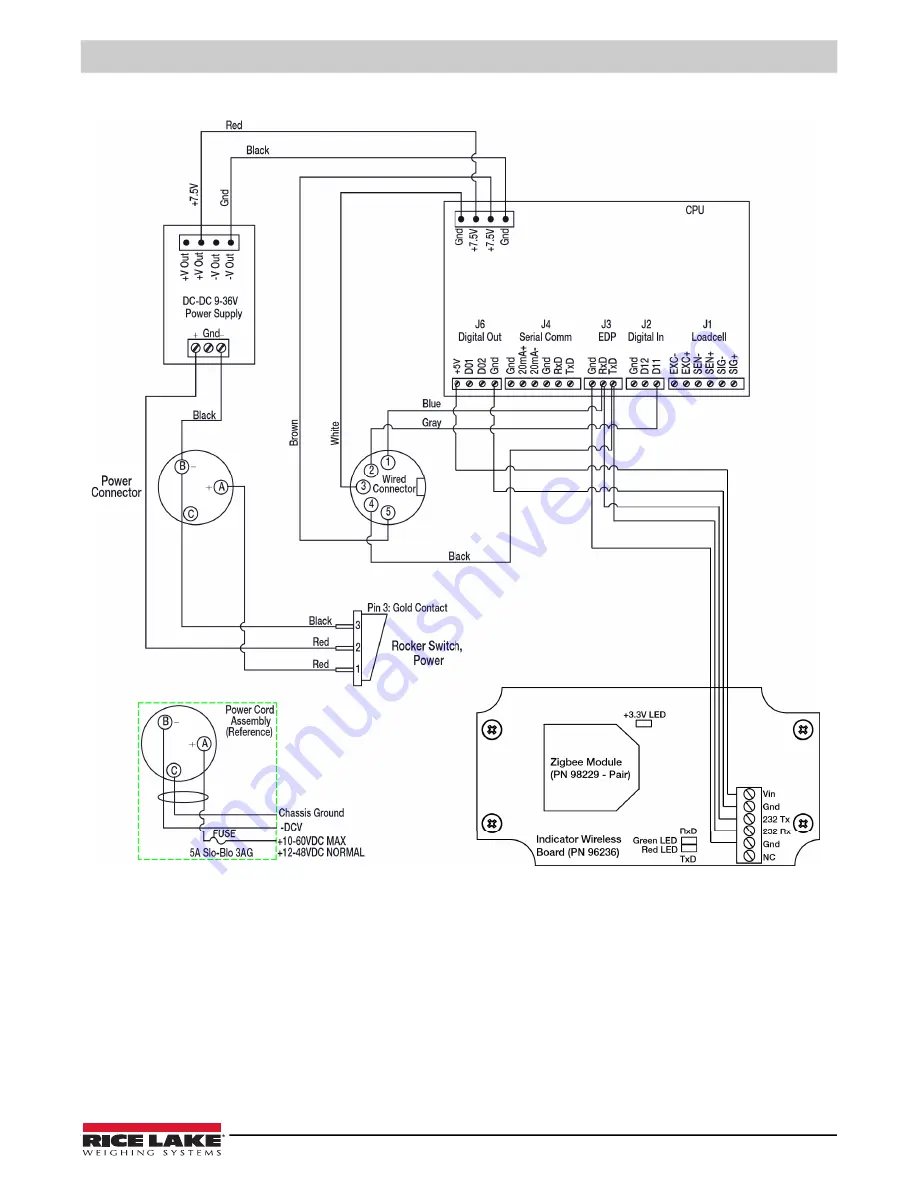
CLS-420 Wiring Diagrams
Figure 3. CLS-420 Indicator Wiring Diagram
Red
Black
Blue
White
Green
Page 1: ...nd the junction box which is located on the forklift and is powered by a lithium ion battery housed in a battery box Figure 1 Wireless Components for Communication To convert the unit from wired to wi...
Page 2: ...install the wireless sub assembly box to the indicator 1 Use the attached screws and screw the wireless sub assembly box onto the back of the indicator 2 Open the rear of the indicator 3 Run the wire...
Page 3: ...CLS Series Wired to Wireless Conversion Instructions Rice Lake Weighing Systems All Rights Reserved 3 CLS 420 Wiring Diagrams Figure 3 CLS 420 Indicator Wiring Diagram Red Black Blue White Green...
Page 4: ...box is welded onto the cover plate There is an On Off switch to conserve the life of the battery and an LED to indicate when the battery is on Battery life is approximately 24 hours of continuous use...
Page 5: ...attery to supply power to the indicator when using a wireless version of the CLS 420 The lithium ion battery is located on the top of the cover plate in a painted enclosure Charging the Lithium Ion Ba...
Page 6: ...eft bay of the charger and press the button on the front label See Figure 7 on page 5 This initiates the recalibration sequence in the left bay only The process can take up to nine hours to complete a...