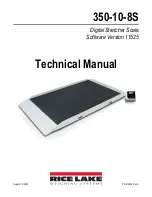
Rice Lake 350-10-8S Technical Manual Download Page 13

Operation

© Rice Lake Weighing Systems


 All Rights Reserved

9

3.2 Weighing

Use the following steps to weigh.

1. Press 

 to turn on the scale. 

0.0

 appears on the display along with the 

ZERO 

annunciator.

2. Place the patient on the scale. The patient’s weight is displayed, the 

LOCK

 annunciator is on and the indicator beeps 

to indicate the end of the weighing process.

3. Press 

 to change the display from lb to kg and vice-versa.

4. Press and hold 

 until 

OFF

 displays to turn off the scale.

3.3 Hold/Release Function

Use the following steps to use the Hold/Release function.

1. Press 

 to turn on the scale. 

0.0

 prompts along with 

ZERO

 on the display.

2. Press 

 once the patient’s weight stabilizes. The patient’s weight and the 

HOLD 

and

 LOCK

 annunciators remain 

on the display when the patient is off the scale.

3. Press 

 again to return the scale to zero.

Pressing 

 will not work while using Hold/Release function.

Pressing 

 prior to the patient getting on the scale will


also hold the weight display.

3.4 Preset Tare 

Use the following steps for the Preset Tare function prior to patient weighing if additional items are being used by the patient.

1. Press 

 to turn on the scale. 

0.0

 appears on the display along with the 

ZERO

 annunciator.

2. Place additional item(s)


on the scale.

3. Press 

 until the display returns to 

0.0

 and 

NET

 annunciator appears on the display.

4. Remove additional item(s) from the scale. The weight displays with a negative symbol to the left of it.

  Not removing the additional item(s) prior to patient weighing will also work.

5. Position the patient and additional item(s) on the scale. The display identifies the patient weight. The 

NET

 annunciator 

is still active. The weight of the additional item(s) remains stored in memory for the duration of this weigh in.

6. To cancel the tare weight, remove patient from the scale and press 

 until 

NET

 disappears from the display and 

the display turns back to 

0.0

 and 

GROSS

 appears.

  Tare weight is also canceled when the scale is turned off.

3.5 Toggle Tare

Use the following steps to use the Toggle Tare function when the additional item to be weighed is known.

1. Press 

 when the scale is empty and 

0.0 

displays. The default values prompts while 

0.0

 is flashing on the display 

(default is programmed to be 33.0 lb/15.0 kg).

2. Use 

 and 

 to adjust the value. Press 

 to start the tare function. The 

NET

 annunciator turns on instead 

of the 

GROSS

 annunciator.

Note

Note

TARE

T

Note

TARE

T

Note

TARE

T

ENTER

Summary of Contents for 350-10-8S

Page 1: ...350 10 8S Digital Stretcher Scale Software Version 11525 Technical Manual PN 213455 Rev A August 18 2022...

Page 2: ...respective companies All information contained within this publication is to the best of our knowledge complete and accurate at the time of publication Rice Lake Weighing Systems reserves the right to...

Page 3: ...raining or obtained by calling 715 234 9171 and asking for the training department Revision History This section tracks and describes the current and previous manual revisions for awareness of major u...

Page 4: ...2 Weighing 9 3 3 Hold Release Function 9 3 4 Preset Tare 9 3 5 Toggle Tare 9 3 6 Using the Body Mass Index BMI Function 10 3 6 1 LB Mode 10 3 6 2 KG Mode 10 3 7 Troubleshooting 11 4 0 Configuration 12...

Page 5: ...rt 15 of the FCC Rules These limits are designed to provide reasonable protection against harmful interference when the equipment is operated in a commercial environment This equipment generates uses...

Page 6: ...rt the scale while someone is on the scale Do not allow minors children or inexperienced persons to operate this scale Do not use in the presence of flammable materials Do not use this product if any...

Page 7: ...parts are included and undamaged If parts were damaged in shipment notify Rice Lake Weighing Systems and the shipper immediately Parts contained in the shipping box include Scale Manual Indicator Part...

Page 8: ...located in the parts box in the original shipping box Use the following steps to attach the feet to the scale 1 Tip the scale onto its side using the recessed handle openings Ensure the scale base is...

Page 9: ...minimal clearance between the scale base and the floor without having the scale base contacting the floor Figure 2 5 Scale Base Clearance 5 It is important to ensure that the scale is completely level...

Page 10: ...remove the tilt stand bracket from the indicator to gain access to the load cell connection Figure 2 7 Remove Tilt Stand 2 Remove the four back retaining screws to remove the back cover to the indicat...

Page 11: ...e used for an extended period of time If the LO BAT indicator activates for accurate weighing replace the batteries or connect the scale to an AC power source as soon as possible 2 3 3 Power Connectio...

Page 12: ...I Pressing the BMI key enables access to the BMI Body Mass Index mode defaults when scale is turned on The patient is gets on the scale weight stabilizes and press the BMI key The display then asks fo...

Page 13: ...y the patient 1 Press to turn on the scale 0 0 appears on the display along with the ZERO annunciator 2 Place additional item s on the scale 3 Press until the display returns to 0 0 and NET annunciato...

Page 14: ...adjust the height value 5 Press 6 The BMI value and BMI annunciator are shown on the display Press to return to the Weighing mode and the BMI function will be turned off 3 6 2 KG Mode 1 Ensure that t...

Page 15: ...high E07 AD too low E10 Overload Scale has been overloaded Remove load from scale E4L BAT Battery low but still usable one bar left on indicator display E4U Battery low and unstable no bars left on in...

Page 16: ...the menus and or parameters Press to enter a displayed menu and or parameter Press or to scroll through values Press to save the displayed selection and move to the next parameter 4 2 2 Enter Numbers...

Page 17: ...cated in the back of the scale to enter the setup parameters for the scale Use a small paper clip small screwdriver or other similar object to press the setup switch 4 Once the setup switch is pressed...

Page 18: ...Use the Up Down arrow keys to increment decrement numbers 7 When done press ENTER key to move to the next parameter LOAD LOAD This is the amount of weight applied during calibration Can also be change...

Page 19: ...10 20 50 100 Values in lb 1 2 5 10 20 50 100 200 0 2 0 5 1 0 2 0 5 0 10 0 20 0 0 1 The display toggles between a numeric value and ROUND The decimal point location is set to the DISP parameter display...

Page 20: ...use the following steps 1 Press the ENTER key to change values 2 Use the Up Down arrow keys to change the available parameters 3 When done press ENTER key to move to the next parameter UNITS UNITS Un...

Page 21: ...e scale to enter the setup parameters for the scale Use a small paper clip small screwdriver or other similar object to press the setup switch on the back of the indicator under the cover 4 Prog displ...

Page 22: ...r on the scale until ID flashes 2 Press again 3 Continue to press to scroll through the various menu items 4 Once complete press again then Done displays 5 Press to start the weighing process Figure 4...

Page 23: ...weight was either in motion or out of range If displaying weight and not BMI the scale will send out the following 21 character string xxxxxxxxx SP uu SP mmmmm SP CR LF Example 60 1 KG PATIENT SP WEI...

Page 24: ...pe Protocol Commands Name ESC Character ESC Value with Parameters Description Reading R R Tells PC the scale is sending a reading immediately following this is the value that is sent Example ESC R ESC...

Page 25: ...Zero the scale F Show flash values used for the first flash process L USB On Off not available on USB communication Table 5 5 Maintenance Protocol Commands Escape Protocol Example 1 Escape Protocol E...

Page 26: ...ing the use of the USB driver Driver protections may need to be temporarily disabled on Windows 10 or later computers to allow for the installation of the USB driver 1 Connect the scale s indicator to...

Page 27: ...verall appearance of the entire scale for any obvious signs of damage Inspect the condition of the AC power adapter cord for cracking fraying or for broken or bent prongs 6 2 Cleaning Proper care and...

Page 28: ...s Automatic power off can be configured Environmental Operating Temperature 50 F to 104 F 10 C to 40 C Storage Temperature 0 F to 122 F 10 C to 50 C Humidity 85 Capacity 1000 lb x 0 2 lb 450 kg x 0 1...

Page 29: ......

Page 30: ...54868 USA U S 800 472 6703 Canada Mexico 800 321 6703 International 715 234 9171 Europe 31 0 26 472 1319 Rice Lake Weighing Systems Specifications subject to change without notice www ricelake com PN...

Reviews: