


User
Manual
of
Network
Camera
33
33
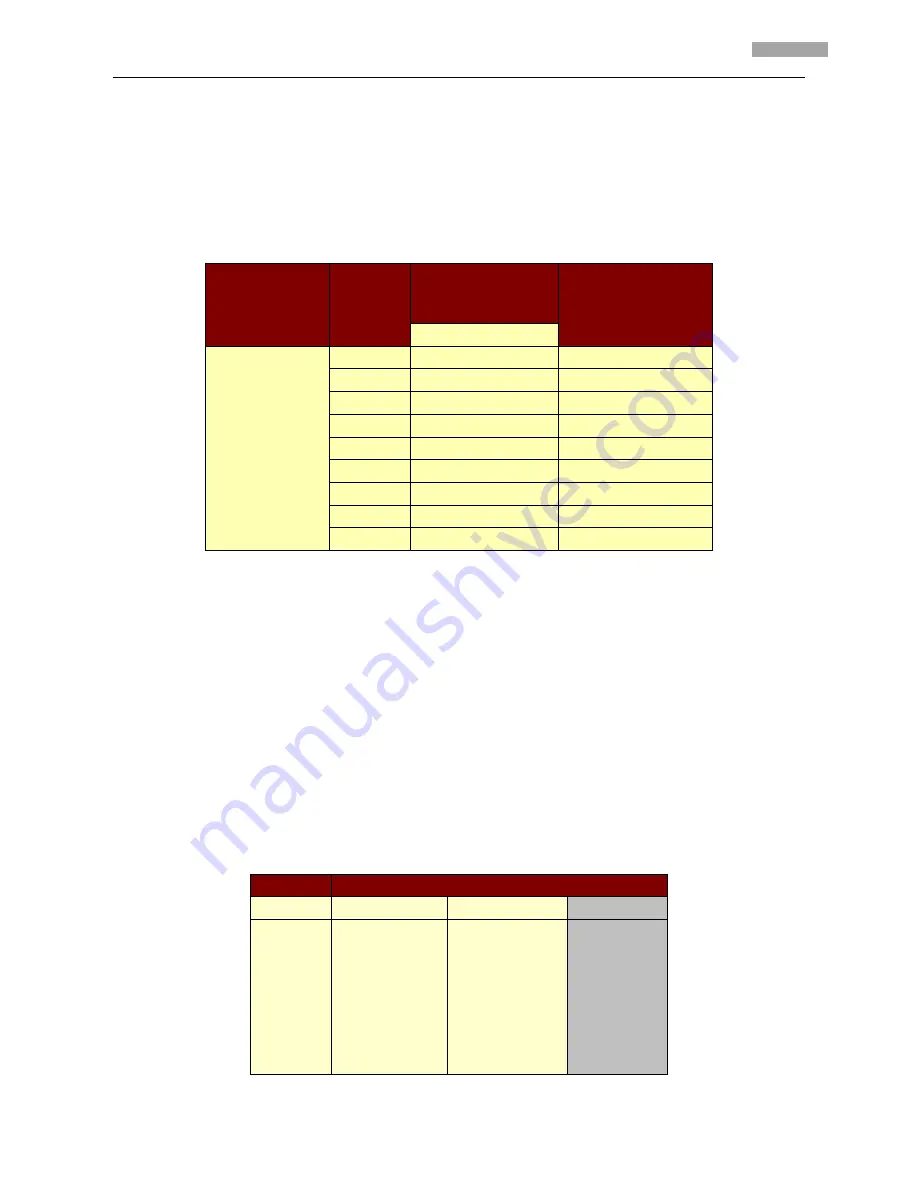
4.2.4
Frame
settings
FRAME
can’t
be
changed
by
pressing
left
/
right
button;
User
can
select
resolution
through
“configuration”
”remote
configuration”
“channel
configuration
”
“Frame
rate”;
The
relationship
between
frame
and
resolution
is
as
below
table:
Model
Resolution
Max.
Frame
Rate
Max
bitrate
(
recommended
)
NTSC
DS
‐
2CD852MF
‐
E
DS
‐
2CD752MF(
‐
E)
DS
‐
2CD752MF
‐
FB
UXGA
10
4M
HD720p
15
3M
SVGA
30
2.5M
4CIF
30
1.5~2M
VGA
30
1.5M
Dcif
30
1.5M
2cif
30
1.5M
Cif
30
384K~768K
Qcif
30
384K~512K
Note:
DS
‐
2CD852F’s
frame
and
resolution
relationship
is
different
from
above
table.
Please
refer
to
the
specifications
in
the
Appendix.
4.2.5
Shutter
settings
SHUTTER
can
be
adjusted
by
pressing
left
/
right.
And
there
are
three
options
in
this
item:
OFF,
auto
×
2
and
auto
×
5;
“OFF”
means
the
regulation
of
the
shutter
exposure
time
is
default;
“Auto
×
2”
means
the
regulation
of
shutter
the
exposure
time
is
considerably
wider;
“Auto
×
5”
means
the
regulation
of
the
shutter
exposure
time
is
at
its
maximum.
The
corresponding
frame
and
resolution
at
different
SHUTTER
modes
is
as
below:
60Hz
Resolution
OFF
Auto
×
2
Auto
×
5
QCIF
CIF
2CIF
DCIF
4CIF
VGA
SVGA
30fps
15fps
5fps
Summary of Contents for DS-2CD752MF-E
Page 1: ...NETWORK CAMERA User Manual V2 0 0 2009 8...
Page 49: ...User Manual of Network Camera 43 43...
Page 60: ...User Manual of Network Camera 54 54 Dimension mm 156 134 5 6 2 5 33 Weight 1400g 3 08lbs...
Page 61: ...User Manual of Network Camera 55 55 Dimension...
Page 63: ...User Manual of Network Camera 57 57 Dimension mm 156 134 5 6 2 5 33 Weight 1400g 3 08lbs...
Page 64: ...User Manual of Network Camera 58 58 Dimension...
Page 66: ...User Manual of Network Camera 60 60 Weight 900g 1 98lbs Dimension...
Page 69: ...User Manual of Network Camera 63 63 First Choice for Security Professionals...


