background image

3-4 FORK LIFT OPERATION

WARNING

TO AVOID SERIOUS INJURY OR DEATH:

NEVER LIFT LARGE ROUND HAY        

BALES OR OTHER LOADS ON THE

FORK LIFT ATTACHMENT THAT 

COULD ROLL BACK ONTO TRAC-

TOR OPERATOR AREA.

NEVER USE FORK LIFT ATTACH-
MENT TO LIFT OR SUPPORT
PEOPLE.

TRANSPORT LOADS LOW AND 
SLOW.

AVOID CONTACT WITH POWER 
LINES.

The fork lift attachment (Figure 3-3) is intended for
handling palletized material. It is recommended that
tractor be equipped with ROPS and seat belts. Use
the loader dump cylinders to give the forks the desired
tilt. Position the forks on their support rods to the
desired width so that the load will be carried approxi-
mately equal on each fork. Position load as far back
as possible.

3-5 QUICK HITCH OPERATION

The quick hitch (Figure 3-4) is designed to allow
easy mounting and dismounting of attachments from
loader. With attachment on flat, level surface, mount
as follows:

Tilt quick hitch slightly forward at top and slowly
drive into attachment.

Hook quick hitch under top cuff on attachment and
lift off ground using boom cylinders only.

Tilt quick hitch backward so that bottom of attach-
ment will swing into position. Release spring-loaded
pins into place behind hitch lug for operation.

To dismount the attachment:
Tilt quick hitch backward and rotate handles up to
disengage pins. Reverse the mounting procedure.

3-6 TRANSPORTING

When transporting on road or highway, day or night,
use tractor flashing warning lights unless prohibited
by law. Carry load as low as possible maintaining
adequate ground clearance and good visibility.
Reduce tractor ground speed when carrying a load.
Take extra care when traveling over rough terrain or
on slopes.

CAUTION

WHEN TRANSPORTING A LOAD, KEEP
THE ATTACHMENT AS LOW AS POSSIBLE
TO RESIST TIPPING IN CASE A WHEEL
DROPS IN A RUT.

Figure 3-3
Fork Lift Attachment

Figures 3-4 A, B, C, & D
Quick Hitch Attachment

Adjustable Forks

41

ALWAYS CHECK TO INSURE THAT QUICK

HITCH PINS ARE IN THE LATCHED POSI-

TION BEFORE OPERATING LOADER OR

ACCIDENTAL DISENGAGEMENT OF THE

ATTACHMENT COULD RESULT.

CAUT

I

ON

A.    Top Cuff       Quick Hitch Tilted Forward

B. Drive Into Attachment

C. Raise And Roll Back Attachment

D. Lower Spring-Loaded Pins

Spring Loaded 

Pins Raised

Summary of Contents for 2347 QT

Page 1: ...IL 60936 800 446 5158 Email parts servis rhino com LOADER This Operator s Manual is an integral part of the safe operation of this machine and must be maintained with the unit at all times READ UNDER...

Page 2: ...mplement to be used with all its safety equipment properly attached to minimize the chance of accidents BEFORE YOU START Read the safety messages on the implement and shown in your manual Observe the...

Page 3: ...RA PAGE Dealer Preparations Check List 4 Safety 5 Decal Location 22 Decal Description 24 Federal Law Regulations 29 I INTRODUCTION DESCRIPTION 30 1 1 Introduction 30 1 2 Description 30 II LOADER MOUNT...

Page 4: ...attachments for loader operations Buckets for lifting loose materials bale spear for lifting round bales fork lift for lifting palletized material Operators manual has been delivered to owner and he...

Page 5: ...5 SAFETY SECTION...

Page 6: ...azards and the degree of possible injury faced when operating this equipment Indicates an imminently hazardous situation that if not avoided WILL result in DEATH OR VERY SERIOUS INJURY Indicates an im...

Page 7: ...re operating the Tractor or Implement an operator on prescription or over the counter medication must consult a medical professional regarding any side effects of the medication that would hinder thei...

Page 8: ...se in the Operator s position exceeds 80db Noise over 85db over an extended period of time will cause severe hearing loss Noise over 90db adjacent to the Operator over an extended period of time will...

Page 9: ...eated or substantial breathing of hazardous dusts including crystalline silica could cause fatal or serious respiratory disease including silicosis Concrete masonry many types of rock and various othe...

Page 10: ...ury or death Read the Tractor operators manual for proper starting instructions SG 13 Operate the Tractor and or Implement controls only while properly seated in the Tractor seat with the seat belt se...

Page 11: ...ing the loader to suddenly move and drop Sudden dropping of the loader and attachment could result in serious injury SL 05 Use extra care when turning or stopping Allow for increased length and weight...

Page 12: ...least 25 of the total Tractor and Loader weight including the maximum load in the bucket or attachment on the rear axle Always wear your seatbelt and make sure the ROPS structure is fully deployed to...

Page 13: ...ted do not use the attachment Contact your dealer before using the attachment On level ground tilt the attachment down 90 degrees and lower it to the ground Lower the loader further to slightly raise...

Page 14: ...eet away from travel path SL 29 Always look behind you before backing up Make sure you are looking in the direction of travel A bystander could walk behind the tractor Running into a bystander can res...

Page 15: ...ent on the rear wheels to prevent tipping forward loss of steering control and possible injury Add counterweight if required when operating on slopes and proceed with the load uphill to prevent tippin...

Page 16: ...ry could result from crushing or pinching by the loader or attachment SL 06 Make sure the loader is properly attached to the tractor and the retaining pins securely lock the loader into position Impro...

Page 17: ...quipment before operating on roads or uneven ground Only transport the Tractor and Implement at the speeds which allow you to properly control the equipment Be aware of the operating conditions Do not...

Page 18: ...sed position Traveling with the bucket or plow in the raised position increases the chances of colliding with overhead obstructions and making the unit more prone to tipping over SNPO 37 READ UNDERSTA...

Page 19: ...netrable gloves safety glasses and use Cardboard to check for evidence of oil leaks If you suspect a leak REMOVE the HOSE and have it tested at a Dealer If oil does penetrate the skin have the injury...
Page 20: ...surfaces of the engine or muffler Use gloves and eye protection when servicing hot components Contact with a hot surface or fluid can cause serious injury from burns or scalding SG 38 Never allow anyo...

Page 21: ...ect and store the loader on firm flat ground Make sure the loader stands are properly installed and rest on firm ground or support blocks If the stands sink or fail the loader could fall causing serio...

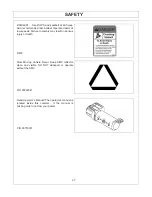
Page 22: ...the decals may occur while in shipping use or reconditioning Rhino cares about the safety of its customers operators and bystanders and will replace the safety decals on this product in the field fre...

Page 23: ...68 2 DANGER Crushing Electrocution Falling Hazard 9 D471 1 WARNING Handling Bales 10 D470 1 DANGER Use ROPS Seatbelt Rear Ballast 11 03200347 REFLCTR SMV Sign 12 00776031 1 _________ Canister Operator...

Page 24: ...SAFETY 24 Decal Description Rhino Left P N 49696 Rhino Right P N 51448 MODEL NAME 2347 QT 2347 QT Name...

Page 25: ...c pressure Never use hands to check for leaks Wear safety glasses oil impenetrable gloves and use cardboard to check for evidence of oil leaks If you suspect a leak remove the hose and have it tested...

Page 26: ...y and to avoid overturns Keep bystanders 10 feet away when operating loader When parking or servicing unit lower bucket to the ground on level hard surface stop engine set parking brake place transmis...

Page 27: ...e to comply may result in serious injury or death D470 Slow Moving Vehicle Decal Keep SMV reflector clean and visible DO NOT transport or operate without the SMV P N 03200347 Read Operator s Manual Th...

Page 28: ...xtended through slots at the bottom of the attachment bracket and the tapered side of pin is firmly seated against attachments slots Make sure the gap is not larger than 1 8 Tilt attachment down lower...

Page 29: ...for all machine movement to stop before servicing adjusting cleaning or unclogging the equipment except where the machine must be running to be properly serviced or maintained in which case the emplo...

Page 30: ......

Page 31: ......

Page 32: ......

Page 33: ...G DO NOT STAND UNDER LOADER WHILE REMOVING INSTALLING PARKING STANDS Tighten Nut To 85 ft lbs Pivot Pin Cuff NOTE When valve control is held open a squealing noise will be heard when cylinders bottom...

Page 34: ......

Page 35: ......

Page 36: ...rial loaded in a given period of time Time is lost if two or more attempts are made to fill the bucket on each pass LIFTING THE LOAD WARNING DO NOT LIFT OR CARRY ANYONE IN THE BUCKET OR ON ANY OTHER P...

Page 37: ...IS DANGEROUS EXTREME CARE IS RECOMMENDED DO THIS NOT THIS When transporting the load keep the bucket as low as possible to avoid tipping in case a wheel drops in a rut NOT THIS DO THIS DUMPING THE BU...

Page 38: ...DING FROM A BANK Choose a forward gear that provides sufficient ground speed for loading Exercise caution when undercutting high banks Dirt slides can be dangerous Load from as low as possi ble for ma...

Page 39: ...cise cut LOADING LOW TRUCKS OR SPREADERS FROM A PILE For faster loading minimize the angle of turn and length of run between pile and spreader Backgrade occasionally with a loaded bucket to keep the w...

Page 40: ...ssibility of the object rolling or sliding down the loader arms onto the operator 3 3 BALE SPEAR OPERATION The bale spear Figure 3 2 is intended for handling large round bales Before operation set tra...

Page 41: ...tachment and lift off ground using boom cylinders only Tilt quick hitch backward so that bottom of attach ment will swing into position Release spring loaded pins into place behind hitch lug for opera...

Page 42: ......

Page 43: ...nstall a seal repair kit Improper hydraulic valve Repair or replace valve operation Slow leakdown Worn control valve Have authorized Rhino dealer replace seals Worn cylinder piston seals Have authoriz...

Page 44: ...ce 12 Before operating the machine thoroughly read the operation section of this manual 13 Before operating read the maintenance section of this manual to be sure that any parts requiring lubrication...

Page 45: ...3 Tractor Hydraulic Kit Straight Adaptor 1 2 NPT to 3 4 JIC 3 4 16 JIC Threads 4 Hoses Mainframe To Tractor Outlets Through Quick Couplers Not Supplied Figure 5 4 Cuff Arrangement NOTE HOSES COMING FR...

Page 46: ...ket using 1 2 x 3 bolts lockwashers and nuts The slotted hole also requires a flatwasher as shown D Attach valve plate to tube using U bolts lock washers and nuts Note Mounting tube may be too long fo...

Page 47: ...C Attach Quick Couplers to these fittings Quick couplers not supplied in kit 47 NOTES 1 When attaching a loader valve to the rear remotes of the tractor a power beyond kit is not required Figure 5 6 A...

Page 48: ...WILL CAUSE SERIOUS DAMAGE TO TRACTOR HYDRAULIC SYSTEM Power Beyond Plug To Pressurized Return Inlet To Sump Inlet Use Long Hose Here To Pressure Inlet B C A These hoses to be furnished by dealer 5 4 B...

Page 49: ...short spears into tubes at bottom of frame and tight en lock bolts 1 2 X 1 1 2 Bolt 3 8 U Bolt Lockwashers Nuts 5 7 TINE TEETH Fasten tine teeth to bucket with fasteners provided as shown Tine Tooth...

Page 50: ...except when specific torque values are assigned in manual text RECOMMENDED TORQUE IN FOOT POUNDS UNLESS OTHERWISE STATED IN THE MANUAL NOTE These values apply to fasteners as received from supplier dr...

Page 51: ...51...

Page 52: ...52...

Page 53: ...harges exceeding a reasonable amount as determined by Manufacturer and for returning the goods to the Dealer whether or not the claim is approved Purchaser is responsible for the transportation cost f...

Page 54: ...ly to confine the employee to the protected area provided by the ROPS REQUIRED OF THE OPERATOR 1 Securely fasten seat belt if the tractor has a ROPS 2 Where possible avoid operating the tractor near d...

Page 55: ......

Page 56: ...2347 QT SOM 03 12 P N F 4370C Printed U S A 2347 QT LOADER...

Reviews: