


NOTE
Step 1-Input switch
Local control -- Front Panel Operation
VSP 330 support 2 inputs by HDMIA and HDMIB,
push the input will send the input to all the outputs with
the output resolution and the scale configuration data.
User can set each output by push HDMI1~HDMI4
separately.
NOTE
If there is not input for current input, the image
will freeze as last frame.
Step 2-Set scale
Push Scale to go into scale setting menu, user can set
Horizontal size, vertical size, horizontal position (X) and
vertical position (Y).
Go to each set menu, push Sel to go into setting, push
Up or Down to change the value, push Sel to enable
value and push ESC to escape the menu.
NOTE
Keep push UP or DOWN button, the value will
change fast each time from 1
10
100 pixels.
During PIP mode, HDMIA is the main window
,
HDMIB is sub window
,
user can only set the position
of sub window, which means main window position is
always (0,0). If user want to set PBP, need to scale
HDMIA and HDMIB, position HDMIB to middle.
Step 3-Set output resolution
Push OUT button and use UP or DOWN button to go to
the right resolution for the monitor or display system,
and push SEL button to decide to go to the selected
resolution.
VSP 330 can set output resolution as the same
to HDMIA and HDMIB, and have other 8
800×600×60Hz ;1024×768×60Hz;1280×720×60Hz;
1280×720×50Hz;1280×1024×60Hz; 1600×1200×60Hz;
1920×1080×60Hz;1920×1080×50Hz;
The output resolution should be the same or large than
the end display.
NOTE
Step 4-Save
VSP 330 supports 6 user modes. Press SAVE button,
SAVE1 to SAVE6 buttons will light up, press SAVE1 to
SAVE6 separately will finish save operation.
NOTE
SAVE1 is the default user mode of VSP 330,
after power on, VSP 330 will work as SAVE1
settings. After Factory reset, all user-mode go to initial
settings.
Remote control
software operation
This software
is only setup
for windows system,
please refer to the user
manual for detail.
During install and
application, please use
right language
interface.
Step 1-Set up communication
Step 2-Set up output resolution
Select output resolution from pull down
output list.
Step 3-Set Scale
User can scale the image with mouse drap and drop
operation; User can also scale by input the data into the
scale parameters and set.
Step 4-Save operation
Push the pull down list to select
HDMIA or HDMIB as output resolution, it
means the output will work directly with this resolution.
NOTE
Advance setting functions
VSP 330 support advance setting for seamless switch
and split panel control.
They are available from local or remote control.
Address:S603-604 Weiye Building Torch Hi-Tech Industrial Development Zone Xiamen,Fujian Province, P.R.C
Tel: 00865925771197 Fax:00865925771202
Email: [email protected] http://www.rgblink.com
VSP 330 Quick Start
Rev 1.0
Page 2 of 3
Step8-power connector
The IEC connector power cord to the power input on
the VSP 310, VSP 310 85 to 265V power supply
supports AC input, compatible with the current world
power system
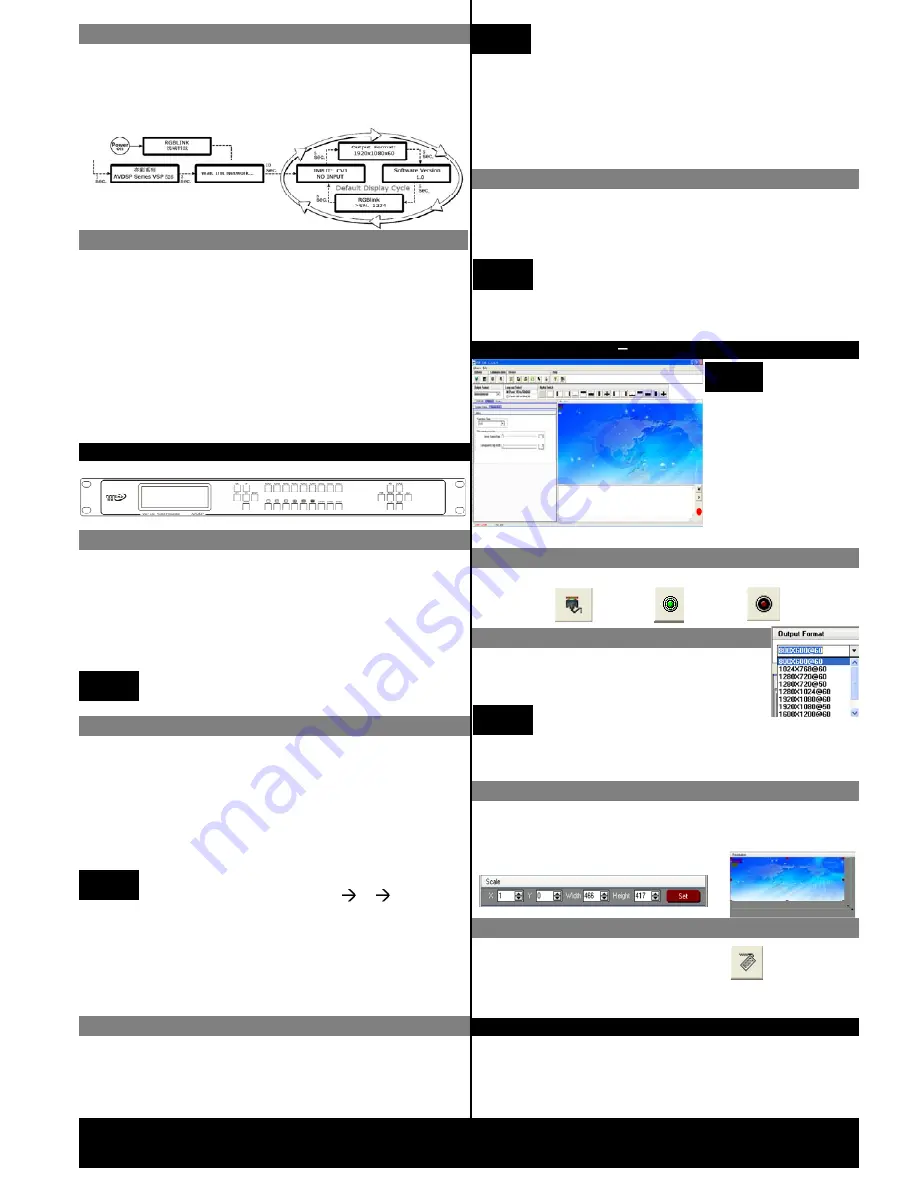
Powering up
Push power button switcher to ON position. LCD
module on the front panel will show RGBLINK and VSP
310 model information, and go into self verification
before it load the last setting configuration data and send
the processed image to the target display or device. For
the first time running, CV1 input is the default input
source. User can operate with VSP 310 with local front
panel and remote control with the software run on the
PC, remote control by RS232, USB or TCP/IP.
Use the RS 232 port on the computer, baudrate should
be 115200.
Set com
Open com
Close com
Push
“
Save to flash
”
button and
select one of user mode to save, there
are three user mode in the list.
Save to flash
button, use
to save user
mode


