


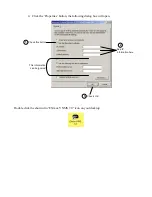


Enter address information as required.
Default IP Address Information:
Item
Type of Address
Default Address
1
Management IP Address
192.168.35.100
2
Subnet Mask
255.255.255.0
3
Gateway
192.168.35.1
4
Multicast IP Address
224.192.16.2
5
TDM Engine 1 IP Address
192.168.35.101
6
TDM Engine 2 IP Address
192.168.35.102
Certain settings in the eXmux 3500 CLI require a system reboot. The user will be prompted when this
is required. The Node ID can be set between 1 and 999. The Node ID can also be assigned
automatically by the VNMS software
but can only be changed using the CLI interface. If left at
the default “0” the node ID will not be visible.
After setting the required address information press ‘M’ to return to the main menu, select
“Exmux 3500 Reboot” so that the changes take effect.
Select “Logoff.”
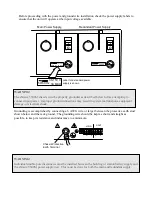
Disconnect the USB cable from the front or rear of the eXmux and connect an Ethernet cable from
your PC/laptop to any of the LAN/WAN ports on the Ethernet Switch. The Ethernet Switch is located
on the rear of the eXmux as shown below.
Location of Ethernet Switch
Rear view of eXmux
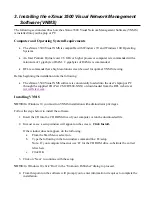
The Visual Network Management Software (VNMS) can now be activated on your computer using the
Activation Key Code supplied by RFL.
Summary of Contents for EXMUX 3500M
Page 22: ...Notes ...
Page 23: ...Notes ...


