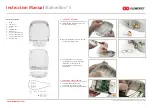
Install the Top Cover using screws 2.9×25mm and screws 2.9×12mm.
Mind the correct positioning of the Screws as shown on picture!
Cut or chip away premolded parts of the front panel, if interfering with
RouterBoard´s connectors.
3 Installation of the Seal and Light Guides
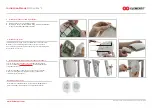
A Install the Silicone Seal in StationBox´s Body.
B According to the specific RouterBoard setup, install the Light Guides
to support readability of RouterBoard LEDs.
Instruction Manual
StationBox® S
5 How to Mount, Remove and Protect the StationBox® S
RF elements Accessories
4 Install the Top Cover
You can easily snap StationBox® S to compatible Antenna. Please
refer to our webpage
www.rfelements.com
to check updated list of
compatible antennas.
To remove StationBox® S from the mount, use tool to release the
mount´s lock. Any firm object that fits the gap could be used:
screwdriver, wrench, knife etc.
For installation on the Wall or Pole, use RF elements EasyBracket™ S,
bracket compatible with StationBox® S and StationBox® Mikro.
2× Screws #7
2× Screws #8
www.rfelements.com
RouterBoard is Trademark of MikroTik, Aizkraukles iela 23, Riga, LV-1006 LATVIA


