background image

5

G

Register this product online at 

www.rexeleurope.com

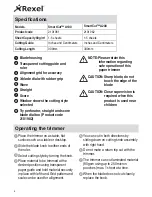
Cutting restrictions

•  Remove staples, paper clips etc before 

cutting

•  Do not cut metal film or film containing 

glass etc.

•  Do not cut more sheets than capacity 

allows

•  Trimmer should be operated by an adult 

or under adult supervision

•  Do not carry trimmer by holding onto the 

cutting blade handle

•  Always operate trimmer with both hands 

on a stable base or desk

• Do not touch the edge of the blade
•  Check the fittings of the rotary blade and 

cutting rail from time to time

Service

Do not attempt to service or repair the unit 

yourself. If your trimmer is under warranty 

return it to the point of purchase for 

replacement or repair. If your trimmer is no 

longer under the point of purchase return 

period and requires replacement or repair, 

please contact your supplier for further 

assistance.

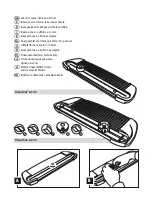
To replace the  

blade carrier

1

  Slide carrier to the centre of the cutting 

guide at the 15cm mark 

A

.

2

  Open the cutting guide slightly and 

remove the used carrier. Snap in the 

new carrier. Your fingers will not touch 

the blade 

B

.

3

  Only use the accessories that are 

approved by the manufacturer.

Guarantee

Operation of this machine is guaranteed 

for two years from date of purchase, 

subject to normal use. Within the 

guarantee period, Rexel will at its own 

discretion either repair or replace the 

defective machine free of charge. Defects 

due to misuse or use for inappropriate 

purposes are not covered under the 

guarantee. Proof of date of purchase will 

be required. Repairs or alterations made 

by persons not authorised by Rexel will 

invalidate the guarantee. It is our aim to 

ensure that our products perform to the 

specifications stated. This guarantee does 

not affect the legal rights which consumers 

have under applicable national legislation 

governing the sale of goods.

Summary of Contents for SmartCut A100

Page 1: ...uel d utilisation D Bedienungsanleitung I Manuale d istruzioni E Manual de instrucciones O Gebruiksaanwijzing S Bruksanvisning P Manual de Instruções Q Instrukcja obsługi o Руководствo по зкcплyатации o Návod k obsluze H Használati útmutató CZ RUS ...

Page 2: ...SmartCut A100 A200 English 4 Français 6 Deutsch 8 Italiano 10 Español 12 Nederlands 14 Svenska 16 Português 18 Polski 20 Pyccкий 22 Česky 24 Magyar 26 ...

Page 3: ...fficio e a scuola Ideal para casa oficina y colegios Zeer geschikt voor thuis op kantoor of op school Utmärkt för hem kontor och skola Ideal para casa escritorio e colégios Doskonała dla domu biura szkoły Отлично подходит для дома офиса и школы Kiválóan használható otthoni irodai és iskolai célokra Ideální pro domácnost kancelář a školu CZ RUS 5 6 7 8 9 SmartCut A200 1 2 3 4 1 2 ...

Page 4: ...ouch the edge of the blade mNOTE Please retain this information regarding safe operation of this paper trimmer Operating the trimmer 1 Place the trimmer on a stable flat surface such as a table or desktop 2 Slide the blade knob to either ends of the ruler 3 Select cutting style by turning the knob 4 Place material to be trimmed at the desired position using transparent paper guide and hold materia...

Page 5: ...your supplier for further assistance To replace the blade carrier 1 Slide carrier to the centre of the cutting guide at the 15cm mark A 2 Open the cutting guide slightly and remove the used carrier Snap in the new carrier Your fingers will not touch the blade B 3 Only use the accessories that are approved by the manufacturer Guarantee Operation of this machine is guaranteed for two years from date...

Page 6: ...TTENTION Merci de suivre ces instructions pour votre sécurité lors de l utilisation de cette coupeuse Pour utiliser la coupeuse 1 Installer la coupeuse sur une surface plane et stable comme une table ou un bureau 2 Faire coulisser le curseur de coupe vers l une ou l autre extrémité de la règle 3 Sélectionner le style de coupe en tournant le curseur 4 Positionner le papier à couper à l aide du guid...

Page 7: ...emplacer la lame 1 Faire glisser le curseur jusqu au centre du guide de coupe à 15cm A 2 Ecarter délicatement le guide de coupe et retirer le curseur usagé Introduire le nouveau curseur Vos doigts ne toucheront pas la lame B 3 N utilisez que les accessoires approuvés par le fabricant Garantie Le fonctionnement de cette machine est garanti pendant deux ans à compter de la date d achat sous réserve ...

Page 8: ...innern Sie sich bitte an diese Informationen Benutzung des Schneidegeräts 1 Stellen Sie das Schneidegerät auf eine stabile flache Oberfläche Tisch Schreibtisch 2 Schneideknopf kann zu beiden Enden des Lineals geschoben werden 3 Durch Drehen des Schneidekopfes können sie die gewünschte Schneideart auswählen 4 Legen Sie das zu schneidende Material unter Zuhilfenahme des trans partenter Papierführer ...

Page 9: ...ontaktieren Sie bitte Ihren lokalen Händler für entsprechende Unterstützung Zum wechseln der Messer 1 Schneidekopf zur Mitte des Lineals führen an der 15 cm Linie am Lineal A 2 Das Lineal etwas öffne den Schneidekopf rausnehmen und durch den Neuen ersetzen Berühren Sie nicht die Schneidemesser B 3 Bitte verwenden Sie zur Nutzung des Trimmers nur das vom Hersteller vorgesehene Zubehör Garantie Wir ...

Page 10: ...entamente le istruzioni prima di utilizzare la taglierina Funzionamento 1 Posizionare la taglierina su un piano stabile come un tavolo od una scrivania 2 Far scorrere la manopola lungo tutto il righello 3 Scegliere il tipo di taglio facendo ruotare la manopola 4 Inserire il materiale da rifilare utilizzando la guida trasparente trattenendolo in posizione con una mano al momento del taglio La scala...

Page 11: ... restituzione diretta contattare il fornitore per richiedere assistenza tecnica Come sostituire la guida della lama 1 Far scorrere la guida fino al centro della barra di taglio in corrispondenza dei 15 cm A 2 Sganciare la barra di taglio ed estrarre la guida usata Inserire la nuova evitando di toccare la lama con le dita B 3 Utilizzare solo gli accessori approvati e raccomandati dal produttore Gar...

Page 12: ...ncionamiento de esta guillotina de papel Funcionamiento de la guillotina 1 Coloque la guillotina en una superficie estable plana como una mesa o un escritorio 2 Deslice el soporte de la cuchilla por ambos lados de la regla 3 Seleccione el tipo de corte girando el soporte 4 Coloque el material a cortar en la posición deseada usando la guía de papel transparente y sujete firmemente el material con l...

Page 13: ...ntro de la guía de corte de la marca de 15cm A 2 Abra la guía de corte cuidadosamente y retire la guía antigua Ajuste la nueva guía Sus dedos no tocarán la cuchilla B 3 Utilice únicamente accesorios originales del fabricante Garantía El funcionamiento de esta máquina está garantizado durante 2 años desde la fecha de compra bajo una utilización normal Durante el período de garantía Rexel reparará o...

Page 14: ...n met de rolsnijmachine steeds te bewaren Bediening van de rolsnijder 1 Plaats de rolsnijder op een vlak stabiel oppervlak zoals een tafel of een bureel 2 Beweeg de snijkop naar willekeurig welk uiteinde van de snijlineaal 3 Door de snijkop een slag te draaien maakt u een keuze uit de drie verschillende snijmanieren 4 Plaats het te snijden materiaal op de gewenste positie met behulp van de transpa...

Page 15: ...an de aandruklineaal iets uit elkaar Haal de gebruikte meskop er tussen uit Doe de nieuwe meskop op dezelfde manier tussen de twee helften van de aandruklineaal Op deze manier komen uw handen niet in contact met het mesblad B 3 Gebruik alleen door de leverancier goedgekeurde accessoires Registreer dit product online op www rexeleurope com Guarantee De werking van deze machine is gegarandeerd voor ...

Page 16: ...det finns barn mFÖRSIKTIGHET Sharp Blade rör inte vid kniveggen mNOTERA Behåll denna information ang säkerhetsinstruktioner på denna pappers trimmer Användning 1 Placera trimmern på ett plant och stabilt underlag 2 För skär knoppen till den ena eller andra sidan av linjalen 3 Välj skär stil genom att vrida på knoppen 4 Placera materialet som ska trimmas skäras i önskad position med hjälp av den tr...

Page 17: ...n kontakta leverantören För att ersätta knivhållaren 1 För hållaren till mitten av skärguiden vid 15 cm markeringen A 2 Öppna skärguiden något och ta bort den använda hållaren Knäpp in den nya hållare Dina fingrar kommer inte att röra kniven B 3 Använd endast tillbehör som är godkända av tillverkaren Garanti Apparaten garanteras fungera i 2 års från inköpsdatumet om den används normalt Rexel repar...

Page 18: ...nto desta guilhotina de papel Funcionamento da guilhotina 1 Coloque a guilhotina numa superfície estável e plana como uma mesa 2 Deslize o suporte da lâmina para ambos os lados da régua 3 Seleccione o tipo de corte girando o suporte 4 Coloque o material a cortar na posição pretendida utilizando a guia de papel transparente e suporte firmemente o material com a mão esquerda enquanto corta Para o ac...

Page 19: ...ajuda Para trocar a lâmina do roleto 1 Deslize o bloco para o centro da guia de corte até à marca de 15cm A 2 Abra o suporte da lâmina com muito cuidado e retire a antiga Ajuste a nova lâmina Os seus dedos não devem de tocar na lâmina B 3 Utilize exclusivamente acessórios originais do fabricante Garantia O funcionamento desta máquina é garantido por 2 anos a partir da data de compra em condições n...

Page 20: ...ożność jeśli w pobliżu urządzenia znajdują się dzieci mUWAGA Nie dotykaj krawędzi ostrza mUWAGA Ze względów bezpieczeństwa należy zachować powyęszą informację Obsługa gilotyny 1 Umieścić gilotynę na stabilnej płaskiej powierzchni takiej jak stół czy biurko 2 Przesuń przycisk ustawienia noża do dowolnego końca prowadnicy 3 Wybierz sposób cięcia przez obrót przycisku 4 Posługując się przezroczystą p...

Page 21: ...ymiana osłony noża 1 Przesunąć osłonę na środek przymiaru cięcia na znak 15 cm A 2 Otworzyć delikatnie przymiar cięcia i usunąć zużytą osłonę Zatrzasnąć nową osłonę Twoje palce nie będą dotykać noża B 3 Można używać części tylko zatwierdzone przez producenta Gwarancje Udzielamy gwarancji na dwa lata pracy urządzania od daty zakupu pod warunkiem że urządzenie będzie eksploatowane w sposób określony...

Page 22: ... с детьми mПРИМЕЧАНИЕ Hе прикасайтесь к острой кромке ножа mПРИМЕЧАНИЕ Сохраняйте эту информацию по безопасной эксплуатации данного резака для бумаги Эксплуатация резака 1 Установите резак на устойчивую ровную поверхность типа обычного письменного стола 2 Плавно передвигайте ручку вращающую лезвие в оба конца линейки 3 Выберите стиль разреза путем поворота ручки 4 Поместите предназначенный для рез...

Page 23: ...ке 15 см A 2 Осторожно откройте направляющую планку и извлеките использованный контейнер Вставьте новый контейнер Ваши пальцы не должны касаться лезвия B 3 Используйте только те комплектующие качество которых подтверждено производителем Информация о данном изделии находится на сайте www rexeleurope com Гаpантия Pабота настоящей машины гарантируется в течение двох года с даты покупки при условии но...

Page 24: ...řítomnosti dětí je při laminování třeba dbát zvýšené opatrnosti mPOZNÁMKA Nedotýkejte se ostří břitu mPOZNÁMKA Prosíme uchovejte tyto informace týkající se bezpečného provozu této řezačky na papír Obsluha řezačky 1 Umístěte řezačku na pevný rovný povrch například na desku nebo na stůl 2 Přesuňte jezdec nože k jednomu konci pravítka 3 Zvolte styl řezu otočením jezdce 4 Umístěte řezaný materiál v po...

Page 25: ...ostří nože B 3 Používejte pouze příslu enství které je schváleno výrobcem Tento výrobek si můžete zaregistrovat online na www rexeleurope com Záruka Provoz tohoto stroje je za předpokladu standardního způsobu používání zaručen po dobu dvou let od data zakoupení V průběhu záruční doby bude společnost Rexel bezplatně provádět opravy stroje nebo podle vlastního uvážení rozhodne o výměně vadného stroj...

Page 26: ...özben gyermekek is lehetnek a közelében mMEGJEGYZÉS Vigyázat a kés éles ne érjen a kés éléhez mMEGJEGYZÉS Kérjük hogy a papírvágógép biztonságos működtetése érdekében őrizze meg a használati utasítást A vágógép működtetése 1 Helyezze a vágógépet egy stabil sima felületre pl munkaasztalra vagy íróasztalra 2 Illessze a vágófejet a vezeték bármely végére 3 Válassza ki a vágás stílusát a gomb elforgat...

Page 27: ...éscsúsztató gomb cseréje 1 Csúsztassuk a gombot a vezetősín közepe felé a 15 cm em jelig A 2 Nyissuk fel kissé a vezetősínt és vegyük le a használt gombot Pattintsuk helyére az új gombot A művelet közben ujjunk nem fog hozzáérni a pengéhez B 3 Kizárólag a gyártó által jóváhagyott kiegészítőket használjuk Jótállás Ezen berendezésre rendeltetésszerű használattal két év jótállást vállalunk A jótállás...

Page 28: ......

Page 29: ......

Page 30: ...ACCO Brands Europe Oxford House Aylesbury HP21 8SZ United Kingdom www accoeurope com Ref A100 A200 6416 Issue 1 01 09 ...

Reviews: