background image

status light on the camera will light up white while charging and go out once charged. 


TURNING THE CAMERA ON/OFF 

Press the 

POWER

 button on the side of the camera to turn the camera 

ON

 or 

OFF

. Once 

turned on the camera will automatically go in standby mode. 

RECORDING VIDEO 

Press the 

VIDEO KEY

 to 

START

 or 

STOP

 recording video while in the standby mode. 

SNAPSHOTS 

Press the 

PHOTO KEY

 to take a still image while in standby mode or recording.  

AUDIO ONLY 

Press the 

AUDIO

 button to record audio only while in the standby mode.  

FILE TAGGING 

Press the 

MENU/BACK

while recording video to tag and write protect the current file. 

AUXILIARY LED ILLUMINATION 

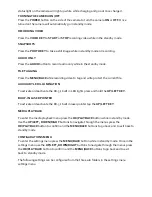
To activate or deactivate the RX-5’s built in LED lights press and hold the 

UP/LEFT KEY

BUILT-IN LASER POINTER 

To activate or deactivate the RX-5’s built in laser pointer tap the 

UP/LEFT KEY

MEDIA PLAYBACK 

To enter the media playback menu press the

 OK/PLAYBACK 

button while in standby mode. 

Use the 

UP/LEFT, DOWN/RIGHT

 buttons to navigate through the menus press the 

OK/PLAYBACK

 button to confirm and the 

MENU/BACK

 buttons to go back and to exit back to 

standby mode. 

CONFIGARATIONS MENU 

To enter the settings menu press the 

MENU/BACK

 button while in standby mode. Once in the 

settings menu use the 

UP/LEFT, DOWN/RIGHT

 buttons to navigate through the menus press 

the 

OK/PLAYBACK

 button to confirm and the 

MENU/BACK

 buttons to go back and to exit 

back to standby mode. 

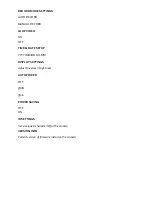
The following settings can be configured from the three sub folders in the settings menu 
settings menu 


Summary of Contents for RX-5

Page 1: ...REWIRE SECURITY RX 5 BODY WORN CAMERA USER GUIDE ...

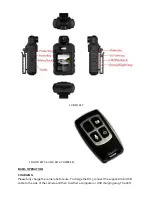
Page 2: ...AUDIO KEY 4 POWER KEY BASIC OPERATION CHARGING Please fully charge the camera before use To charge the RX 5 connect the supplied mini USB cable to the side of the camera and then to either a computer or USB charging plug The LED ...

Page 3: ...or deactivate the RX 5 s built in LED lights press and hold the UP LEFT KEY BUILT IN LASER POINTER To activate or deactivate the RX 5 s built in laser pointer tap the UP LEFT KEY MEDIA PLAYBACK To enter the media playback menu press the OK PLAYBACK button while in standby mode Use the UP LEFT DOWN RIGHT buttons to navigate through the menus press the OK PLAYBACK button to confirm and the MENU BACK...

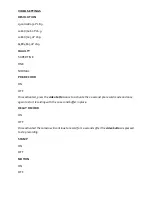
Page 4: ...E RECORD ON OFF Once activated press the video button once to activate the 20 second pre record mode and once again to start recording with the 20 second buffer in place DELAY RECORD ON OFF Once activated the camera will continue to record for 10 seconds after the video button is pressed to stop recording STAMP ON OFF MOTION ON OFF ...

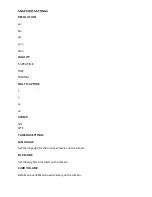
Page 5: ... SUPER FINE FINE NORMAL MULTI CAPTURE 1 5 10 20 STAMP ON OFF CAMERA SETTINGS LANGUAGE Set the language for the on screen menus on the camera FILE MODE Set the way files are stored on the camera CARD VOLUME Details on available and used memory on the camera ...

Page 6: ...VIDEO ON OFF TIME DATE SETUP YYYY MM DD HH MM DISPLAY SETTINGS Adjust the screen brightness AUTO POWER OFF 3MIN 5Min POWER SAVING OFF ON ID SETTINGS Set a unique 8 character ID for the camera VERSION INFO Current version of firmware install on the camera ...

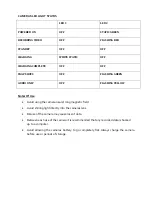
Page 7: ...DIO ONLY OFF FLASHING YELLOW Notes Of Use Avoid using the camera near strong magnetic field Avoid shining light directly into the cameras lens Misuse of the camera may cause loss of data Between each use of the camera it is recommended that any recorded data is backed up to a computer Avoid allowing the cameras battery to go completely flat Always charge the camera before use or periods of storage...

Reviews: