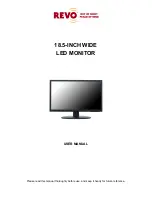
Revo 18.5


Important Safety Instructions 


1.  Read these instructions. 
2. Keep 

these 

Instructions. 

3.  Heed all warnings. 
4.  Follow all instructions. 
5.  Do not use this monitor near water. 
6.  Clean only with dry cloth. 
7.  Do not block any ventilation openings. Install in accordance with the manufacturer’s 

instructions. 

8.  Do not install near any heat sources such as radiators, heat registers,stoves, or other 

monitor (including amplifiers) that produce heat. 

9.  Do not defeat the safety purpose of the polarized or grounding-type plug. 

A polarized plug has two blades with one wider than the other. 
A grounding type plug has two blades and a third grounding prong. 
The wide blade or the third prong are provided for your safety. 
If the provided plug does not fit into your outlet, consult an electrician for replacement 
of the obsolete outlet. 

10. Protect the power cord from being walked on or pinched, particularly at plugs. 

convenience receptacles and the point where they exit from the monitor. 

11. Only use attachment/accessories specified by the manufacturer. 
12. When a cart is used, use caution when moving 

the cart/ monitor combination to avoid injury from tipping over. 

13. Unplug the monitor during lightning storms or when unused 

  for long periods of time. 

 
14. Refer all servicing to qualified service personnel. Servicing is required when the monitor 

has been damaged in any way, such as power-supply cord or plug is damaged, liquid has 
been spilled or objects have fallen into the monitor, the monitor has been exposed to 
rain or moisture or does not operate normally or has been dropped. 


- 2 -


Summary of Contents for 18.5" wide LED monitor

Page 1: ...18 5 INCH WIDE LED MONITOR USER MANUAL Please read this manual thoroughly before use and keep it handy for future reference...

Page 2: ......

Page 3: ...T 5 CONNECTING WITH EXTERNAL EQUIPMENT 6 INSTALLATION 7 CONTROLS AND FUNCTIONS 8 15 MOUNTING GUIDE 16 D SUB CONNECTOR PIN ASSIGNMENTS 17 POWER MANAGEMENT 18 SPECIFICATIONS 19 TROUBLE SHOOTING GUIDE 20...

Page 4: ...ed for your safety If the provided plug does not fit into your outlet consult an electrician for replacement of the obsolete outlet 10 Protect the power cord from being walked on or pinched particular...

Page 5: ...of fire or electric shock do not expose the monitor to rain or moisture This symbol is intended to alert the user to the presence of uninsulated dangerous voltage with in the product s enclosure that...

Page 6: ...D PLACE Ventilation holes are provided on the cabinet to prevent the temperature from rising Do not cover the unit or place anything on the top of unit AVOID HEAT Avoid placing the unit in direct suns...

Page 7: ...y turning the equipment off and on the user is encouraged to try to correct the interference by one or more of the following measures Reorient or relocate the receiving antenna Increase the separation...

Page 8: ...g the stand 1 Place the monitor with its front facing downward on a soft cloth 2 Assemble the Stand Base into the Stand Body in the correct direction using the included screws in the accessory box B P...

Page 9: ...1 Rear Connection 1 3 5mm AUDIO OUT 2 3 5mm AUDIO IN 3 VGA 4 DC 12V 7...

Page 10: ...OSD The button converts the aspect ratio as 16 9 or 4 3 The AUTO button is auto adjustment function 5 6 VOL VOL Adjusts the volume and menu settings The VOL button is mute function 7 I Turns the powe...

Page 11: ...adjust the item 4 Change the value you wish to adjust by using the VOL VOL buttons 5 Press the MENU button twice to exit the sub menu and the adjusted item 6 Press the MENU button again to exit the OS...

Page 12: ...rtical noise of screen image 0 100 Phase1 Adjusts the number of horizontal picture elements 0 60 Gamma Adjusts the gamma of the picture 0 3 Sharpness Adjusts sharpness of the picture 0 4 Auto Adjust 1...

Page 13: ...3 Position Option Function Value H Position Adjusts the horizontally picture position 0 100 V Position Adjusts the vertically picture position 0 100 Back Returns to previous menu 11...

Page 14: ...Display Menu Option Function Value OSD H Pos Moves the horizontally OSD position 0 100 OSD V Pos Moves the vertically OSD position 0 100 OSD Timer Adjusts the display time of OSD 5 20 Back Returns to...

Page 15: ...5 Language Option Function Value Language Sets the language of OSD menu English Korean French German Spanish 13...

Page 16: ...Signal Source Shows the signal source VGA Fit to screen Converts the aspect ratio 16 9 4 3 Volume Adjust the level of audio volume 0 100 Reset Resets the monitor settings to the factory default Back...

Page 17: ...7 Exit Option Function Exit Exits the OSD menu 15...

Page 18: ...al The LCD monitor is suitable for wall mounting by using the VESA 100 standard wall mount not included Attention You must use four M4x10 screws to assemble this monitor and the wall mount bracket 16...

Page 19: ...IDEO 11 GROUND 4 GROUND 12 SDA for DDC 5 GROUND 13 H SYNC or H V SYNC 6 RED GROUND 14 V SYNC 7 GREEN GROUND 15 SCL for DDC 8 BLUE GROUND D SUB Accessories 1 Power Adaptor Power Cord Included 2 User Ma...

Page 20: ...vertical or sync signal This monitor enters an appropriate mode through identifying each of the three modes of the signaling system Power Consumption Mode 18 5 Turned On 15W No Signal Turned Off 1W LE...

Page 21: ...66X768 60Hz Frequency Horizontal 31 64kHz Vertical 56 75Hz Input Signal VGA RGB PC Audio in out Active Display Area H x V 409 8mm x 230 4mm Packing Dimensions W x H x D 500mm x 375mm x 125mm 19 69 x 1...

Page 22: ...onment or human health from uncontrolled waste disposal please separate this from other types of wastes and recycle it responsibly to promote the sustainable reuse of material resources Household user...

Page 23: ...MEMO...

Page 24: ...MEMO...

Page 25: ...MEMO...

Page 26: ...MEMO...

Page 27: ......

Page 28: ...P N L39ME0230 Rev 0...

Reviews: