


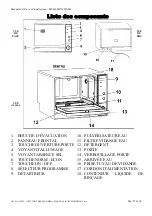


Manuale del d’uso ed installazione – M9016 MINI WASH
Del 04-11-2008- C:\SETTORE DENTALE\M9016\MANUALE ISTRUZIONE\M9016.doc
Pag. 20 di 34
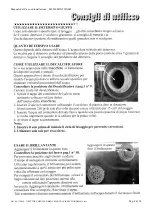
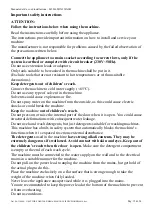
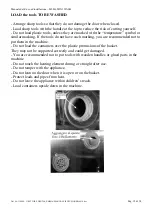
Operational instructions.
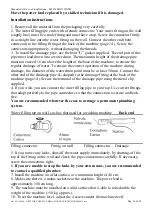
1. Make sure the filling and drainage pipes are connected correctly.
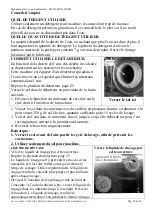
2. Press the button to open the door.
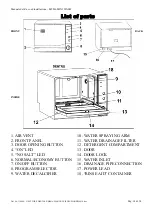
3. Arrange the parts inside their basket.
4. Make sure the spraying arm turns freely without obstructions. If necessary, remove any
obstacles.
5. Fill the detergent compartment on the internal panel of the door (7 grams approx.).
6. Close the door properly.
7. Open the water supply tap (water supply fitting on the wall).
8. Select the required program (Normal, Economy).
9. Press the ON/OFF button (pressed in=ON, out=OFF). The red LED lights up when the
machine is ON.
10. The machine stops automatically when the program ends. The LED remains lit until the
switch is turned OFF.
11. The machine is
designed to stop if the door is accidentally opened during the wash
cycle.
12. At the end of the wash cycle, leave the parts to cool down for approximately 15 minutes
so as not to get hold of them while they are too hot. The parts will cool down quicker if you
leave the machine’s door ajar.
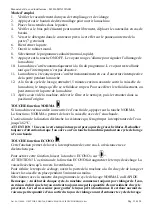
13. Once you have unloaded the machine, take the filter out, clean it and put it back in its
original position.
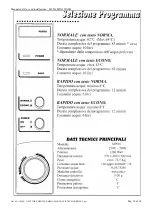
NORMAL function button
If you have connected the machine to a cold water supply fitting, press the NORMAL
button. The “NORMAL” function will allow you to wash the parts with hot water.
Once pressed, this button will activate a heating element that will increase and maintain the
temperature of the water inside the machine at 62°C.
ATTENTION: The water gets so hot that it could cause serious scalding. Always be
very careful when opening and/or touching the machine while the wash cycle with hot
water is running.
ECONOMY function button
This function allows you to wash at the temperature of your water supply.
The heating element will not be activated.
To activate this function, leave the “ECONOMY” button in position “ “
IMPORTANT:
When you activate the ECONOMY function, the drying time will increase.
The parts will only dry through ventilation.
Open the machine to reduce the drying time at the end of the program.
Leave the parts where they are for at least 5 minutes.
Select the NORMAL or ECONOMY wash cycle via the program selection knob.
NOTE:
At the beginning of each cycle, the machine always starts in drainage mode, so
that the drainage pipe always has a small amount of water of the previous cycle in it. This is
required to keep the pipe ready for operation. It is therefore quite normal to see a slight
amount of water come out of the drainage pipe before the regular wash cycle starts.


