REVELL SPOT 2.0 User Manual Download Page 11

English

English

20

Additional tips and tricks can be found online at 

www.revell-control.de.

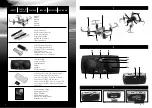
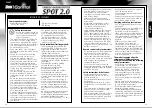
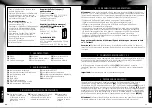
12   CHANGING THE PROPELLERS

Prior to installation, make sure that you do not mix up the propellers. The quadro-

copter has 

4 different propellers

, which differ in color and direction of rotation.  

If the propellers are mixed up, the multicopter will not fly.


12A 

Carefully lever the propeller off with a screwdriver.

12B 

Push the new propeller back on to the motor shaft.

12C

  Arrangement of the propellers:

front left 

yellow A

rear left 

black B

 front right 

yellow B

 hinten rechts 

black A

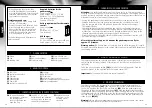
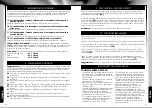
11   PROP GUARD INSTALLATION

To protect the propellers from crash damage, attach the prop guards before flight.

1.  Carefully pry off the prop using a screwdriver.  

NOTE:

 Do one corner at a time so you don’t accidentally mix up the props.

2.  Push the prop guard in place.

3.  Push the prop onto the motor so it is tight on the shaft.
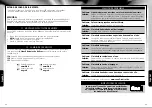
TROUBLESHOOTING

Problem: The quadcopter does not react to control commands.
Remedy:

Charge or replace the battery of the quadcopter. Switch the remote 

control and the model off and on again (see 5. Preparing for take-off). 

Ensure that the battery is fully charged.

Problem: Red LED is flashing on the remote control.
Remedy: 

Replace the AAA batteries in the remote control.

Problem: The model will no longer fly loops.
Remedy: 

The battery charge level is too low.

Problem: The model will not remain level in the air.
Remedy:

Battery power is too low - charge the battery! Switch the remote control 

and the model off and on again. Land, wait 3 seconds and start again.

Problem: The model does not take off.
Remedy:

Propellers are not mounted in the correct position. Observe chapter 12 

„Changing the propellers“. Ensure that the battery is fully charged.

Problem: The model flounders in the air.
Remedy:

Check the cabin cover, the motors and the propellers for damage.

Problem: The model overturns when starting.
Remedy:

Check that the propellers are mounted correctly, see chapter 12.  

Re-calibrate the gyro in the model - chapter 6

Problem: The model pulls heavily in one direction or flies the opposite way.
Remedy:

Re-calibrate the gyro in the model - chapter 6

20

21

www.revell-control.de

SERVICE NOTES

Go to www.revell-control.de for ordering information 

and tips on replacing spare parts, plus other useful 

information  on all Revell Control models.

Summary of Contents for SPOT 2.0

Page 1: ...HE REGISTERED TRADEMARK OF REVELL GMBH GERMANY Made in China ERSATZTEILE REPLACING SPARE PARTS EPIÈCES DÉTACHÉES RESERVEONDERDELEN PIEZAS DE REPUESTO PEZZI DI RICAMBIO 43645 2 x Motoreinheit MOTOR CCW R F L R 43646 2 x Motoreinheit MOTOR CW L F R R 43644 Canopy Kabine 43647 Akku LIPO 1S 3 7V 350MAH 43643 Rotor Set Rotor Satz ...

Page 2: ...cro scheda SD 2GB dispositivo di lettura scheda USB Elica di ricambio Hélices de recambio Reserve propeller Hélice de rechange Replacement propeller Ersatz Propeller Radiocomando Emisora Zender Télécommande Remote control Fernsteuerung Istruzioni per l uso Manual de instrucciones Gebruiksaanwijzing Mode d emploi Operating manual Bedienungsanleitung USB Ladegerät und Akku Caricabatterie USB e batte...

Page 3: ...5 4 5 6 7 7A 7B 7C 7D 7E 8F 8C 8D 8 8A 8B 4 6A 6B 2 x 6D 6E 1 x 6C 1 x 5A 8E 10 11 9 12 9A Looping 10B 10C 12C 12B 12A 8G 8H 10A 9B ...

Page 4: ...e nie ohne direkten Sichtkon takt zum Modell es muss sich immer in direkter Sichtweite befinden Ein Modell z B nur anhand eines Videobilds zu steuern ist gesetzlich verboten Bei Nichtbeachtung dieser Sicherheits hinweise können Sie sich strafbar machen Infos und weitere Hilfe erhalten Sie vom Verein für unbemannte Luftfahrtsysteme unter http www uavdach org Für Modelle die draußen geflogen werden ...

Page 5: ...üppel Nicken Rollen auf dem rechten Knüppel umgestellt werden Schieben Sie dazu den Mode Umschalter 5A für Mode 2 nach links Standard Schieben Sie den Schalter für Mode 1 nach rechts und drehen Sie die Fernsteuerung um 180 Wichtig Nur bei ausgeschalteter Fernsteuerung schalten 3 BATTERIEN EINSETZEN FERNSTEUERUNG 3A Zum Öffnen des Batterie fachs die Sicherungs schraube gegen den Uhrzeiger sinn hera...

Page 6: ...macht werden HINWEISE ZUM SICHEREN FLIEGEN ALLGEMEINE FLUG TIPPS Den Quadrocopter immer auf eine ebene Fläche stellen Eine schräge Fläche kann das Startverhalten des Quadrocopter unter Umständen negativ beeinflussen Die Regler immer langsam und mit Gefühl bewegen Den Quadrocopter immer im Auge behalten und nicht auf die Fernsteuerung sehen Den Schubregler wieder etwas nach unten bewegen sobald der...

Page 7: ...egen den Propellerschutz ein 1 Hebeln Sie den Propeller vorsichtig mit einem Schraubendreher ab HINWEIS Bearbeiten Sie immer nur einen Motor auf einmal damit Sie die vier unterschiedlichen Propeller nicht verwechseln 2 Schieben Sie den Propellerschutz von oben auf den Motor auf 3 Setzen Sie den Propeller zurück auf die Motorwelle 12 WECHSELN DER PROPELLER Achten Sie vor der Montage darauf dass Sie...

Page 8: ... the remote control if they are not to be used for an extended period of time Charging unit safety instructions Non rechargeable batteries may not be charged This charging unit is not suitable for people including children with physical or mental limitations or those with insufficient knowledge and experience of charging units unless under supervision or following proper directions from a parent o...

Page 9: ...trim 2K Control for thrust and yaw 2L Battery compartment securing screw 2MBattery compartment 5 MODE 1 AND MODE 2 SWITCH The remote control can be switched from Mode 1 thrust yaw on the right stick nick roll on the left stick to Mode 2 thrust yaw on the left stick nick roll on the right stick To do this push the mode switch 5A for Mode 2 to the left standard Push the switch for Mode 1 to the righ...

Page 10: ... the controller for pitching and rolling carefully to the right 8G Turn the quadrocopter around to the left by moving the controller for thrust and yaw to the left 8H Turn the quadrocopter around to the right by moving the controller for thrust and yaw to the right 10 CAMERA FUNCTION The quadcopter has a camera for photos and videos and a slot for MicroSD cards Disconnect the quadcopter from the b...

Page 11: ...nd the model off and on again see 5 Preparing for take off Ensure that the battery is fully charged Problem Red LED is flashing on the remote control Remedy Replace the AAA batteries in the remote control Problem The model will no longer fly loops Remedy The battery charge level is too low Problem The model will not remain level in the air Remedy Battery power is too low charge the battery Switch ...

Page 12: ...km Ne volez jamais sans contact direct avec le modèle qui doit demeurer à portée de vue à tout moment La loi interdit de piloter un modèle en se servant par exemple de l image fournie par une caméra vidéo L inobservation de ces consignes de sécurité vous expose à des poursuites pénales Des informations et autres aides sont mises à votre disposition par la fédération allemande pour systèmes aéronau...

Page 13: ...nte Pendant la charge le chargeur clignote lentement Si la diode clignote rapidement une erreur s est produite interrompre alors immédiatement la charge Dès que la charge est terminée le chargeur reste allumé en permanence Une fois le chargement terminé déconnecter la batterie du chargeur et le chargeur du port USB Un temps de chargement de 60 minutes permet de faire voler le quadrocoptère pendant...

Page 14: ...e quadricoptère vers la droite diriger le régulateur de poussée et d embardée vers la droite 10 FONCTION CAMÉRA Le quadricoptère est équipé d une caméra pour prendre des photos et enregistrer des vidéos et d une fente pour cartes MicroSD Veuillez déconnecter le quadricoptère de la batterie avant d introduire ou de retirer une carte MicroSD Si la carte MicroSD est bien introduite le quadricoptère r...

Page 15: ...batterie trop faible recharger Éteindre puis rallumer le modèle et la radiocommande Atterrir attendre 3 secondes puis redémarrer Problème Le modèle ne décolle pas Solution Les hélices ne sont pas montées à la bonne position Suivre les instructions du chapitre 12 Remplacement des hélices S assurer que la batterie est complètement rechargée Problème Le modèle vacille dans l air Solution Vérifier si ...

Page 16: ...zender wanneer deze langere tijd niet wordt gebruikt Veiligheidsaanwijzingen bij de lader Niet oplaadbare batterijen mogen niet worden opgeladen Deze lader is niet geschikt voor kinderen en voor personen met lichamelijke of geestelijke beper kingen of met ontoereikende kennis over en ervaring met laders behalve onder toezicht van of na vakkundige instructie door een persoon die bevoegd is om de ou...

Page 17: ...ooit Dek vrijliggende polen af met plakband om kortsluiting te voorkomen Onderhoud en verzorging Neem het model alleen af met een schone vochtige doek Voorkom blootstelling van model accu en batterijen aan direct zonlicht en of directe inwerking van warmte Zorg ervoor dat model zender en lader nooit met water in contact komen hierdoor kan de elektronica beschadigd raken Wijzigingen in techniek en ...

Page 18: ... kunt u zich wagen aan de kunstvliegfunctie Druk hiertoe eenmaal kort op de rechterstuurknuppel op de zender 9A Nu wordt het volgende stuurcommando naar voren achteren of zijwaarts omgezet in een looping 9B Zorg ervoor dat u rondom voldoende ruimte hebt ten minste 10 meter in iedere richting Houd bovendien een minimale veiligheidshoogte aan vlieg ten minste op een hoogte van 5 m De quadcopter verl...

Page 19: ...slaat over de kop bij het opstijgen Oplossing Controleer of de rotoren juist zijn gemonteerd zie hoofdstuk 12 Kalibreer de gyroscoop van het model opnieuw zie hoofdstuk 6 Probleem Het model trekt sterk in een richting of vliegt ervandoor Oplossing Kalibreer de gyroscoop van het model opnieuw zie hoofdstuk 6 www revell control de SERVICEAANWIJZINGEN Op www revell control de vindt u bestelmogelijkhe...

Page 20: ... estar siempre dentro del campo de visión directo La legislación prohíbe p ej volar un modelo solo utilizando la imagen de vídeo Si no observa estas instrucciones de seguridad podrá ser objeto de acciones y sanciones penales Puede encontrar más información y ayuda p ej de la asociación para sistemas de aeronaves no tripulados en http www uavdach org Para la práctica de vuelo exterior se recomienda...

Page 21: ...o y el modo 2 palanca izquierda para gas y guiñada palanca derecha para cabeceo y alabeo Presione el conmutador 5A hacia la izquierda para el modo 2 estándar Presione el conmutador hacia la derecha para el modo 1 y gire la emisora 180 Importante Cambiar los modos solo cuando la emisora esté desconectada Bajo ninguna circunstancia se debe utilizar un cargador de baterías de NiCd NiMH El proceso de ...

Page 22: ...er una tarjeta MicroSD Si la tarjeta se encuentra insertada correctamente y el quadrocóptero está adecuadamente encendido y en conexión con la emisora se encenderá un piloto LED azul encima de la ranura de la tarjeta 10A Fotos para realizar una foto pulse el botón correspondiente La emisora emite un pitido corto y sobre la ranura de la tarjeta MicroSD se enciende brevemente un piloto LED de color ...

Page 23: ... sustituya la batería del quadrocóptero Apague la emisora y el modelo y vuelva a encenderlos véase 5 Preparación para el despegue Asegúrese de que la batería se encuentra completamente cargada Problema En la emisora parpadea una luz LED roja Solución Cambie las pilas del tipo AAA de la emisora Problema El modelo ha dejado de realizar loopings Solución La carga de la batería no resulta suficiente P...

Page 24: ...bito dalla legge L inosservanza di queste istruzioni di sicurezza può costituire un reato Per informazione e ulteriore assistenza contattare l Associazione per i sistemi di aeromobili senza pilota all indirizzo http www uavdach org Per i modellini che volano all esterno dal 2005 è obbligatoria l assicurazione Rivolgersi alla propria compagnia assicurativa e accertarsi che l assicurazione copra i m...

Page 25: ...te di fissaggio vano batterie 2MVano batterie 5 COMMUTATORE MODALITA 1 E 2 Il radiocomando può essere commutato dalla modalità 1 beccheggio rollio sulla leva di comando destra beccheggio rollio sulla leva di comando sinistra alla modalità 2 accelerazione imbardata sulla leva di comando destra A tal fine spostare il commutatore di modalità 5A alla modalità 2 a sinistra standard Spostare l interrutt...

Page 26: ...adricottero ci si potrà avventurare con la funzione di volo acrobatico Premere una volta brevemente sulla leva di comando destra del radiocomando 9A Ora con la prossima immissione del comando avviene un altro looping in avanti indietro o lateralmente 9B Assicurarsi che ci sia spazio sufficiente in ogni direzione almeno 10 metri Prestare attenzione inoltre al livello di sicurezza volare ad almeno 5...

Page 27: ...ero incl assicurazione 53 52 www revell control de ISTRUZIONI DI MANUTENZIONE Per informazioni sugli ordini e consigli su come sostituire i pezzi di ricambio nonché altre informazioni utili su tutti i modelli Revell Control consultate il sito www revell control de Per ulteriori suggerimenti visitare il sito internet www revell control de ELIMINAZIONE DEI GUASTI Problema Il quadricottero non reagis...

Page 28: ...dass sich dieses Produkt in Übereinstimmung mit den grund legenden Anforderungen und den übrigen einschlägigen Bestim mungen der Richtlinie 1999 5 EC befindet Die Konformitätserklärung ist unter www revell control de zu finden Legge sui rifiuti elettronici Una volta concluso l utilizzo rimuovere le batterie e smaltire separatamente i vecchi apparecchi elettrici presso i punti di raccolta comunali ...

Reviews: