


2
Technical Specifications
7”
Colour LCD screen
Power supply: 12V/24V
Power Consumption: 8.64W or lower
Digital Screen Resolution: 800 x3(RGB)x480
Operating Temperature:
-
10C to +65C
2 Inputs
PAL/NTSC/AUTO
Rotation/Mirror on both channels
Full function Remote Control
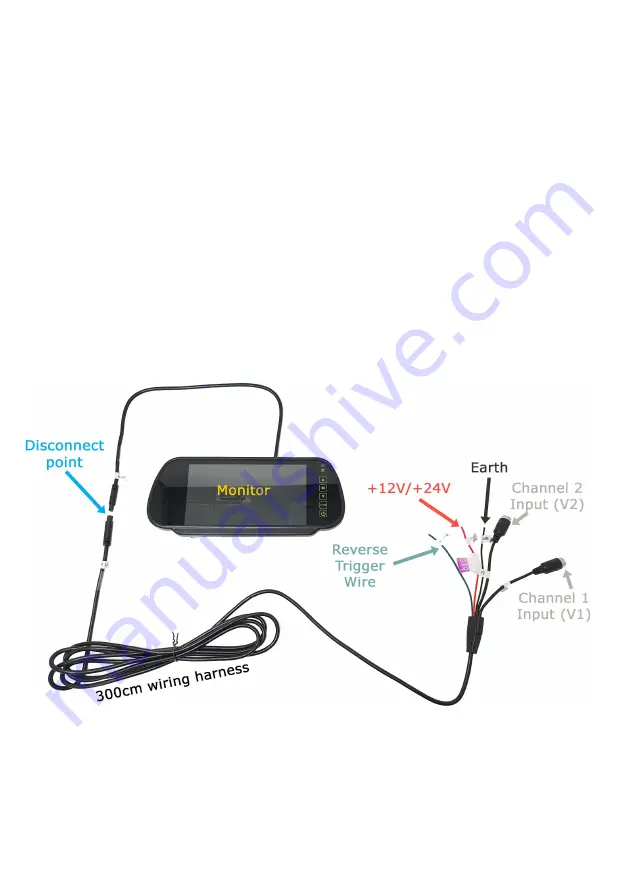
Wiring Harness Layout
We often get calls from people who have connected the green trigger wire to an
ignition source because they want it to come on all the time, this then locks out the
buttons and keeps it on channel 2. If you wish to have it on all the time then please
do not attach the green wire to anything, the monitor will remember the last power
state when the monitor gets power so no trigger is needed in this case.


