889-3819-00
MMU2-1600GE series Operations Manual Rev Apr 2020 Page
44
of 51
4.6.3.1.4.4
COMPARE CONFIGURATION TO PRIOR
This feature allows the user to compare the nine (9) most recent monitor configurations stored in the
Configurations Log to its previous monitor configuration. Date and Time, the total number of different features, a
list of the different features, and the new state and the prior state for each different feature are displayed. This
display is view only. This screen allows you to easily see what has changed from configuration to configuration.
Use the left (◄) or right (►) pushbutton to select one of the nine (9) Configurations Settings to view/compare.
Use the up (▲) or down (▼) pushbutton to scroll through the list of features that are different. Press the
ENTER
pushbutton or the
ESCAPE
pushbutton to exit.
4.6.3.1.4.5
VIEW PRIOR FAULTS LOG
The monitor records the twenty (20) most recent faults in the Prior Faults Log. Date and Time, Temperature, AC
Line Voltage, Fault Type, Diagnostic Fault Code (if applicable), Red Enable Voltage, AC Line Status, Red Enable
Status, Port 1 Disable Status, monitor Type Setting, Type Select Status, Local Flash Status, CVM Status, External
Reset Status, External Watchdog Status, 24V-1 Status, 24V-2 Status, and +24V Monitor Inhibit Status are
displayed on the graphic screen while the front panel LEDs display the same information that was displayed at the
time of the fault. This display is view only.
Use the up (▲) or down (▼) pushbutton to select the entry to view. Use the left (◄) or right (►) pushbutton to
scroll through the entry selected. Press the
ENTER
pushbutton or the
ESCAPE
pushbutton to exit.
4.6.3.1.5
VIEW SIGNAL SEQUENCE LOG
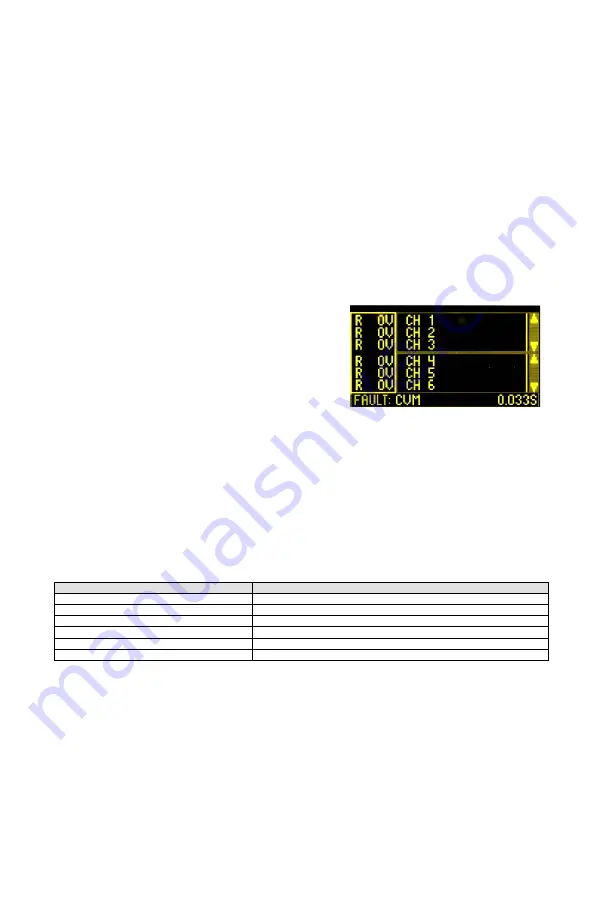
The monitor records the sixty (60) most recent events preceding a
fault in the Signal Sequence Log. The Fault Type, Date and Time,
Time Prior to Fault; Status of all Greens, Yellows, Reds, and
Walks; RMS Voltages of all Greens, Yellows, Reds, and Walks;
Status of all DC inputs; Status of Red Enable; AC Line Voltage;
Red Enable Voltage; and DC Input Voltages are recorded. This
display is view only.
The display consists of a voltage section, two status sections, and a
single line footer showing the Fault Type and the Time Prior to Fault. Use the
ENTER
pushbutton to toggle
between the three display sections.
When the voltage section is highlighted, the up (▲) or down
(▼) pushbutton will toggle the voltage display
between Red, Yellow, Green, and Walk voltages. The left (◄) or right (►) pushbutton will move the cursor bar to
one of sixty (60) positions corresponding to the Time Prior to Fault.
When the either status se
ction is highlighted, the up (▲) or down (▼) pushbutton will toggle the status display
between Channels 1 through 16, AC Line, Red Enable, 24V-2, 24V-1, CVM, Type Select, 24V Inhibit, Local
Flash, External Watchdog, External Reset, and Port 1 Disable (if a
pplicable). The left (◄) or right (►) pushbutton
will move the cursor bar to one of sixty (60) positions corresponding to the Time Prior to Fault.
Press the
ESCAPE
pushbutton to exit.
4.6.3.2
CLEAR LOGS
MENU TEXT
MENU FUNCTION
CLEAR DATE & TIME LOG
Clear the Date & Time log.
CLEAR AC LINE LOG
Clear the AC Line log.
CLEAR RESETS LOG
Clear the Resets log.
CLEAR CONFIGURATIONS LOG
Clear the Configurations log.
CLEAR PRIOR FAULTS LOG
Clear the Prior Faults log.
CLEAR SIGNAL SEQUENCE LOG
Clear the Signal Sequence log.
For each of these screens, use the arrow pushbuttons to select
YES
and press the
ENTER
pushbutton to clear the
selected log of the monitor. Use the arrow pushbuttons to select
NO
and press the
ENTER
pushbutton to exit or
the just press the
ESCAPE
pushbutton to exit.
NOTE: When a log is cleared, the monitor will provide an audible confirmation by sounding the buzzer (five
chirps).
4.6.3.3
CLEAR ALL LOGS
Use the arrow pushbuttons to select
YES
and press the
ENTER
pushbutton to clear the all of the logs for the
monitor. Use the arrow pushbuttons to select
NO
and press the
ENTER
pushbutton to exit or the just press the
ESCAPE
pushbutton to exit.
NOTE: When the Clear All Logs function is used, the monitor will provide an audible confirmation by sounding
the buzzer (five chirps).
4.6.3.4
AC LOGGING EVENTS THRESHOLDS
See Section 4.6.2.2.1


