


III_Operating VisualTable
- 17 -
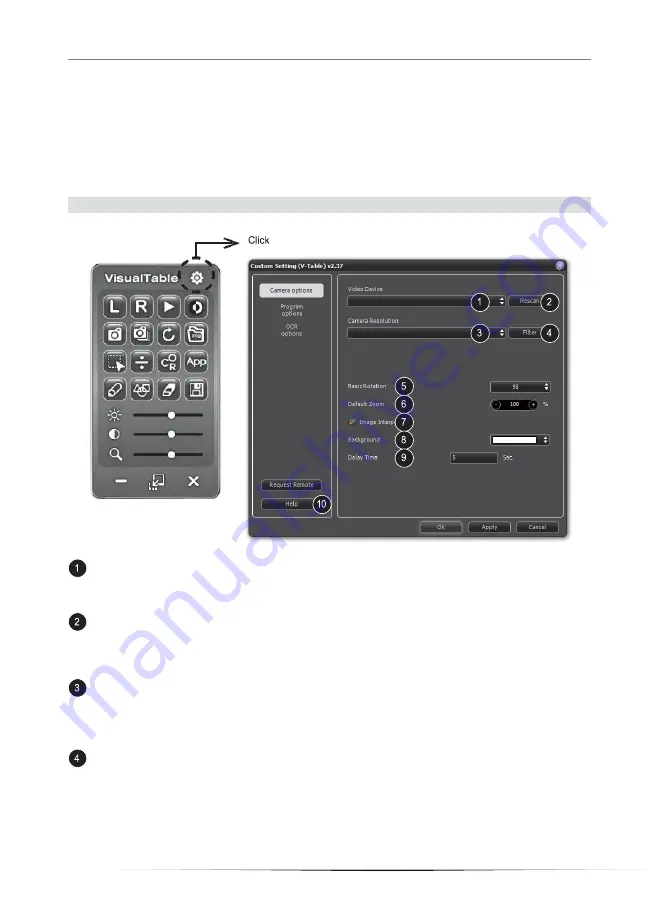
3. Custom settings
Click on the Custom Setting icon on the top right of the menu panel to enter the configuration mode
Click the Camera Setting, Program Setting, or OCR Setting tap respectively on the left side menu to
enable each of the corresponding functions.
Custom Setting > Camera options
1) Camera setting
Video Device: to select a camera device.
- Windos 7 and above : choose TAMTUS-CAM500
- XP :choose USB 2.0 camera device
Re-search: to search for a camera device again
In the event of running the program and then connecting the VisualTable program, you need
to click Re-search under the Camera setting to complete camera selection. When the
VisualTable USB is connected after the program is run,
Camera Resolution: to select the appropriate resolution of a camera.
The maximum resolution 2592 x 1944 has been given at default. Use of the maximum
resolution may cause your computer to slow or not to create computer images, when you are
advised to select a lower resolution.
Detail settings: to determine specific screen values of the camera
Brightness: to adjust the brightness of an image. The farther it moves to right, the brighter it gets.
Contrast: to adjust the contrast of an image. The farther it moves to right, the higher it gets
Color: to adjust the color of an image. The left side gives you red light while the right side blue light.
Saturation: to adjust the saturation of an image. The farther it moves to right, the darker its color
becomes.


