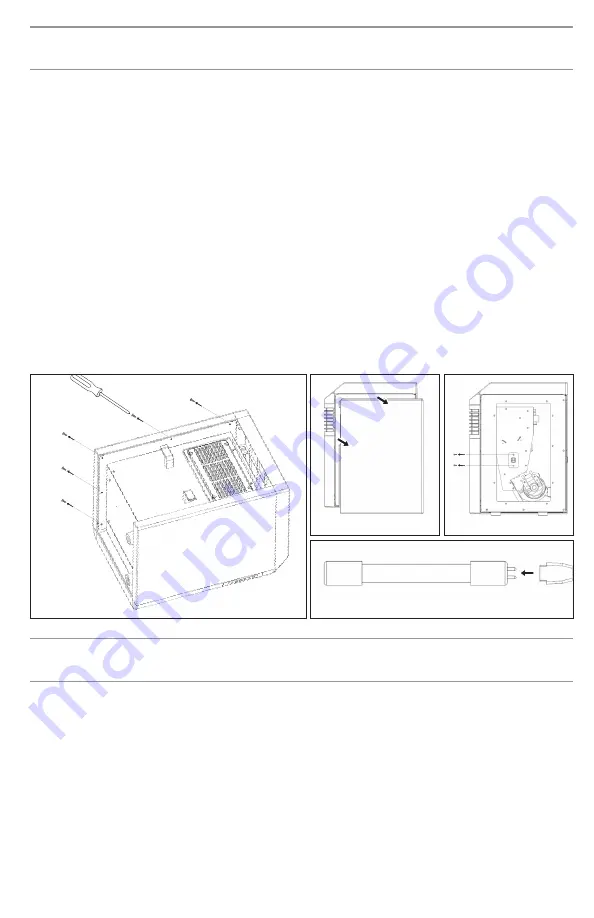
REPLACING THE UV-C BULB (CONTINUED)
REPLACING THE AIR FILTER
1. Be sure the power has been disconnected for at least 15 minutes before replacing
the UV-C bulb.
2. Rotate the unit so you are facing the backside of the unit. You should be seeing the filter,
the cord wrap and the power on/off switch.
3. While facing the back side of the unit, remove the 5 screws on the left-hand side. (Figure A)
4. Slide the left side panel toward you to expose the bulb harness. (Figure B)
5. Unscrew the four screws on the smaller aluminum panel and slide the panel up to remove it
from the unit. Note: Do not remove black plastic cover.
6. Remove the two screws securing the bulb (Figure C) and gently pull the bulb harness
and base out of the unit.
7. Pull the bulb out of the holder (Figure D) and replace with the REM-UVBULB-106A replacement
bulb. Be sure the four prongs align before pushing the bulb into the holder.
8. Making sure the bulb aligns with internal base holder, insert the bulb and base back into
the unit and secure with the two screws.
9. Replace side panel and secure with the five screws.
1. Be sure the power has been disconnected for at least 15 minutes before replacing
the air filter.
2. Remove the 4 thumb screws either with your hand or a flat head screwdriver.
3. Remove filter and dispose.
4. Using a damp cloth, clean around the filter opening and wipe down the filter bracket.
5. Place the REM-UVFILTER-106A replacement filter into the bracket and attach to the unit.
6. Secure the 4 thumb screws.
6
What you need:
What you need:
x1
x1
x1
x1
Remington Airetrex 365
UV-C Bulb
(REM-UVBULB-106A)
Remington Airetrex 365
Air Filter
(REM-UVFILTER-106A)
Phillips Head
Screwdriver
Flat Head
Screwdriver
(optional)
Figure A
Figure B
Figure C
Figure D


