background image

22

23


Press 

OK 

to start slideshow pictures in the selected slide mode (sin

-

gle window/four windows/tripe windows).

Note: In the six picture mode, press 

OK

 one time to start single win

-

dow slideshow.

3.3 COPY & DELETE FUNCTION 

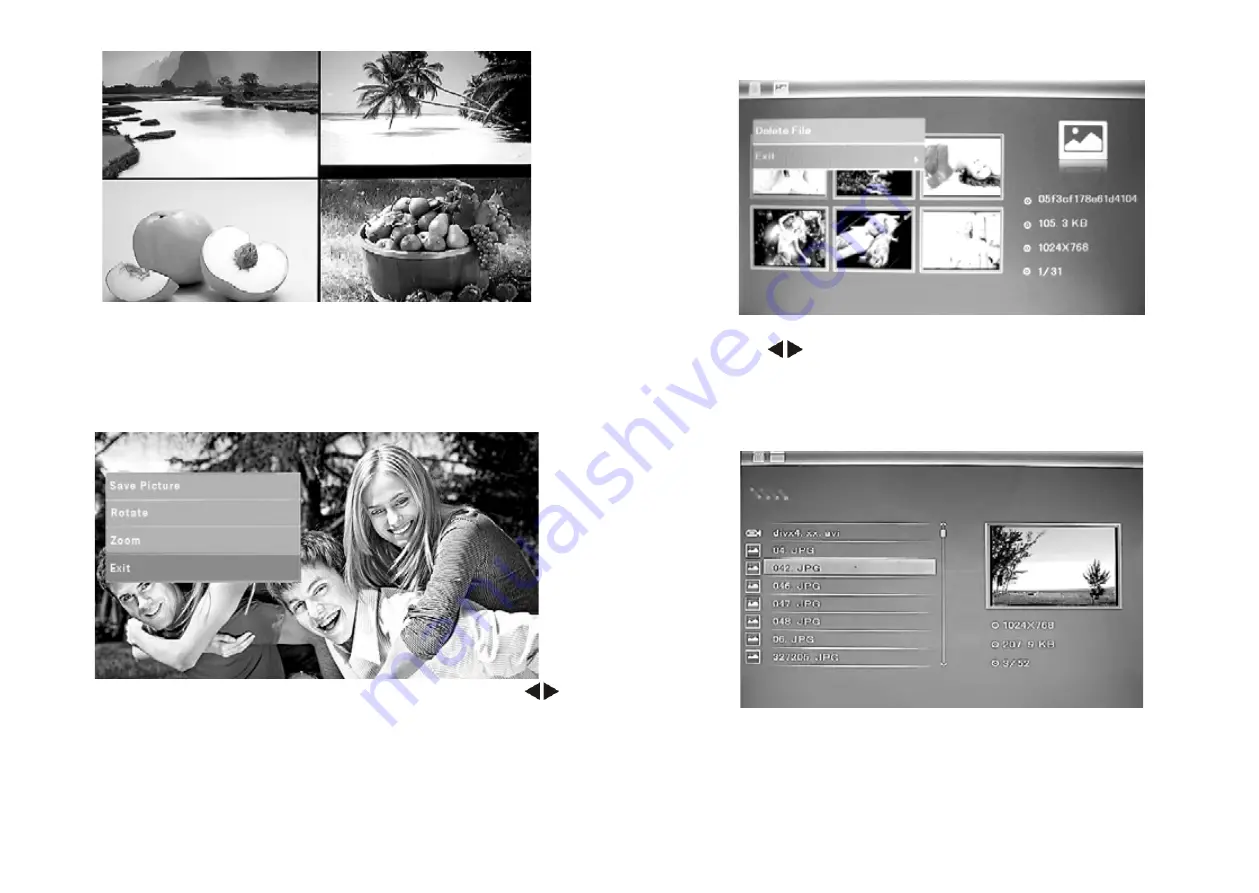
Copy pictures to built-in memory: In one picture mode, use      to 

select the picture you want to copy to the built-in memory, then press 

MENU 

to enter copy interface, press 

OK

 to confirm.

Note: 

System  will  hint “Disk  is  Full”  if  remaining  built-in  memory 

size is not enough to store any photos.

In this interface, you can also take the Rotate and Zoom function.

Delete pictures in built-in memory or memory card: In six-picture 

mode, use       to select the picture you want to delete in the built-

in memory or card device, then press 

MENU 

to enter delete interface, 

press 

OK

 to confirm.

4. FILE 


Press 

EXIT

  to  choose  «

MEMORY CARD

»  or  “

USB”

  in  the  Card 

choose inferface. Select

 File

, then press 

OK

 to access to file interface. 

You can browse all the files in the memory card in this mode, and press 

MENU

 to delete file in built-in memory or external devices.

Summary of Contents for DEJA VIEW SL885

Page 1: ...1 DEJA VIEW SL885...

Page 2: ...2 3 SD USB USB 1 JPEG 2 USB USB 2 0 HOST 3 SD SDHC MMC 4 5 6 7 8 10 9 10 11 1 8 1 2 1 3 AC DC 1...

Page 3: ...4 5 1 5 1 1 5 2 6 3 6 3 1 USB 7 3 2 7 3 3 8 4 9 5 10 6 11 8 13 9 14 1 1 1 1 SD MMC MS 2 USB 3 1 2 3 OK 4 5 6...

Page 4: ...6 7 2 1 110 240 DC IN 2 3 EXIT 3 5 3 3 3 1 USB SD MMC SDHC USB 2 0 USB USB 3 2...

Page 5: ...8 9 OK OK OK 3 3 OK 4 SD USB...

Page 6: ...10 11 OK 5 OK 6 OK OK OK 1 2 3 4 3 5 15 30 1 5 15 30 1 5 6...

Page 7: ...13 7 8 OK 00 40 OK 00 40 OK 00 40 OK 00 40 9 OK OK 10 12 24 OK 11 OK 12 OK 13 7 Input AC 100 240V 50 60HZ 350mA Output DC 5V 1A JPEG SD SDHC MMC USB USB 2 0 8 1024 768 300 1 4 3 300 2 120 140 0 40 10...

Page 8: ...14 15 DEJA VIEW SL885 USER MANUAL Thank you for your purchase of the Digital Photo Frame Please read this User Manual carefully to learn the correct way to use the Digital Photo Frame 8 USB USB...

Page 9: ...r off the unit before inserting or removing a card or USB device Failure to do so may cause damage to the card USB and the unit To reduce the risk of fire or electric shock do not expose this applianc...

Page 10: ...20 3 1 Card and USB 21 3 2 Picture Mode 21 3 3 Copy Delete function 22 4 File 23 5 Calendar 24 6 Setup 25 7 Technical Specifications 27 8 Troubleshooting Guide 28 1 PRODUCT DIAGRAM 1 1 BOTTOM OF FRAM...

Page 11: ...off 3 OPERATING INSTRUCTION After turning on the unit it will display opening logo after 3s then it will show Buit in Memory If there is no inserted card or USB in it 3 1 CARD AND USB It supports SD...

Page 12: ...isk is Full if remaining built in memory size is not enough to store any photos In this interface you can also take the Rotate and Zoom function Delete pictures in built in memory or memory card In si...

Page 13: ...German Spanish 6 2 Photo Sequence Sequence Random 6 3 Slide mode Single window Four windows Triple windows 6 4 Slide speed 3 5 15 30 seconds 1 5 15 30 minutes and 1 hour 6 5 Slide Effect Random Split...

Page 14: ...elect or unselect to format the built in memory 6 12 Reset setting Press OK enter use to select or unselect to reset all settings to default values press OK to confirm 6 13 Exit Press to Main Menu 7 T...

Page 15: ...tery has power the battery can be used for half a year in normal conditions Replace with new battery if necessary Can not read the CARD or USB Please confirm whether there is storage in the card or US...

Reviews: